When I finished this cardigan, I couldn’t stop smiling. It might be the proudest make of my crochet journey so far — bold, cozy, and packed with school spirit.
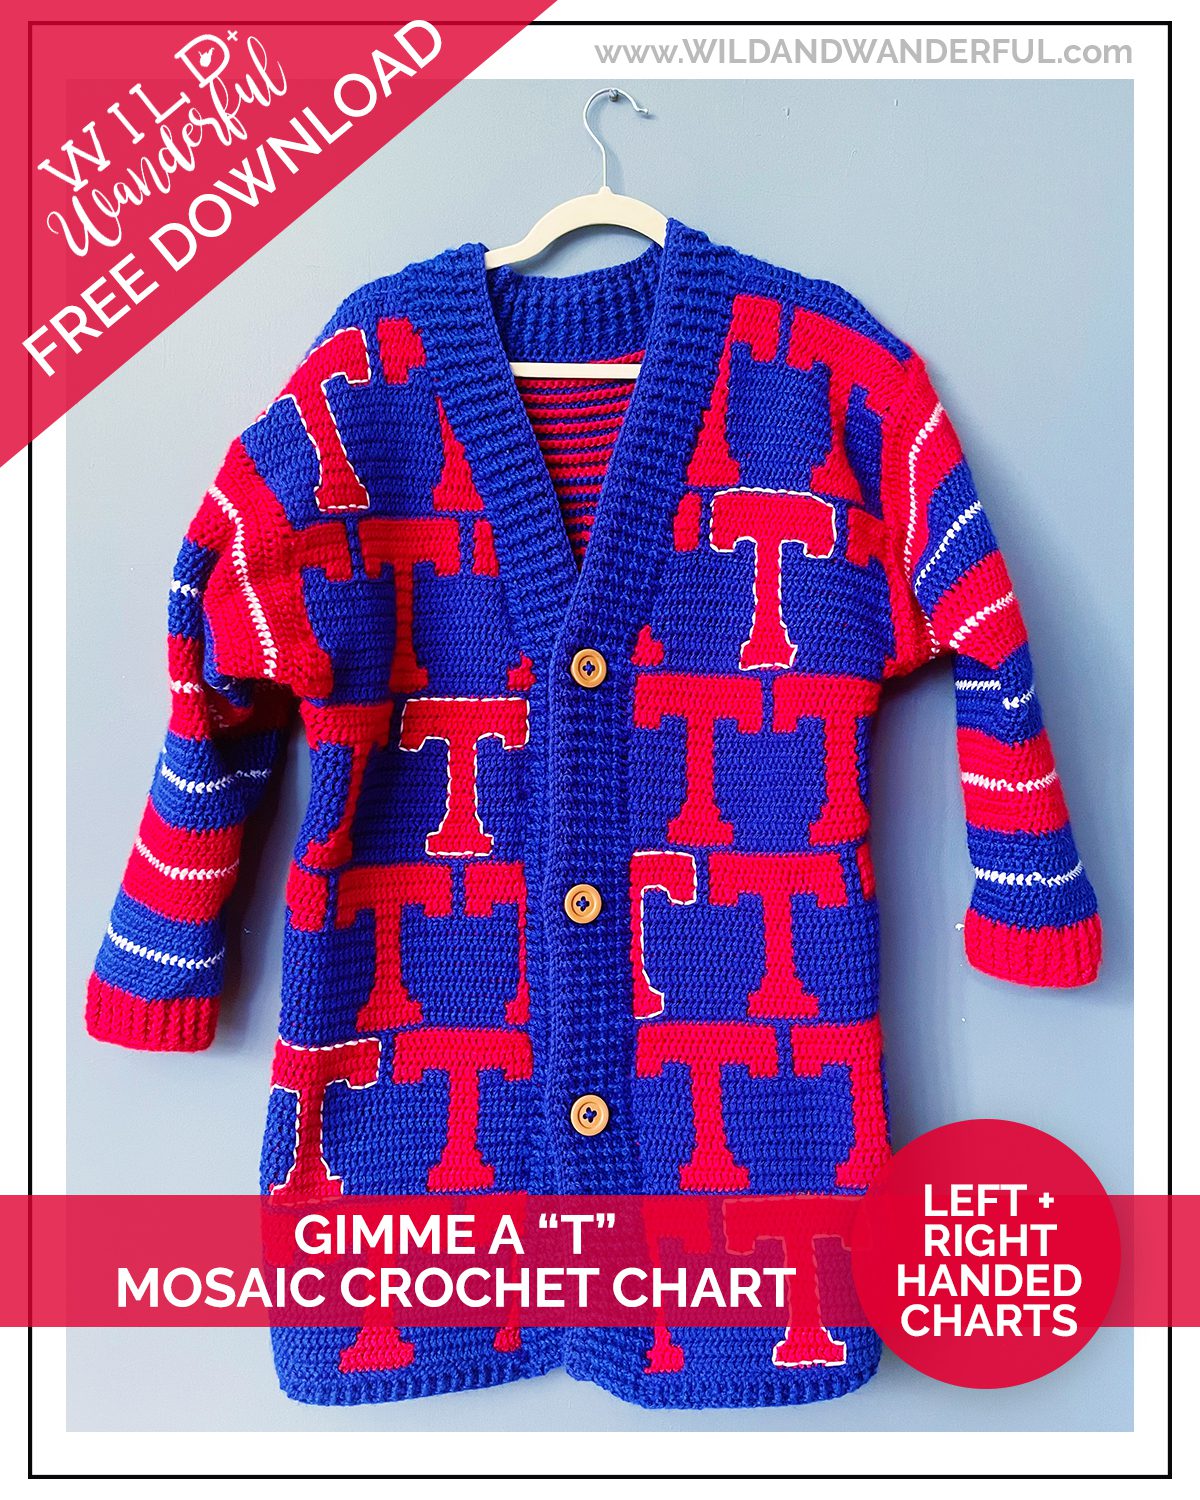
And since I already had the charts all drawn up, I figured it would be a shame to keep them to myself. So today, I’m sharing them with you…for free!

Just pop your info into the form below and the charts will be emailed directly to your inbox. Because I know the brain gymnastics of flipping charts can be frustrating, I went ahead and made separate versions for left- and right-handed crocheters.
While I would love to teach you all of the ins and outs of mosaic crochet right now, I just don’t have it in me (or the time). So I’m sorry that I won’t be going over this technique with you. I do promise that one day I will show you all that I can…just today is not that day! What I can do is give you a quick and dirty explanation of how I brought this cardigan to life.
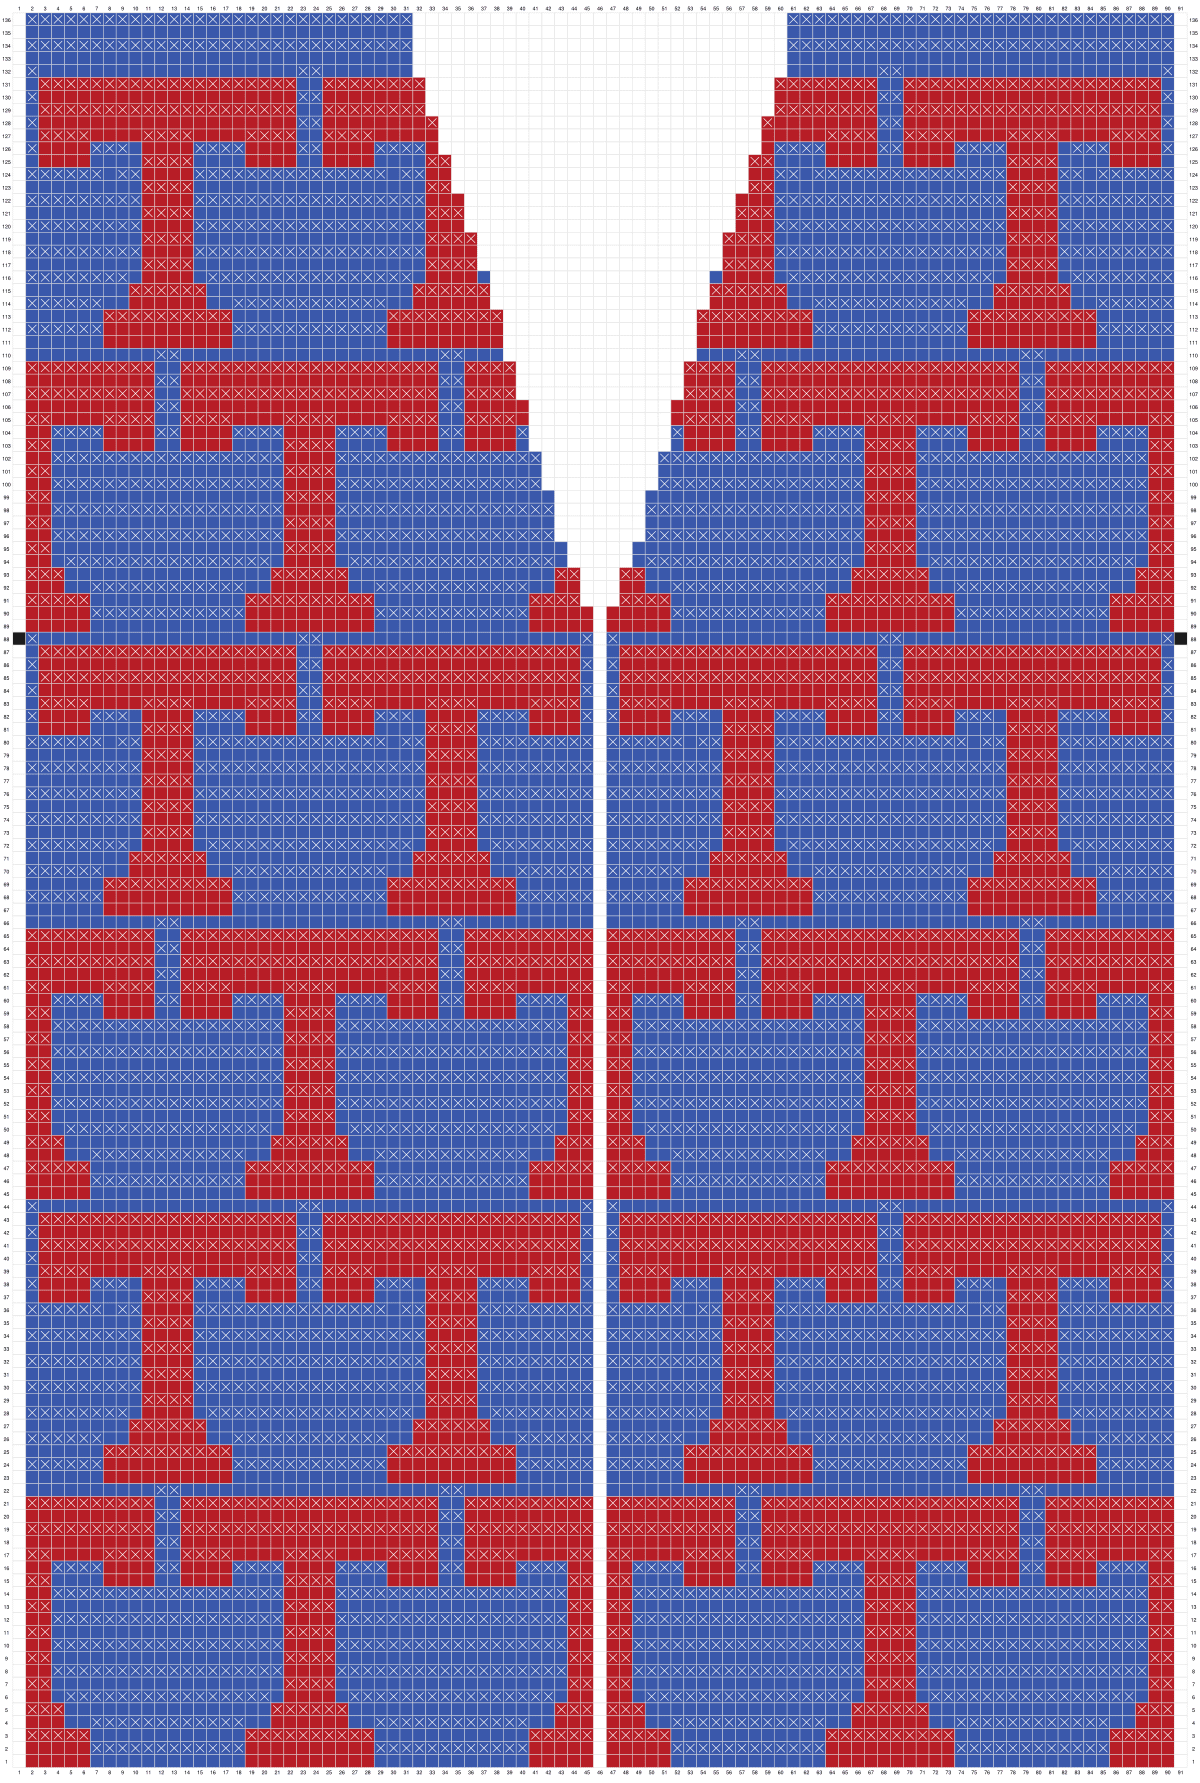
I created both a front panel and a back panel chart to plan out where all the T’s would land. That helped me keep things balanced, especially once I added the button placket in the front.
- Back panel chart: offset, stacked rows of bold red T’s.
- I dropped the top-center a few rows so it would sit on his neckline a little more comfortably.
- The black squares are an indicator of where the sleeves would end, so I knew to sew my side seams to there before I added my sleeves.

- Front panel chart: adjusted for the cardigan’s opening.
- I angled from the shoulder point to the front-middle, so it would have more of a v-closure.
Here’s how I put this all together:
- Bodice: I used my sewing patternmaking knowledge to figure out the right stitch counts for the body and overall sizing.
- I use the same hook and same yarn for basically every project ever (I know…boring) and I know that I crochet with my H hook at 8 stitches wide x 8 DC tall = 4″ x 4″ swatch.
- Sleeves: Honestly? I winged them. I knew I wanted to taper down to 42 stitches around, and I shaped until it looked right. Sometimes crochet math is more art than science. 😉
- I pretty much would decrease by 1 or 2 stitches every row until I reached that 42 stitch goal. And then continued the length until it was what I wanted.
- My sleeves on this cardigan consist of 36 DC rows and 6 SC rows. Before the cuff, they are about 19.5″ long.
- Collar, Bands & Cuffs: Worked in alternating Front Post Double Crochet (FPDC) and Back Post Double Crochet (BPDC) for several rounds. This creates a strong ribbed texture that’s both beautiful and sturdy — perfect for a button placket.
Why Mosaic Crochet?
- Mosaic crochet is hands-down my favorite method for working from graphs:
- You only change colors at the end of a row.
- No carrying yarn across the back.
- Fewer ends to weave in.
- A solid, dense stitch texture — perfect for sweaters and cardigans.
- It’s simple, satisfying, and the results are so bold.


I love that crochet lets us tell stories with yarn. For me, this cardigan was about celebrating my husband, his role as a teacher, and the joy and excitement for educating 7th graders that he pours into every day. ❤️💙 Whether you use these charts for a cardigan, blanket, or swatch practice, I hope they bring a little joy (and a whole lot of team spirit) to your hook.
If you make something with them, please tag me @wildandwanderfulblog so I can cheer you on too!


0 Comments