Meet the Captain. He’s the heart and soul of the Avengers, Louis’ favorite superhero and now he’s a super cute plush doll that you can make for yourself. He’s also the first of the Avenger’s plushies patterns that I’m going to be sharing!

Want to make one for yourself? I created a pdf with all of the pattern pieces! Woot! I must warn you ahead of time, there are a lot of pieces for this little guy. I don’t want you to start cursing me when you get into this.
Supplies needed:
— Grab your printable pattern pieces by using the form above
— Red fleece
— Blue fleece
— White fleece
— Fiberfill stuffing
— Black permanent marker / embroidery thread & needle
— (2) black buttons for eyes
Cut out all of your pattern pieces.

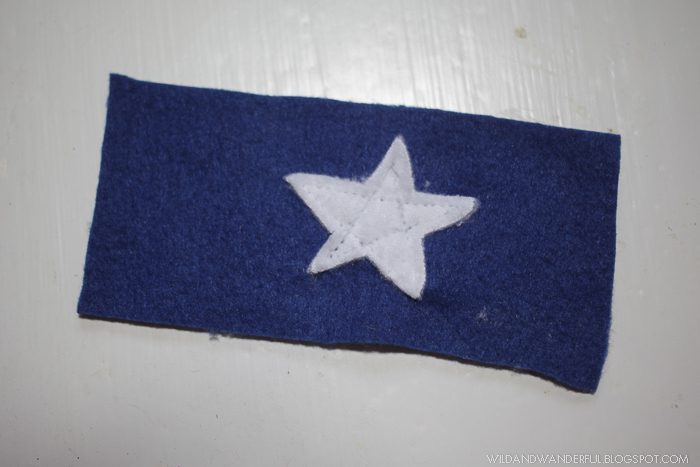
You’re going to want to applique the small details before we get started on anything else. I learned an amazing technique from Obsessively Stitching [HERE] for sewing applique items onto fleece. My horribly illustrated version is below but I do recommend looking at her site and reading how she did it. So much easier with these smaller pieces!

I hand sketched the “A” and stars onto the backside of one of the shirt pieces, the mask and the inner shield. It’s crude but it worked for me. Then I laid out a larger piece of white fleece right side down, the main piece right side down on top of it and free-motion stitched the design along my markings.
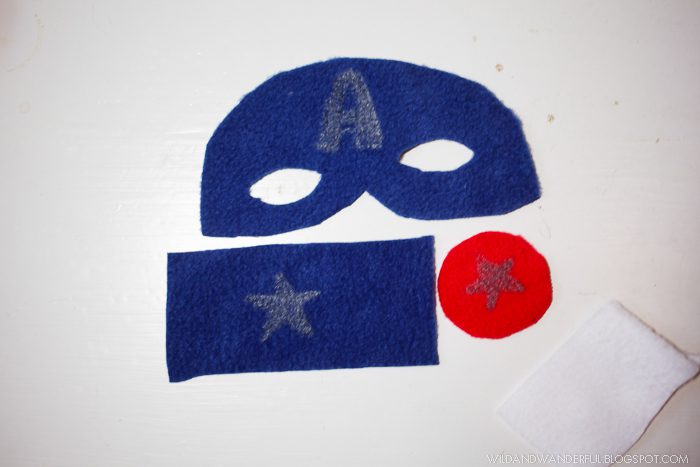

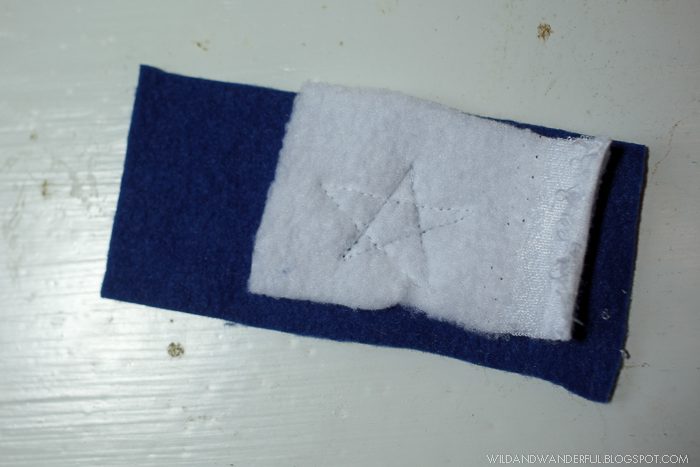
Simply turn over your piece and clip around the edges of your stitching. You’ll have a nicely placed (or off-center if you’re like me!) applique. Do this for all three pieces.
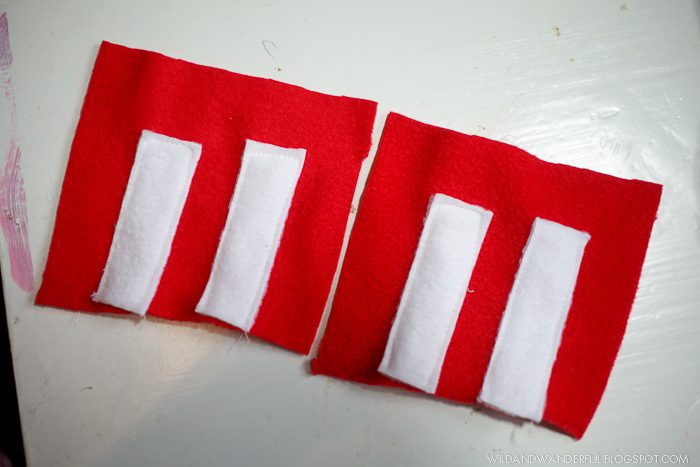
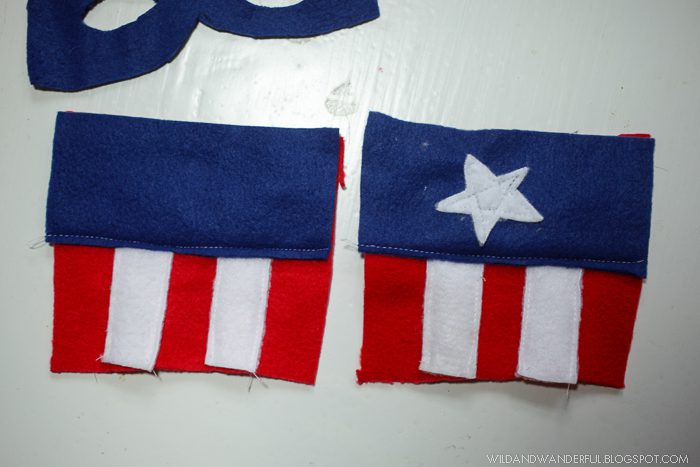
Next, you’re going to want to sew the uniform stripes on to both of the large red squares that are labeled “body main”. Line them up with the edges along the bottom of the body pieces. Stitch as close to the edge as you can get.
Next, locate your shirt pieces (one will have the star that you’ve previously appliqued), line them up along the top edge and stitch close to the edge, overlapping some of the white stripes you just sewed on.
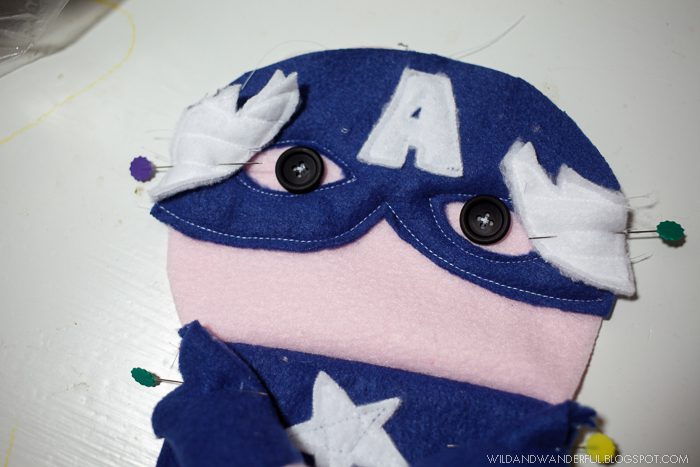
Now find the pink main head pieces, the mask piece with the “A” on it and the back helmet piece. With one of the main head pieces as the base, sew along the eye sockets and bottom of the mask, close to the edge. Repeat for the back helmet and the remaining head piece, just sewing along the straight bottom edge of the back helmet.

**Not pictured (because this is my first pattern go-round and I of course made massive mistakes in a tutorial sense, sorry!!) is the step where I sewed the head pieces to the body pieces. Right sides together, sew the front head piece (the one with the mask) onto the front body piece (the one with the star). Repeat with the back head and back body piece.
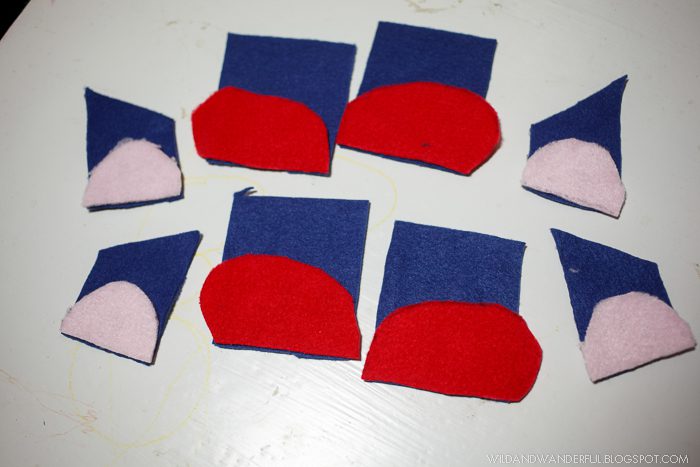
Next is a little tedious. Find all of your leg, feet, arm and hand pieces. Lay them, right sides together and connect the pieces to the coordinating piece. Leg to foot, arm to hand. Make sure you have your feet pieces going the right direction, so he will end up with one left and one right foot.
Then sew the legs and arms (right sides together) to their opposite pieces, leaving the top open. Turn right side out. Stuff each arm/leg with a small amount of fiberfill. Not too much, just enough to fluff out the body pieces and give them a tiny bit of structure. If you overstuff, you will be cursing yourself when you go to sew the entire body together.

**Another step I missed out on explaining in photos (so super sorry!!) is the wings for the helmet. I just sewed two pieces, wrong sides together along the outside edges, to each other and ran a couple of horizontal lines of stitches on them to give them a little more structure.
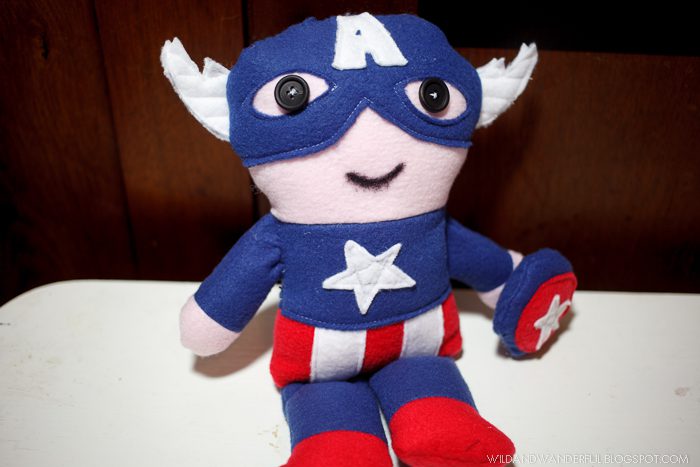
Hand stitch on the button eyes. Then line up the wings where you want them to be placed. As close to the bottom of the mask is best…as they kind of fall close to the ears on the Captain. Pin in place.
Line up the arms and pin in place. See how they are filled a little too full? Yeah. That’s what I did and sewing the entire body together was a pain. Don’t do what I did. Fill them just a teeny big, don’t overstuff the limbs.

Line up and pin the legs in place. Same goes for the legs. I put too much fiberfill in them and it bit me in the butt later.

I can feel Captain’s eyes staring at me in this photo saying, “What are you about to do to me?”

Lay the back body piece. right side down, on top of your front piece after everything is pinned in place. Carefully sew along the entire body, leaving only a 2-ish inch gap in the top of the head so you can turn it inside out.
If you put too much fiberfill in the arms and legs, this will prove to be a huge pain in the ass. HUGE. It was a struggle to get everything lined up and keep the limbs out of place while I was sewing it. Don’t be
like me. Don’t pull a Katy. 🙂

Turn him right side out. Fill his main body with fiberfill and hand stitch the opening shut. You’re almost done!

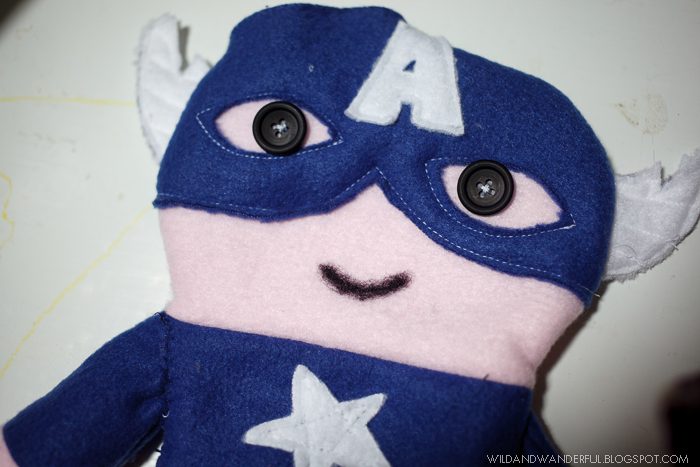
You have a choice for the mouth. You can leave it off if you want. You can draw it on with a permanent marker like I did. OR you could take some black embroidery thread and embroider it on there nicely. I think the embroidery would look cleaner and nicer but I wanted to try out the marker. It’s still fine, it’s just that the fibers of the fleece make it a little less clean than I’d like.
The last piece of the puzzle is to finish the shield. Sew the red circle with the star onto one of the blue shield pieces.
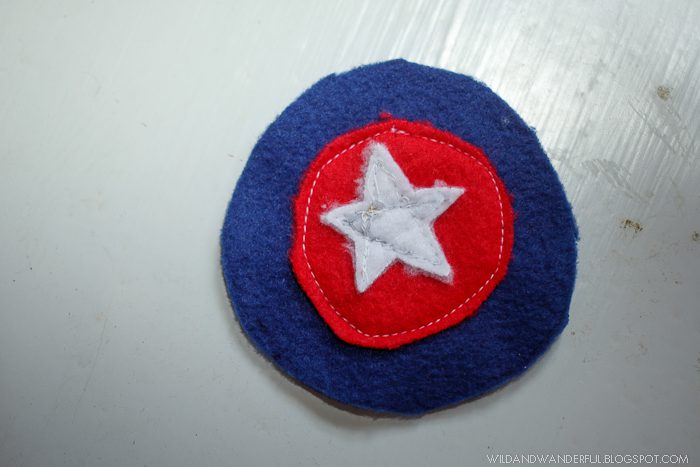
Please ignore how horribly awful my stitching was on the star. My sewing machine kept munching on my threads and I was too lazy to unpick it and start over. Again, don’t be like me. I am a lazy sewist!
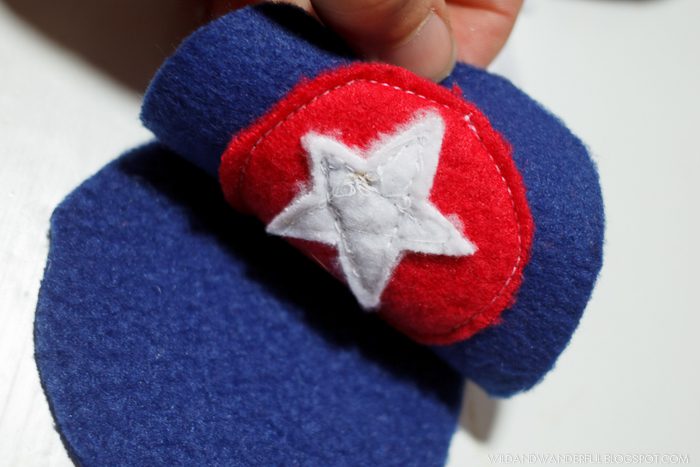
Right sides together, sew your shield pieces together, leaving a small gap so you can turn it right-side out. Fill with a small amount of fiberfill and hand stitch closed. I then hand stitched the shield onto one of Captain’s hands. That way we won’t lose this small piece but it’s still there. Because what is Captain America without his shield?!
Whew. If you’ve made it this far with me you are a rockstar. AND you have a new awesome Captain America plushie for you/your kiddo/your Marvel loving family member.
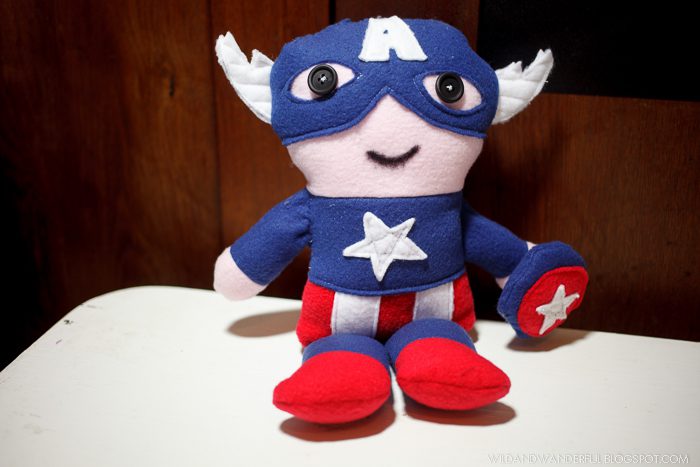
I think he’s a real cutiepants. What about you?
If you have any questions, please ask them! I will try and answer them as much as I can. I know that there are a bunch of holes in these instructions…hopefully I’m being cut a little slack because this was my first attempt at giving full-blown sewing pattern/tutorial directions.


You are amazing! This is like crazy-level amazing. I bow down.
Hardly amazing. But thanks. I'm being more and more humbled by people who make awesome tutorials online because it's hard. I can make things…but telling people how I made them is stupid hard. I'll keep trying. 🙂