DIY Lego Minifigure Bracelet :: Tutorial

Aug 15, 2015

It’s birthday party time in casa de McKinley, which means only one thing: LOTS of super fun crafty party details!  Yay!  I wanted to make something for Louis’ party guests that they’d be able to use more than once…and something that they might not have already, but also incorporated the Lego theme.  By far, this is one of my favorite party details this year.

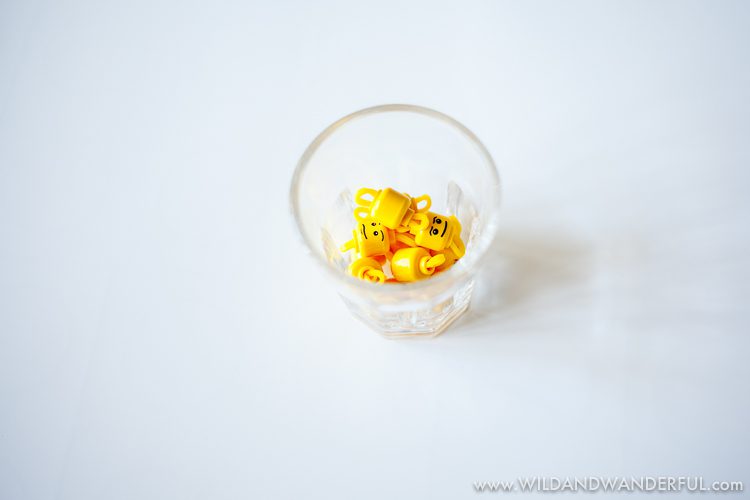
You can find loom bands literally anywhere you turn.  And they’re super cheap.  So they make for quick, cute and inexpensive projects.  We ended up buying a bunch of minifigures and beheading them.  BUT, if you’re someone who is actually planning ahead, you can buy Minifigure heads from the Lego company for cheapie-cheap [HERE].  It just takes over two weeks for them to arrive and we didn’t have enough time.  If I ever do anything with minifig heads again, though…totally hitting up their site.

Anywho.  Let’s get to it!

:: Gather your supplies.  For each bracelet, you will need…
– 40 bands.
– 1 C or S clip.
– Hook (crochet or the loomband kind).
– Lego Minifigure head, with hole punched in it and band inserted.
– Loom.

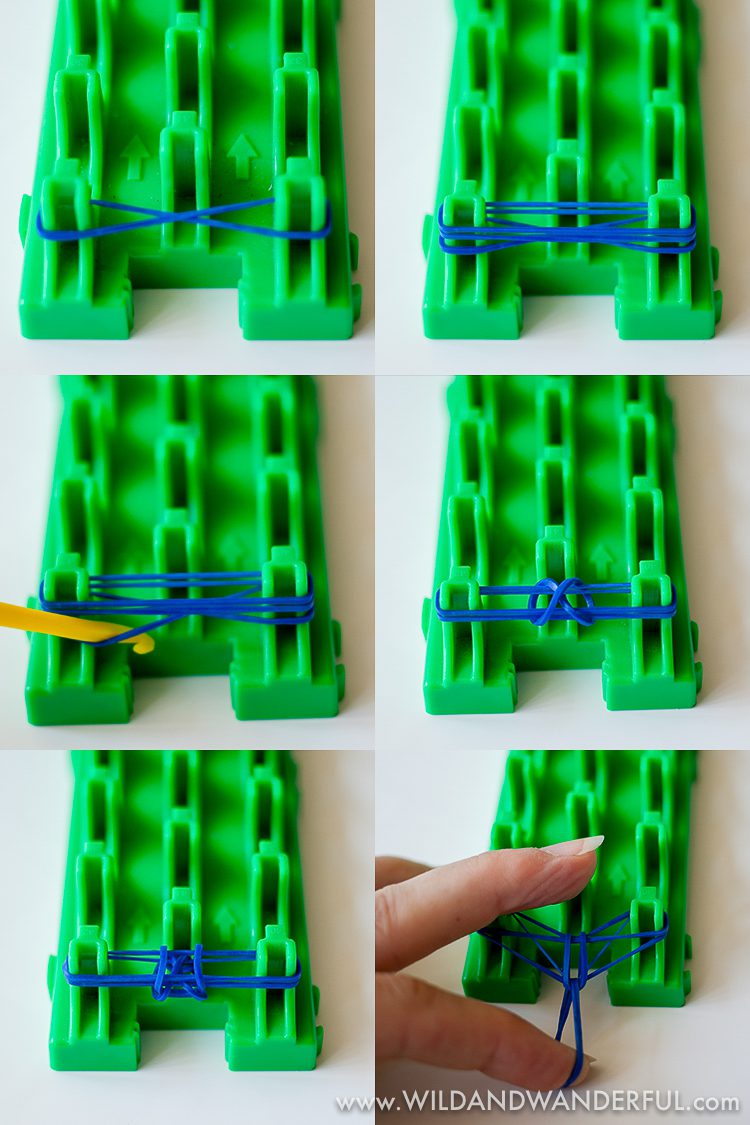
  • Stretch the first rubber band into an infinity shape and place it on the first two pegs on the side sections. Push the rubber band down.
  • Place two rubber bands above the first one.  No need to twist these.
  • Using your hook, grab the very bottom band (the first one that you’d placed down) and pull it up and over top of the other two, looping it around them.  Repeat on the other side.
  • Place a new rubberband on the loom.  You should always have three bands to work with.
  • Grab the very bottom band and pull it up, over the two bands currently on the loom.  Repeat on other side.
  • It often helps me to put my C/S clip on now.  So I can pull the bands down, to help me separate each individual strand and be able to see/grab  them easier.
  • Repeat until you’ve reached your halfway mark…which means you’ve got 20 bands on the loom and in the beginnings of the bracelet.

  • Now it’s time to grab your Minifigure head!  It’s going to act just like a regular band, there just happens to be a head strung in the middle of it.  Place either end on the loom and use it the same as you would if it were any other band.

  • Finish looming your other twenty rubberbands!

  • When you get down to the end, simply take the bottom of the two remaining bands and loop it over the top one.
  • When one is all you have left, *carefully* remove the bracelet from the loom (I like to use my finger as a placeholder) and then slide both ends of the very last band into the C/S clip.

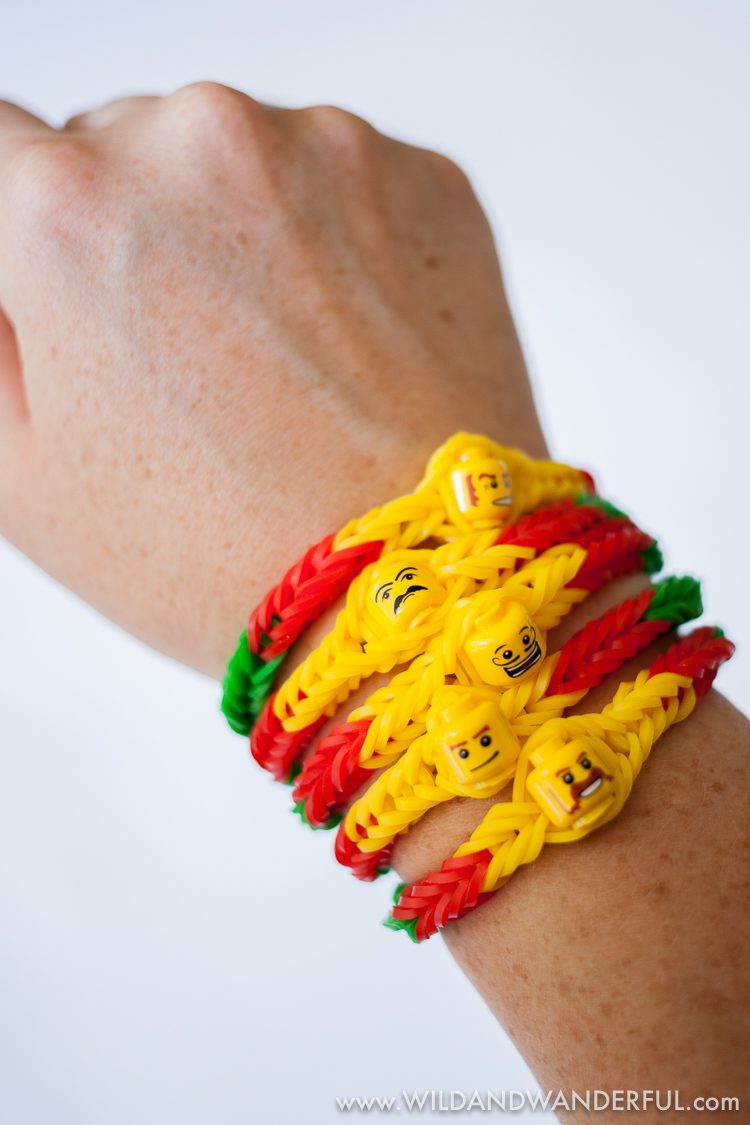
Boom.  You’re done!  You just made an awesome little bracelet.  Go ahead and admire the crap out of it.

But wait!  Are you curious about how to turn the Minifigure head into a bead?  No worries, I’ve got you covered!

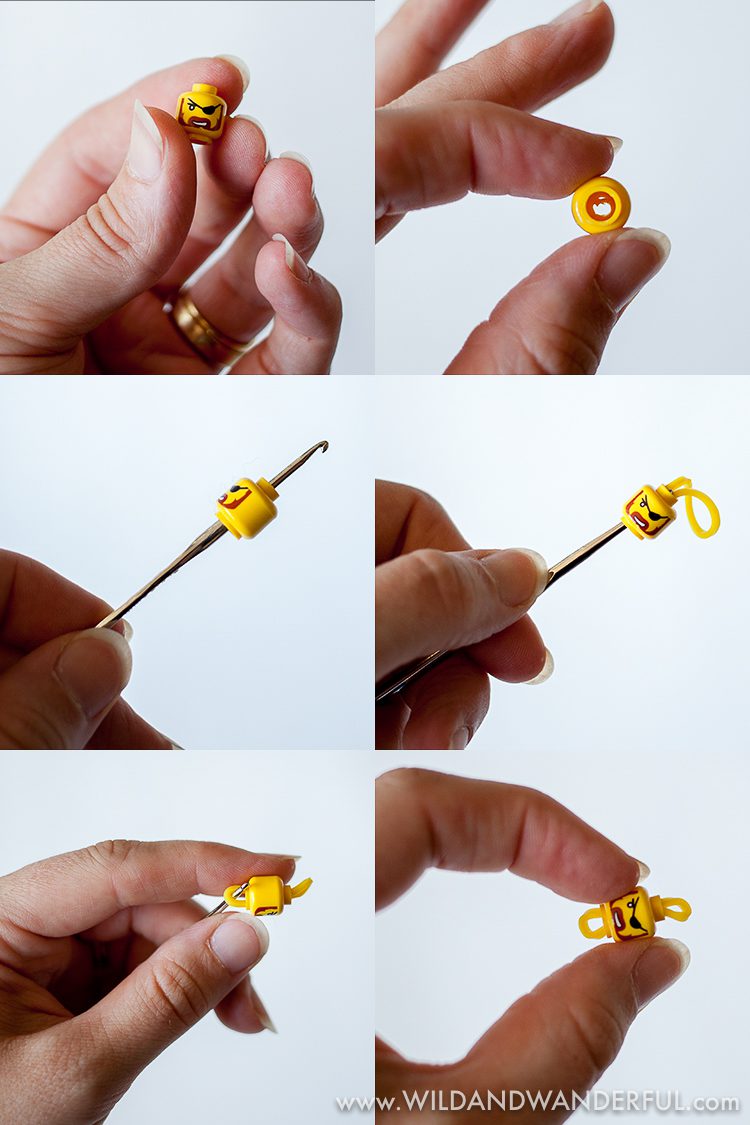
  • Grab your cute beheaded friend and, with a nail, punch a hole from the bottom, into the top of its head.
  • Find something small (like a teeny crochet hook or a large eyed needle) and thread a single rubberband through it.
  • And done! Cutest little bead ever!

Now go ahead and wear your Minifigure bracelet proudly.  Wear more than one!  You know you want to!!  And remember to share with me if you ever do make one of these!  I’d love to see what you come up with!

Want to be a better blogger but don’t know where to start? Head over to the Be a Better Blogger page for daily prompts to help get the creative juices flowing! Oh, and use #beabetterblogger on Twitter/Instagram/Facebook to keep the fun going even after you hit Publish!


Disclosure: As always, you’ll find some affiliate links scattered within my post, which means I receive a small amount of compensation if you end up purchasing something I’ve recommended.  Keep in mind that I link these companies and their products because of their quality and not because of the commission I receive from your purchases. The decision is yours, and whether or not you decide to buy something is completely up to you.  Purchasing from my links does not alter the pricing in any way for you, it simply helps feed my sewing, creating and blogging habits.  Thank you for your support!

0 Comments

Trackbacks/Pingbacks

  1. Turning 5 is Awesome! :: A Lego Party for Louis - […] the boxes we had self-made temporary tattoos, Lego bracelets [tutorial here] and small things of […]

Submit a Comment

Your email address will not be published. Required fields are marked *

Welcome to Wild+Wanderful!  I’m Katy.
Momma. Wife. West Virginian.
Designer. 
Dreamer. Coffee Consumer.
DIY-er. 
Craft Beer Enthusiast.
Purple Obsessor. Lover of Handmade.

MILDLY WILD. MOSTLY WANDERFUL.

LATEST FREEBIES

The Little Wanderer Skirt | A Free PDF Sewing Pattern from Wild+Wanderful!

I'm excited to share that I've been able to update another pattern for y'all! The Little Wanderer skirt is the youth version of my beloved Wanderer Skirt pattern (which is also free). It's an adorable high/low half circle skirt with two hem lengths and optional...

Irish I Were Sewing :: FREE St. Patrick’s Day Themed Silhouette + Cricut Cut Files!

I've been super missing making fun themed outfits to wear. And I've been missing sharing fun cut files on here like I used to. So I remedied both of these things by creating a super fun St. Patrick's Day themed sewing design AND am giving it to you as a freebie on...

The Wanderer Skirt | A Free PDF Sewing Pattern from Wild+Wanderful!

I know, I know. You might be thinking: "Katy, didn't you release The Wanderer Skirt back in 2017?" Yes. I did. But it's been six years of learning how to draft and design and I really wanted to go back and give it a little facelift. So here we are! On the surface,...

The Snuggler Sweater | A Free PDF Sewing Pattern from Wild+Wanderful!

A sewing friend of mine sent me a photo of this adorable sweater, with no sleeve seam, a cross-over front and back, and a "batwing" style dolman sleeve. And I was obsessed with the idea of turning that rtw sweater into a sewing pattern. And that's what I did! Meet:...

Elffire Club :: FREE Stranger Things Inspired Silhouette + Cricut Cut Files!

I saw someone use my free Elf on the Shelf Clothing Pattern the other day for a Stranger Things Eddie / Hellfire Club outfit and immediately was struck by a Christmas pun.  It had to be made.  I couldn't resist. If you need a little refresher on what I was...

Pencil Bow :: FREE Back-To-School Inspired PDF Sewing Pattern (In Two Sizes!)

Happy (almost) Back to School season, y'all!  Once July comes to a close it feels like everything just starts to speed up at an uncontrollable pace in my household....ESPECIALLY since Bennett is a teacher now.  It feels like summer is over and we need to...

RECENT POSTS

Charleston Crossover by Patterns for Pirates

Yayayayayayay! I am super duper excited to share that today is a Patterns for Pirates release day AND it's for a pattern that I've designed under that brand! BEST DAY EVER!!! Named after the capitol of West Virginia, the [eafl id="256706" name="Charleston Crossover"...

Fabric for Pirates :: May 2023 Reveal

It's here! It's here! The 15th is here and it's time to share our shipment from May! We sent out theeeeee cutest DTY this month! It's black and white and floral and has this fantastic mod vibe...

AFFILIATES