Updated 1/30/24: I almost pulled all of my Harry Potter content from my site.
After a lot of deliberation, I decided to continue to share it with my readers + crafting community but with this note:
I vehemently disagree with the comments made by J.K. Rowling. Trans women are women. Trans men are men. Their identities are valid and any attempts to erase their existence is harmful, wrong, and disgusting.
I stand beside the LGBTQIA+ community and find it important to support and respect the Queer Community, including those who have found any level of joy, solace, or identification in the Harry Potter series. As an Ally, learning is an ongoing experience. For those of you interested in educating yourselves on how you can support the Trans and Nonbinary communities, there’s a great guide from The Trevor Project (a nonprofit organization that focuses on suicide prevention efforts in the LGBTQIA+ community): Guide to Being an Ally to Transgender and Nonbinary Young People.
I will not tolerate discriminatory or hateful speech in any form. You don’t have to understand someone to respect them. They know who they are more than we ever will.
Spread love, spread joy, and keep making beautiful things. -KatyM.
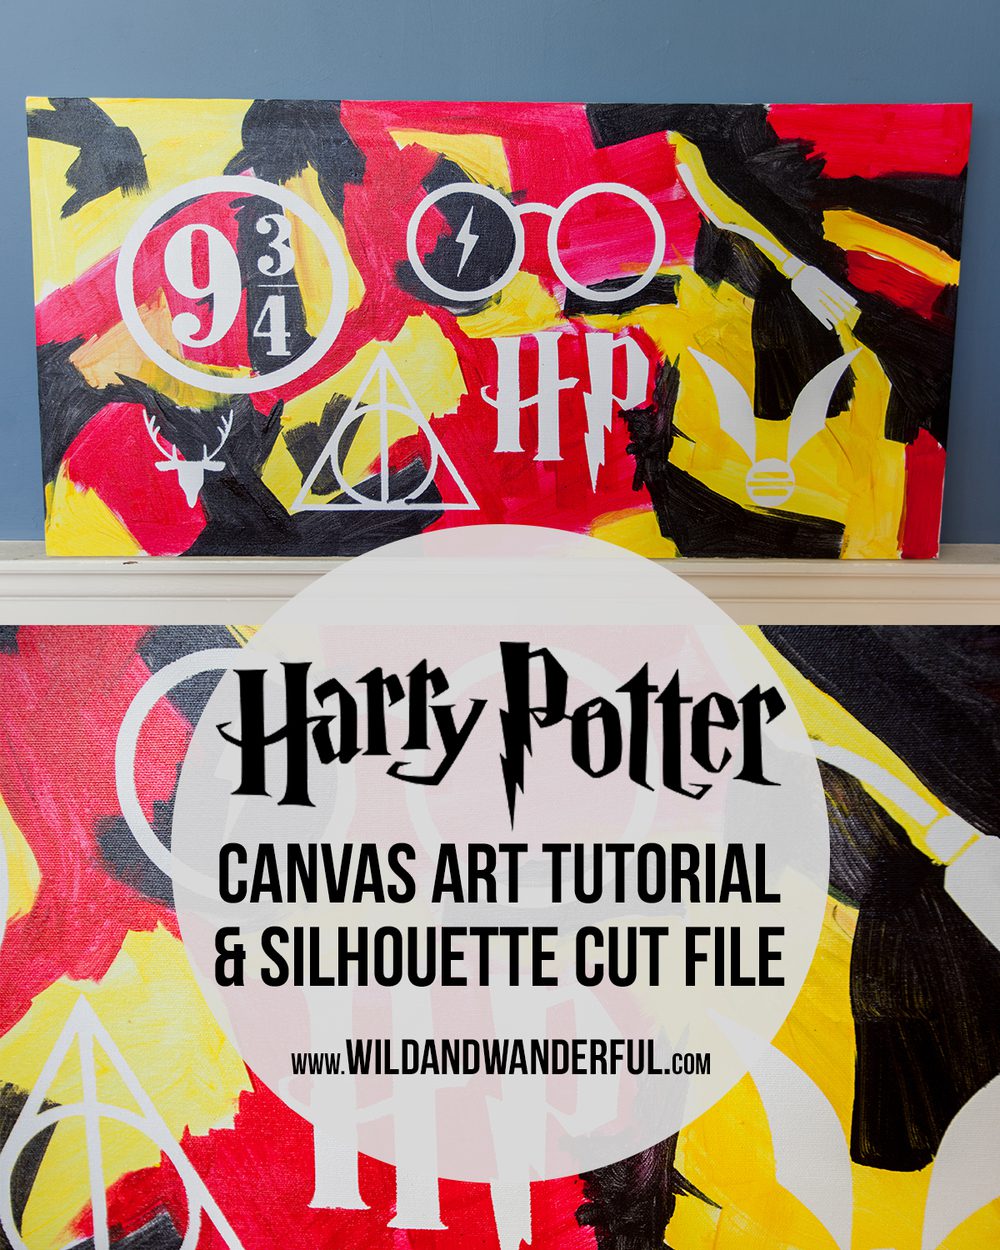
The Harry Potter bug has hit our house (several years later than everyone else)! While walking through JoAnn Fabrics the other day, Louis really wanted to buy this 15 x 30 canvas. Like reeeeeeeally wanted it. He had no plans, really. Just wanted to make something Harry Potter.
Sure! Let’s do it!
Immediately, I thought about using vinyl and painting over it. Sounds easy enough, right? It wasn’t. This project nearly killed my spirit and me all at once. But my struggles are your gains, right? So let me tell you about it!
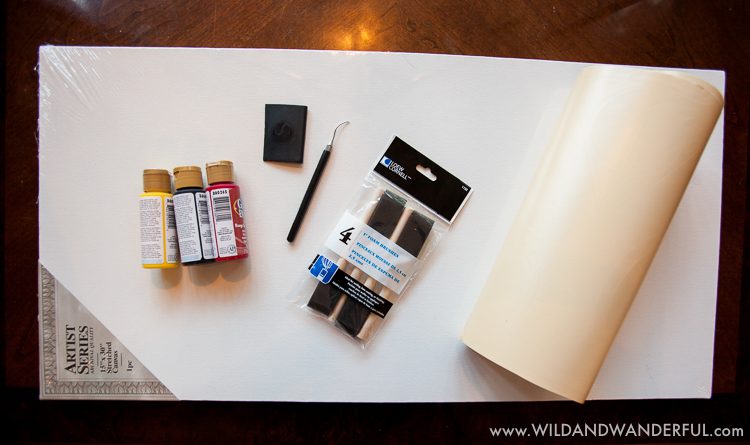
Supplies Needed:
- Harry Potter FREE Digital Cut File (linked above)
- 15×30 Canvas (can be any size…just adjust your file to fit)
- Red, Yellow and Black paint.
- Paint brushes/sponge.
- 12 x 24 inch vinyl + Silhouette machine
- Transfer tape *not pictured
- Mod Podge *not pictured
I don’t know why, but I love a good time lapse video. So here’s the whole process start to finish (minus the entire section that we spent painting…whoops).
Step 1: Apply a thin coat of Mod Podge to the entire canvas and allow to dry. Why this step? Canvas and vinyl don’t play together nicely…I spent a looooot of time trying to get it to stick before having an emotional breakdown. #wishiwerekidding
I tried to even do a vinyl dance for the Vinyl Gods, but apparently my dancing isn’t impressive enough. Vinyl just doesn’t want to stick to it…no matter how hard you try. But a layer of Mod Podge gives you just enough hold to get your vinyl on, no problem! No tears for you guys! I found the solutions! Mod Podge to the rescue!
Set aside and allow to dry completely.
Step 2: Cut, weed and apply transfer tape to your vinyl.
Step 3: No doubt the trickiest part! Apply your vinyl to the canvas. The best way to do this is to get a book or something solid and put it under the canvas. So you have something to push against.
Go slow. Be patient. And drink a lot of beer or wine if need-be.

Step 4: Get to painting! Louis actually did help me with this step. We went as random with our paints as possible. The hardest part was not mixing the black or red into the yellow…to keep that color more consistent. But we did a pretty good job as a team.
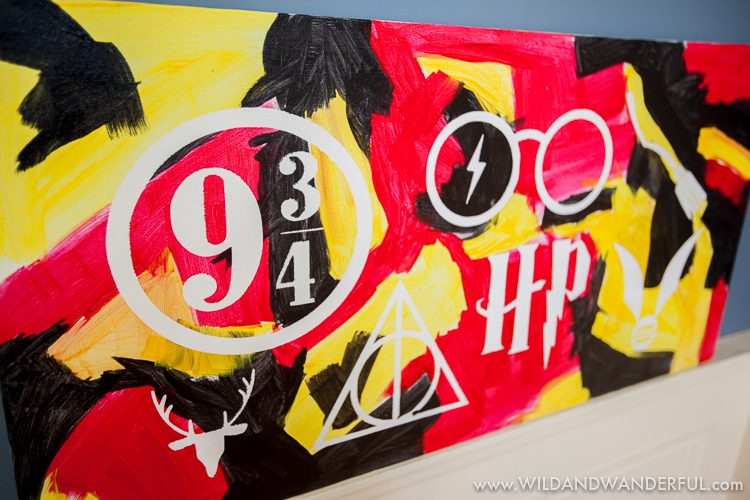
Step 5: Allow paint to dry, and then carefully peel off the vinyl. You’ll reveal blank, white spaces wherever the vinyl was AND you now have a cool, new piece of HP loving wall art!


I LOVE this! Thanks for sharing 🙂
Do you have a file for this for the Cricut?!