We are always looking to gift something to people that is handmade, unique, useful, and that Louis can help us with. Since Mother’s Day was coming up, we really wanted to gift the Grandmas something that fit all of those requirements, and I think we nailed it with this one.
Want to make your own DIY Serving Tray? We’ve got you covered!
Supplies Needed:
- 12″ x 18″ x 1/2″ piece of wood (we found a 12x36x1/2 at Lowes and cut it in two for under $6!)
- Various sheets of scrapbook paper
- Mod Podge (we used Matte) + paintbrush
- Markers + white paper, if you want to decorate your own
- [not pictured] 2 cabinet door handles (both under $2)
- Paper cutting tool

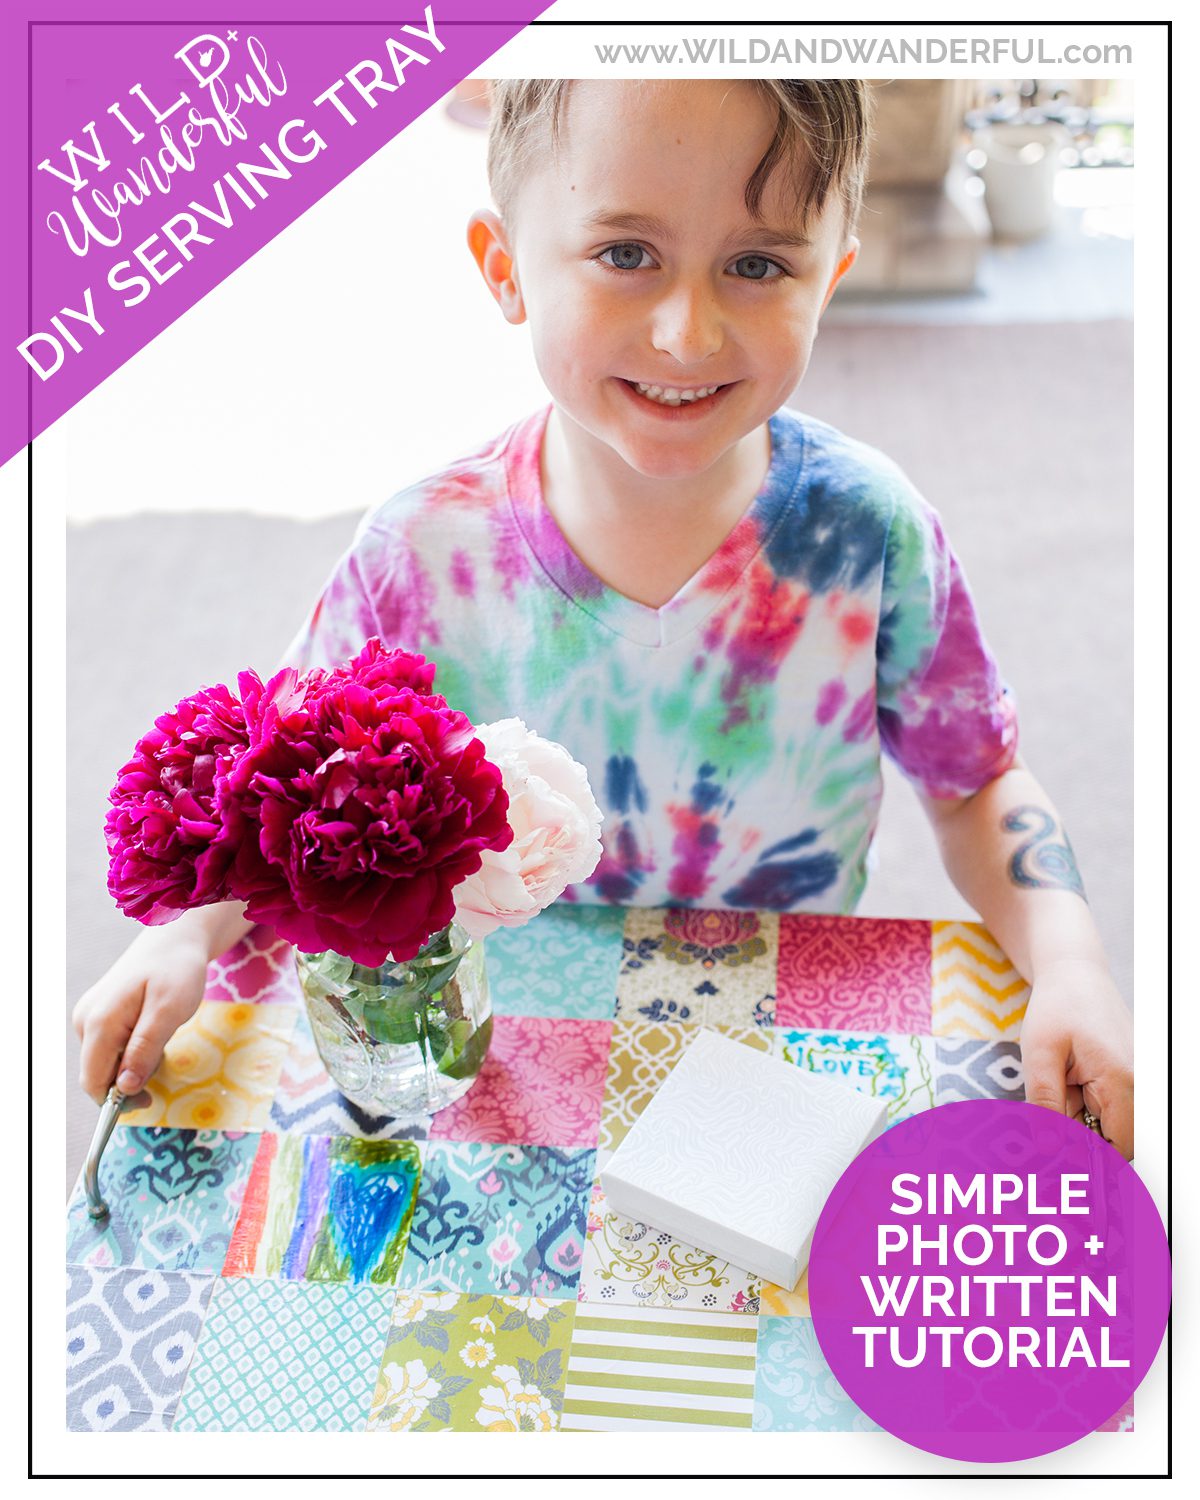
Cut your paper into 3″ x 3″ squares. You’ll need 24 squares total, so no need to cut a million pieces of paper. I just wanted variety.


Since we were personalizing this for Grandma, we had Louis draw on a couple of squares of white paper.

Start gluing! Apply a layer of Mod Podge to the 3×3 section. You don’t want to skimp on the glue but you also want to be able to flatten the square onto the board. Make sure to press out any air bubbles that might be under each section of paper.
Cover your entire board with paper squares, lining them all up.

Allow at least 20 minutes for the glue to dry (I think we waited longer) and then go back over the entire board with Mod Podge. Be sure to cover all of the edges pretty generously, to seal in all of the paper bits.
Repeat with the full coverage a minimum of two more times. We ended up with three full coats of sealant.

If wanted, sign the back of the board. Because who doesn’t love extra notes from the maker of your new gift?

Measure and align the holes for your handles. We drilled from the bottom some holes and then hand cranked the screws in.


Huzzah! Your new serving tray is finished, super cute, and took minimal effort!

We chose not to wrap ours. We simply picked some flowers from outside, threw them into a mason jar and had Louis hand deliver the gift just like this. Pretty sweet if you ask me.


0 Comments