This is a sponsored conversation written by me on behalf of Cricut.
The opinions and text are all mine. Some affiliate links are included.

One of the coolest blogging experiences to-date was when I was contacted about this Cricut blog tour. They wanted to get a bunch of us sewing bloggers together to see what we could come up with for projects that involved their iron-on products.
Considering that my whole business is built from the iron-on and HTV world, I couldn’t say no to this opportunity. And really I couldn’t say no in general, because it sounded so fun! I was officially counted in!


The first step was Cricut sending me this gorgeous new girl for my studio space. Along with this ah-dorable mint green Explore Air2, I was gifted a whole plethora of goodies to play with. If you’re a member of my business/blog Facebook group, you can see the super dorky unboxing video HERE.
Among the colors of iron-on was a rose gold foil color and I couldn’t get it out of my head. Rose gold? Hello? It’s gorgeous, and also matches my iPhone. So???? It needed to happen. I decided that I wanted to “print” some gold onto a solid colored fabric of mine and thought it would be a fun tutorial to share…not to mention so, so easy!


Let’s just say that I went a little wild with this idea and ended up creating my own skirt pattern. And then I went even more wild by grading it for women’s sizes XXS – Plus 3X…and decided to share it as a free download, so everyone can make a fun high/low skirt! Since this is my first pattern, she was named after my blog: The Wanderer Skirt!
Ready to get started with printing some fabric for yourself?
I wanted as many gold dots as I could cut, but that were still a decent size. So after fudging around in Design Space a little bit, I settled on some circles that were around 1.8″ in diameter. That gave me a whopping 72 rose gold circles, which were all aligned neatly by the Design Space software for me…for optimal space usage on my 12×24 piece of Iron-On. I ended up not using up all of my circles, but I’m safe keeping them for another project that will require a little extra shimmer-shine!
**In case you want to use the exact size I used for my Wanderer Skirt, feel free to grab the cut files HERE.

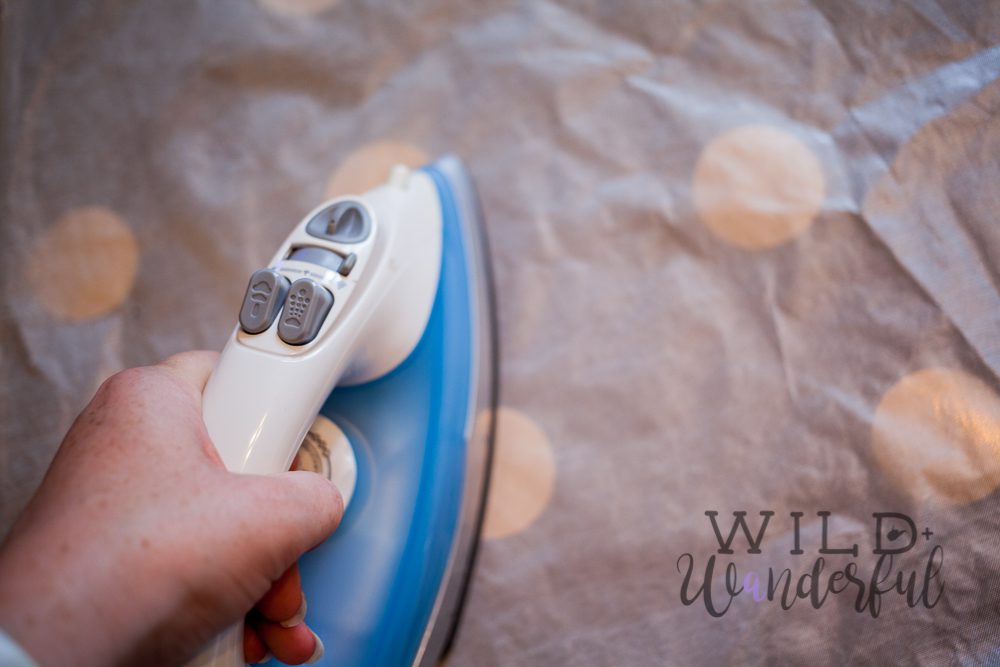
After the Explore Air2 did her thing, all that was left to do was to weed the Iron-On materials. Because of the nature of foil iron-on, the plastic backing isn’t sticky like other iron-ons can be. It actually made a little easier for weeding because nothing was sticking back to the backing when I pulled it off.
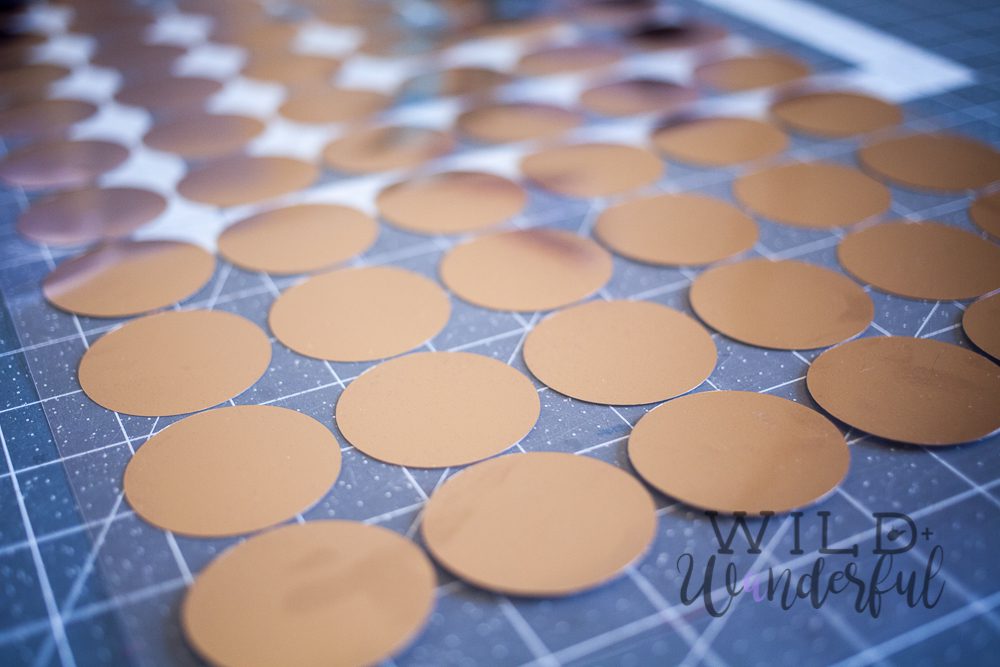

I went ahead and cut all of the circles out as individuals, so I didn’t have to do it during the application process.

To place my polka dots, I simply laid out my entire front skirt piece and randomly spaced them all across the piece of fabric. I like more chaos than accuracy when doing things like this, so I just eyeballed the placement. But you’re more than welcome to measure and give yourself more exact dot placements. That’s just not my style but it’s great if it’s yours!

Following the ironing instructions that came with the iron-on foil, I applied firm and even pressure and ironed my dots one-by-one. Then repeated the process for the back skirt piece. This was a little more tedious than most iron-on projects I take on but it was WORTH IT. Because my newly polka dotted, purple skirt is adorable. I love it so much!
Now all that’s left to do is to sew up your pattern and wear it all day, every day! It’s for sure about to be one of your favorites in your closet.


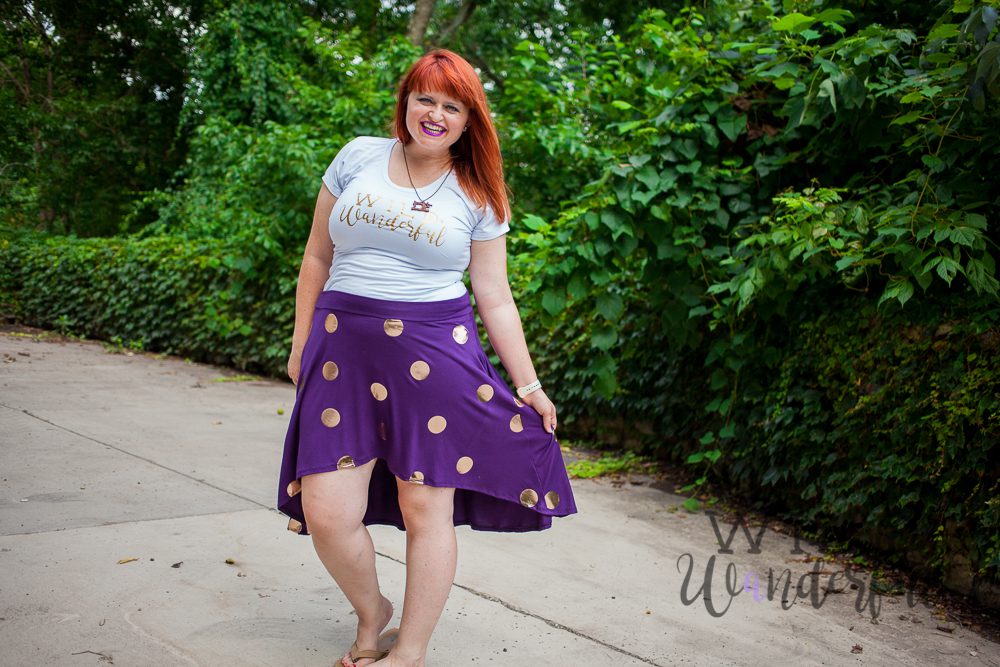
Did you notice my shiny gold shirt too? While I was making this tutorial, and about to take pictures of my finished piece, I’d realized that I’ve never made anything with my blog logo on it. That obviously needed to change. So glad I did! It feels very “blog official”, haha.

Don’t think for a second that this is the only stop on the Cricut Sewing Bloggers Tour! There are SO MANY amazing makers that are sharing their Iron-On projects with you. I’m humbled to be among this lineup of talent!
And on top of it all, Cricut is giving away a brand new Cricut Explore Air2 to one of our readers! Don’t miss out on that amazing opportunity, friends!!
Sweet Red Poppy | Whisk’em | Fleece Fun | Made For Mermaids | Sew Much Ado
That’s Sew Kari | Inside The Hem | Lily Shine Creates | The Simple Life Company | Riva La Diva
My Sweet Sunshine Studio | SewSophieLyn
Week Two: July 26th
Made By Melli | Stitches Quilting | Swoodson Says | The Sara Project | Maker Style
Wild and Wanderful | Sookee Designs | Life Sew Savory | Paisley Roots
Spindle and Seams | Feathers Flights | Sew What Alicia | The Tattooed Quilter
Amber Simmons | Coral and Co.
I was invited to participate in the Cricut Sewing Blogger Program Kickoff.
This experience is based strictly on my opinion. Others may have a different opinion or experience with the product listed above. I was provided the sample free of charge by the company or PR agency and I have given my honest opinion.
This is a sponsored conversation written by me on behalf of Cricut. The opinions and text are all mine.


0 Comments
Trackbacks/Pingbacks