I’m thrilled to be bringing you my first “shared” project for dye sublimation printing on the blog today! I saw these coasters at JoAnn Fabrics the other day and immediately was overcome by my impulse purchasing ways.
Cricut has been pushing their “Infusible Ink” lately…which is just their way of saying dye sublimation without actually telling you what you’re doing. Cricut doesn’t sell printers, they’re selling the papers to cut into shapes and then heat press onto items. So basically they’re allowing their customer base to skip the printing process and just do the sublimation. Which is fine — but it’s not nearly as exciting as creating your own designs, now is it? That’s why I’m here! To talk about how to do it at home…completely!

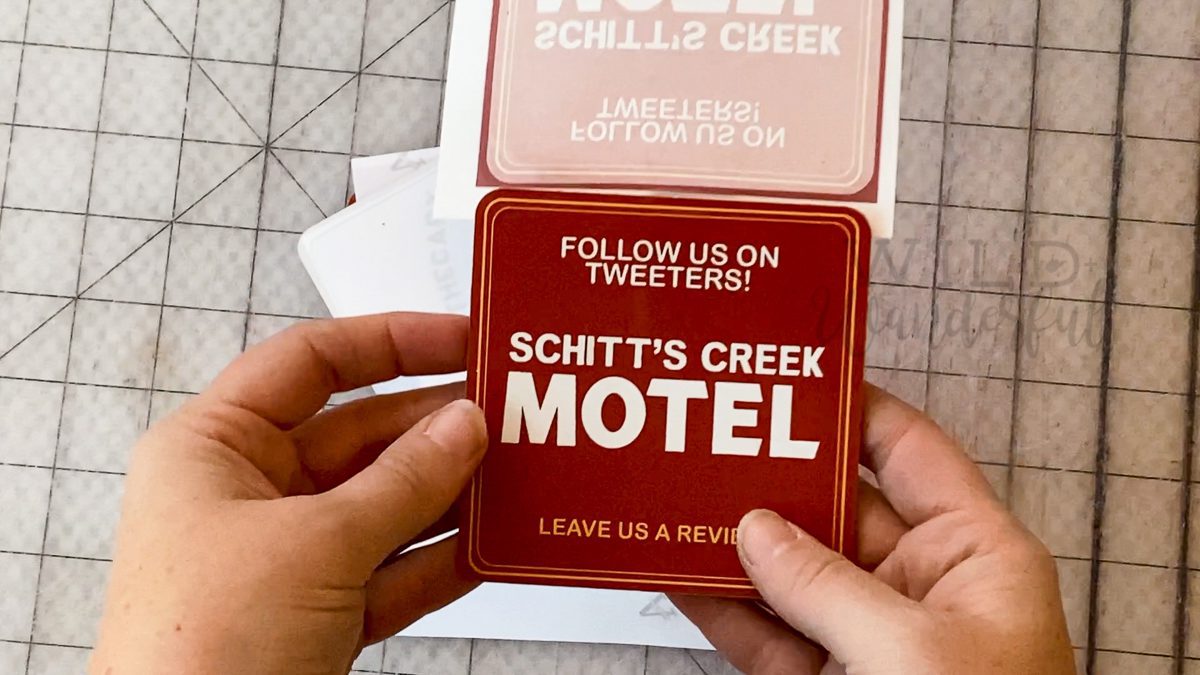
I don’t know about you, but we are superfans of the show Schitts Creek. It’s seriously the best. I’ve never seen such a brilliant way to write over-the-top personalities and hysterical storylines but keep everything so thoughtful and earnest. The way Patrick loves David is just unbelievable. And Moira? Girl, you are an ICON. (But if you must know, if I were a character in real life I’d be Ted. Loveable, constantly full of bad puns, totally the dork in the room always?? It’s me.)
Anyway, I asked my husband what I should print on these coasters and he, with zero hesitation, told me to make Schitt’s Creek coasters. And so it was decided.

To complete this project, you need:
- Sublimation Ready Printer (I cover a ton of printer options in my Sublimation 101: Printers, Ink and Paper post!!
- Sublimation Transfer Paper (Also covered in the above mentioned link.) My favorite is: A-SUB Sublimation Paper: Legal Size
- A Heat Press / other heating tool (This is similar to mine: 15×15 Clamshell Heat Press)
- Sublimation Ready Coasters – Like these Cricut Coaster Blanks or these Cork Back Sublimation Blanks
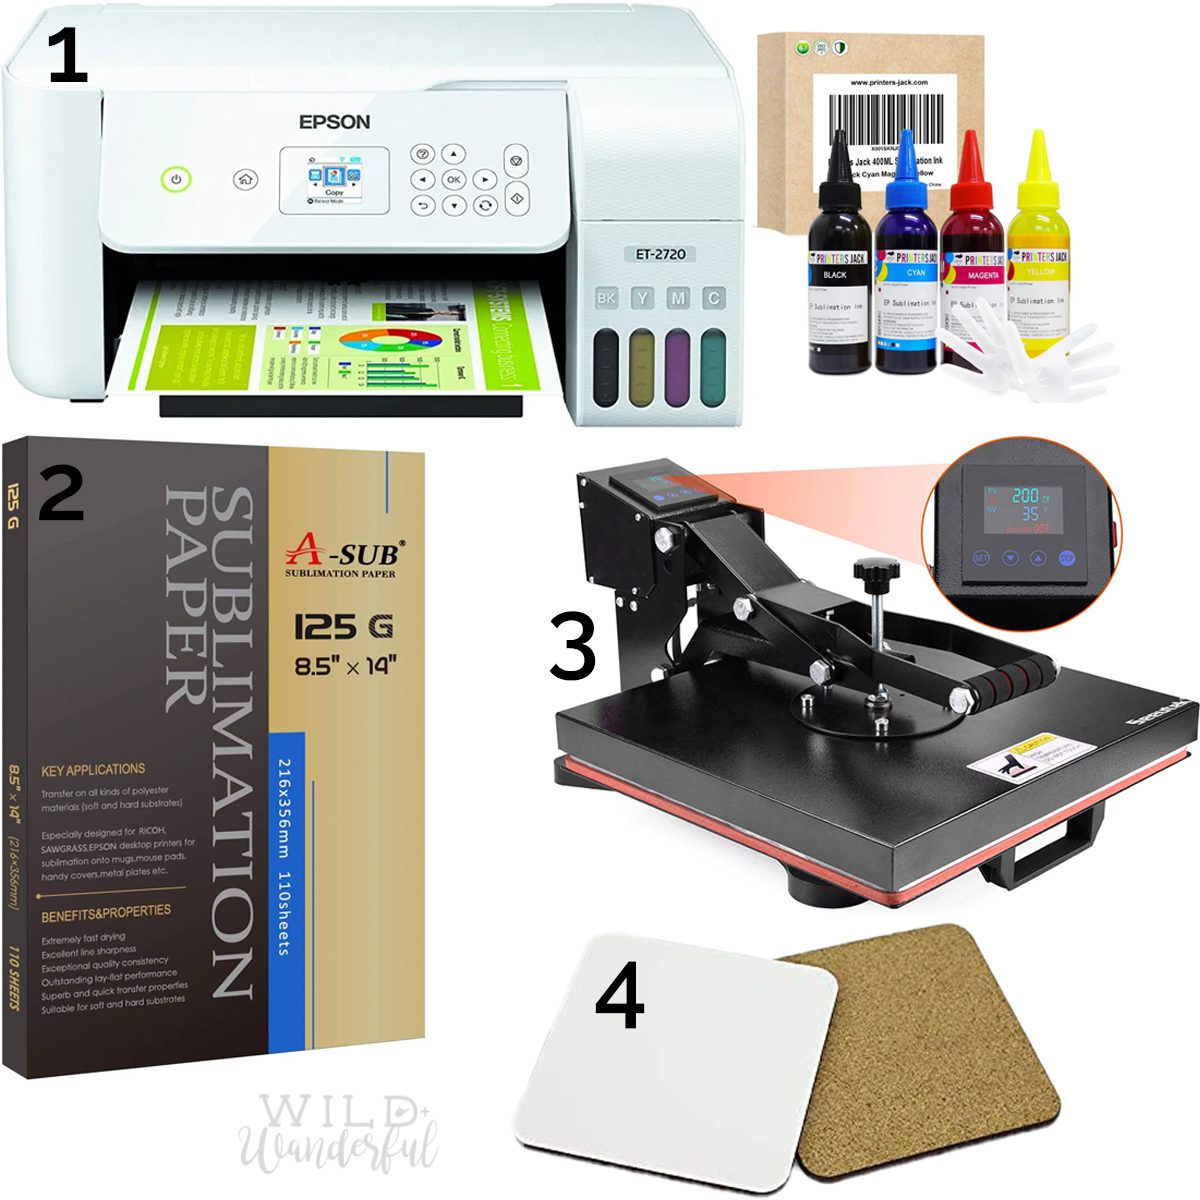
5. Heat Resistant Tape: I’m using the Cricut Brand Tape in my video, but THIS would be an excellent choice as well.
Step 1: Create your designs. I hope to do a deeper dive with all of you about design programs in the near future. However, I do all of my designing inside of Adobe Illustrator. Vector files are much easier to manipulate, and you have complete control over your work. I’ve seen plenty of times now where people are suggesting to use Cricut’s Design Space or Silhouette’s software and I would very much so say not to use it. There are way better editing programs out there (some free!), and if you’re not actually about to cut with these machines, there’s no sense in using their clumsy software for designing anything!
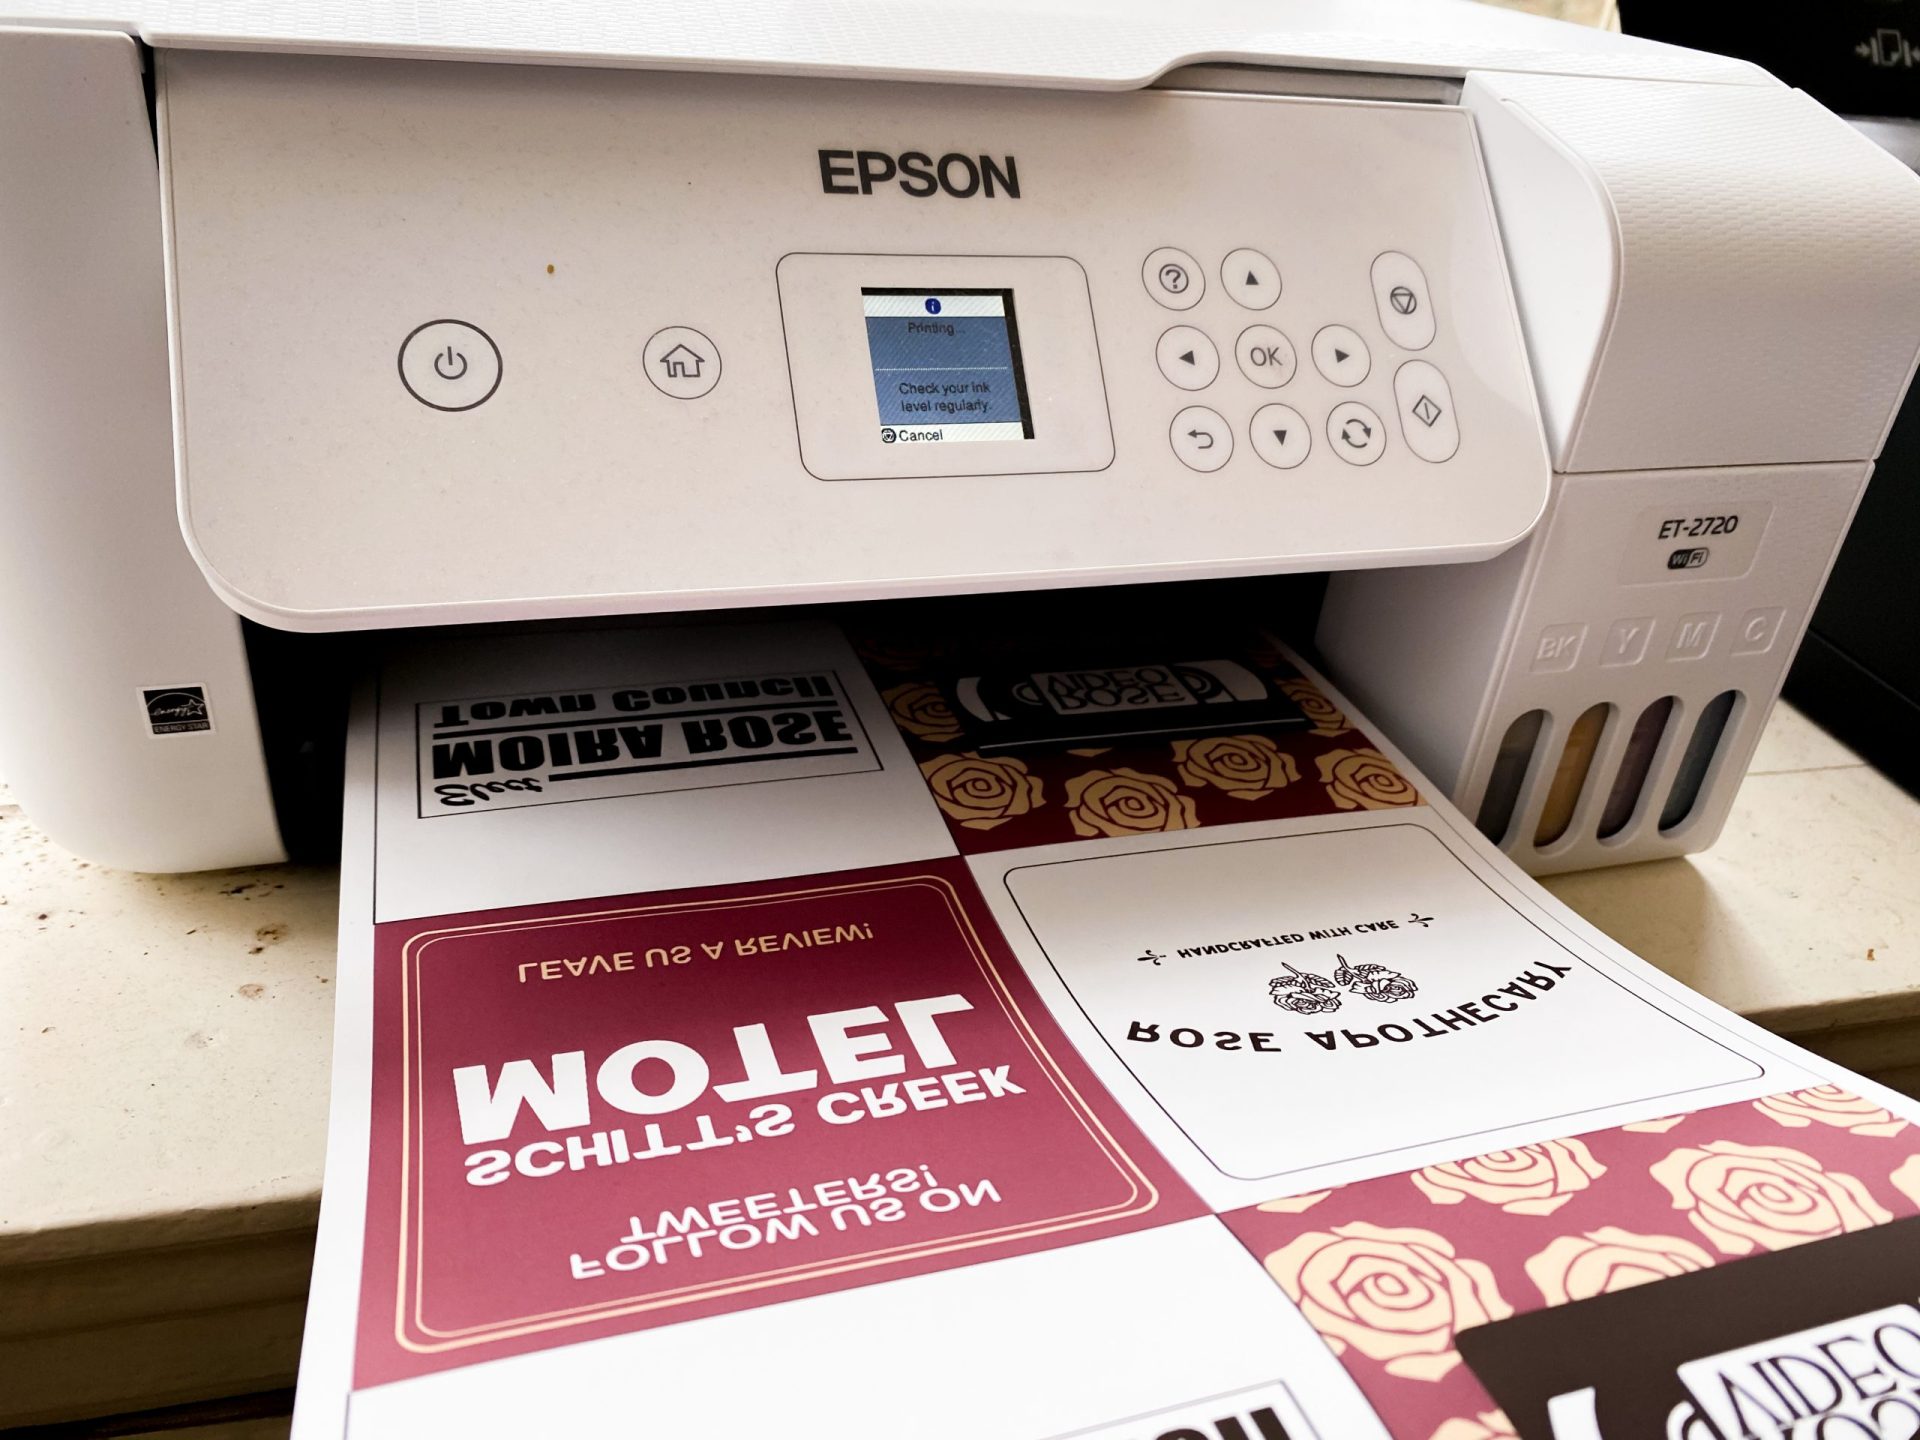
I wanted to use four different designs, and all of my coasters measure at a 3.75″ x 3.75″ size. I have my printouts set for a bleed space, which means I’m actually printing a 3.9″ square for each, which gives me just enough wiggle room to line everything up, and a little room for errors doing so as well.
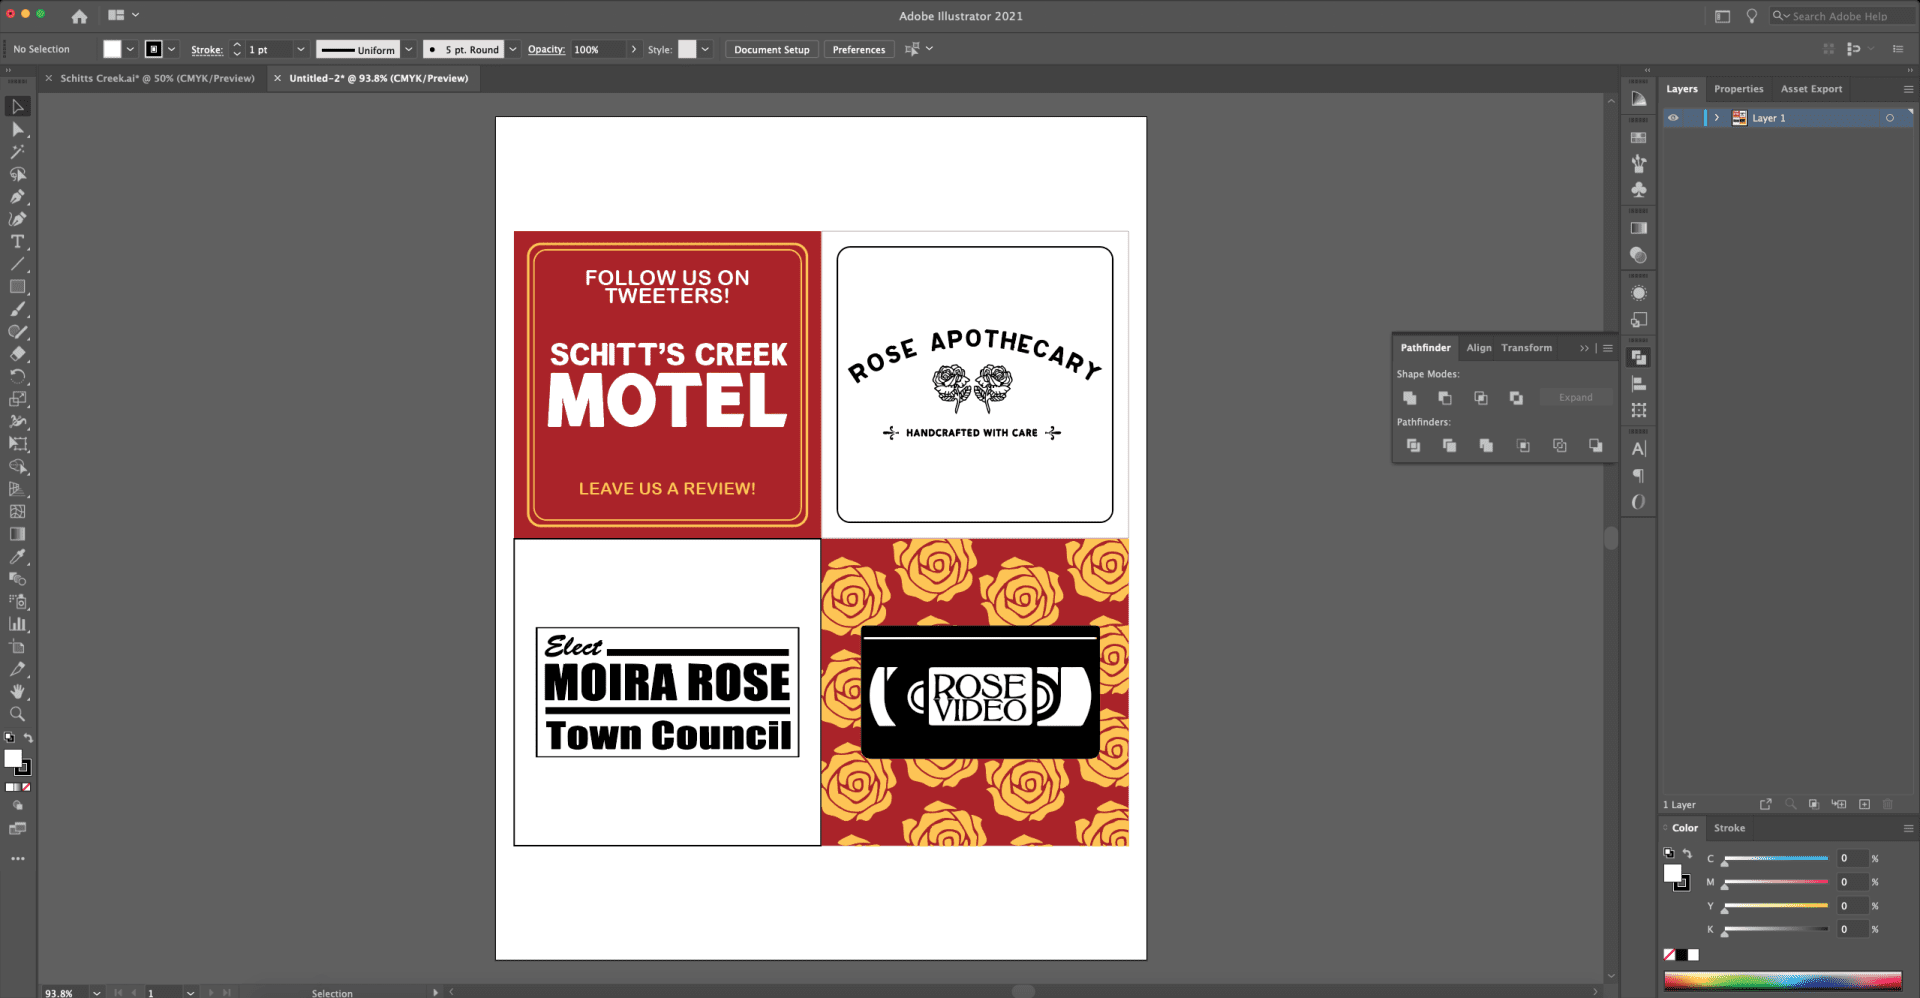
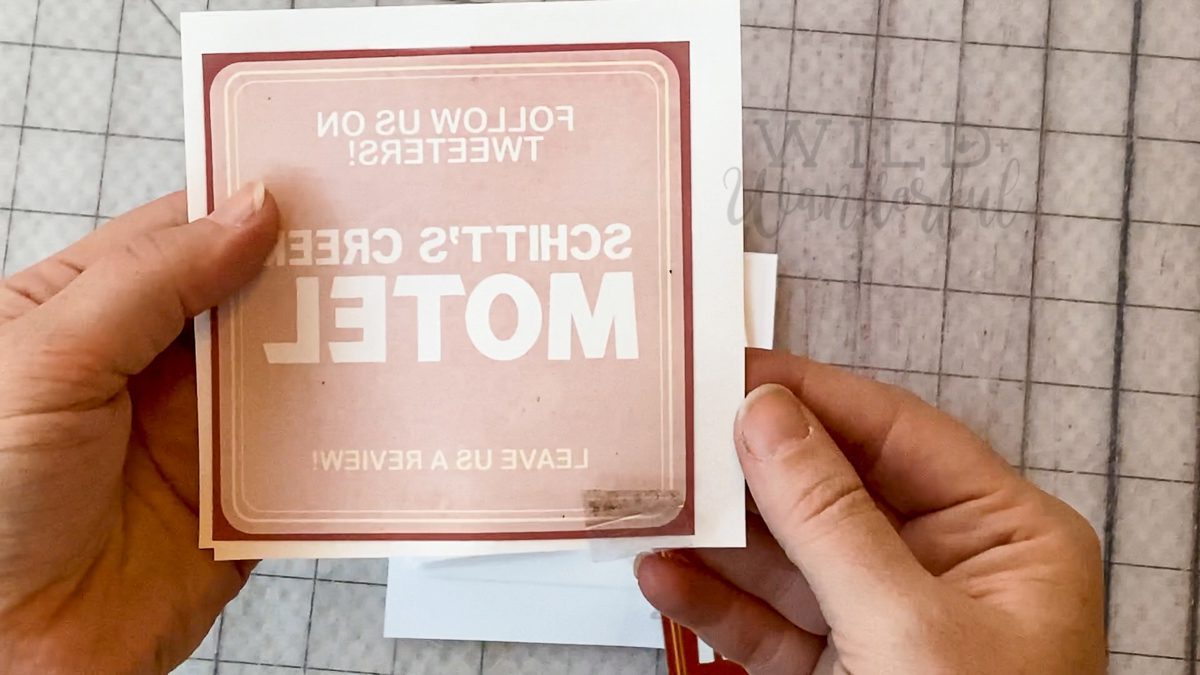
Before you hit that “print” button, make sure to mirror your image in some way. I do it in my editing software — while you can change it in your print settings for a “mirror image” print. Either way, it needs to be done, otherwise you will end up with a backwards image on your finished product.
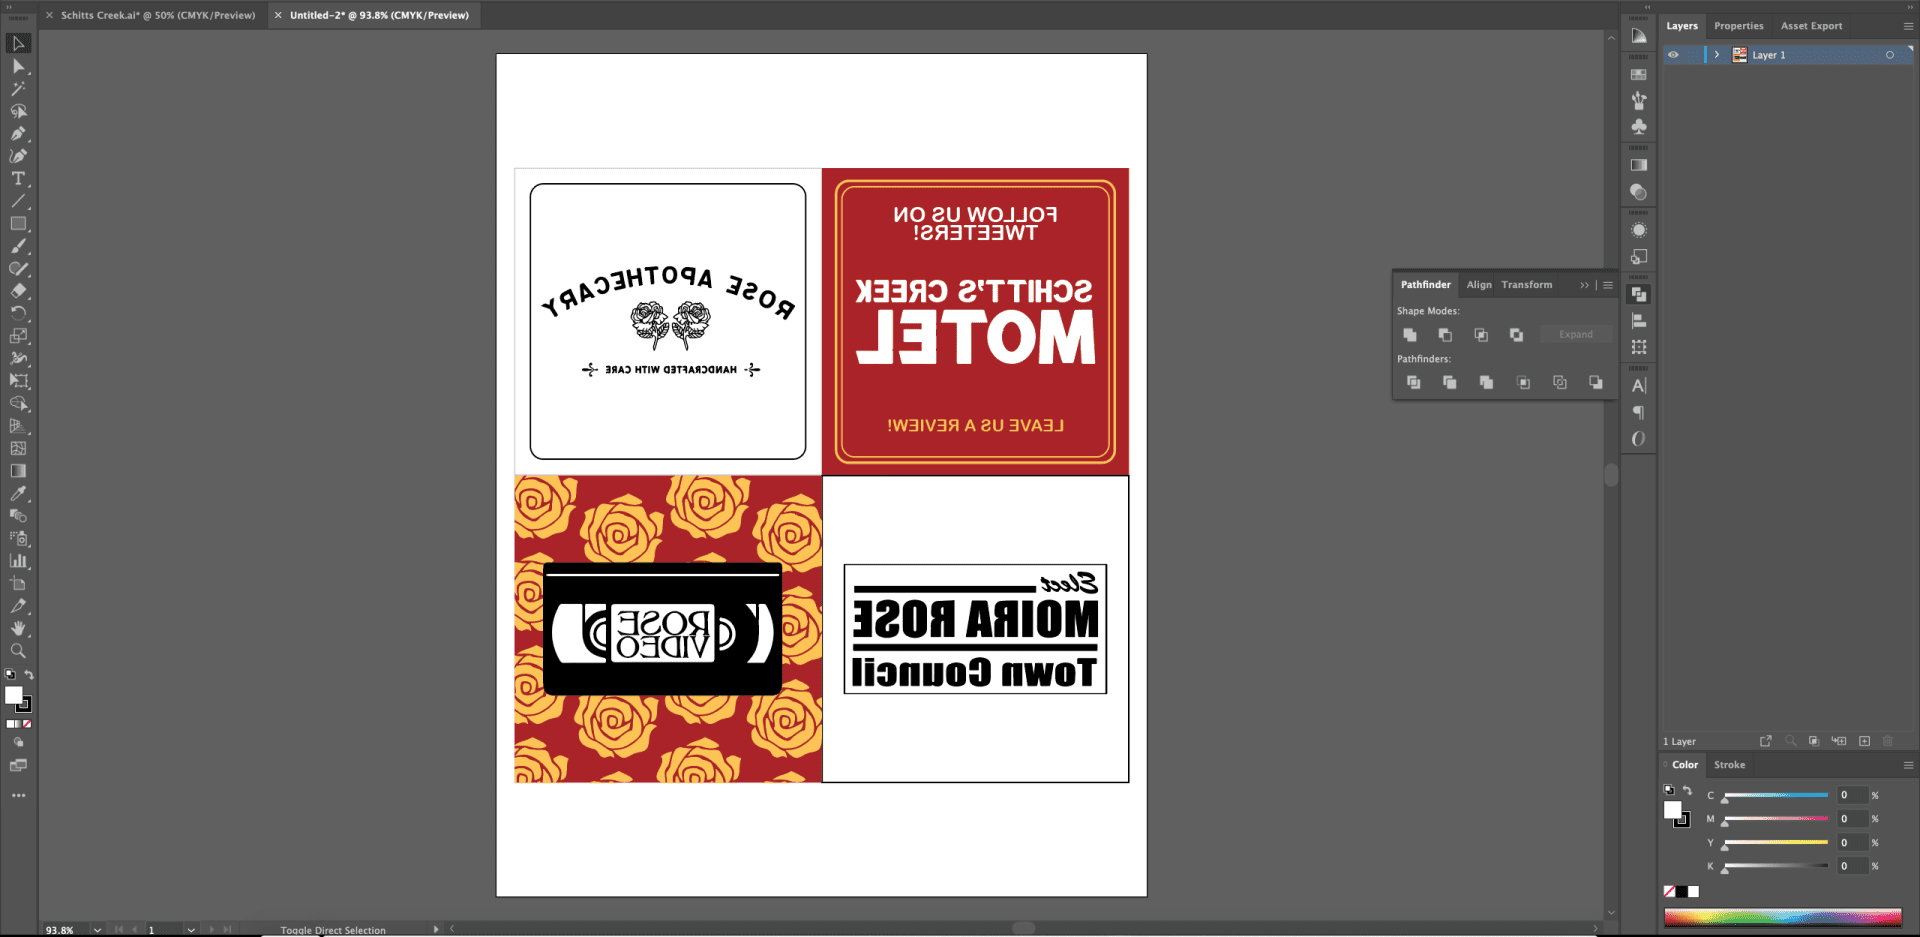
If you’re wondering about my print settings, this is what it looks like from inside of Illustrator, for my Epson Ecotank ET-2720. I choose the “Coated Paper” as my media type, on a normal print quality and it turns out perfectly for me every time.
Step 2: Print, using your Sublimation converted printer, dye sublimation ink, and sublimation transfer paper.
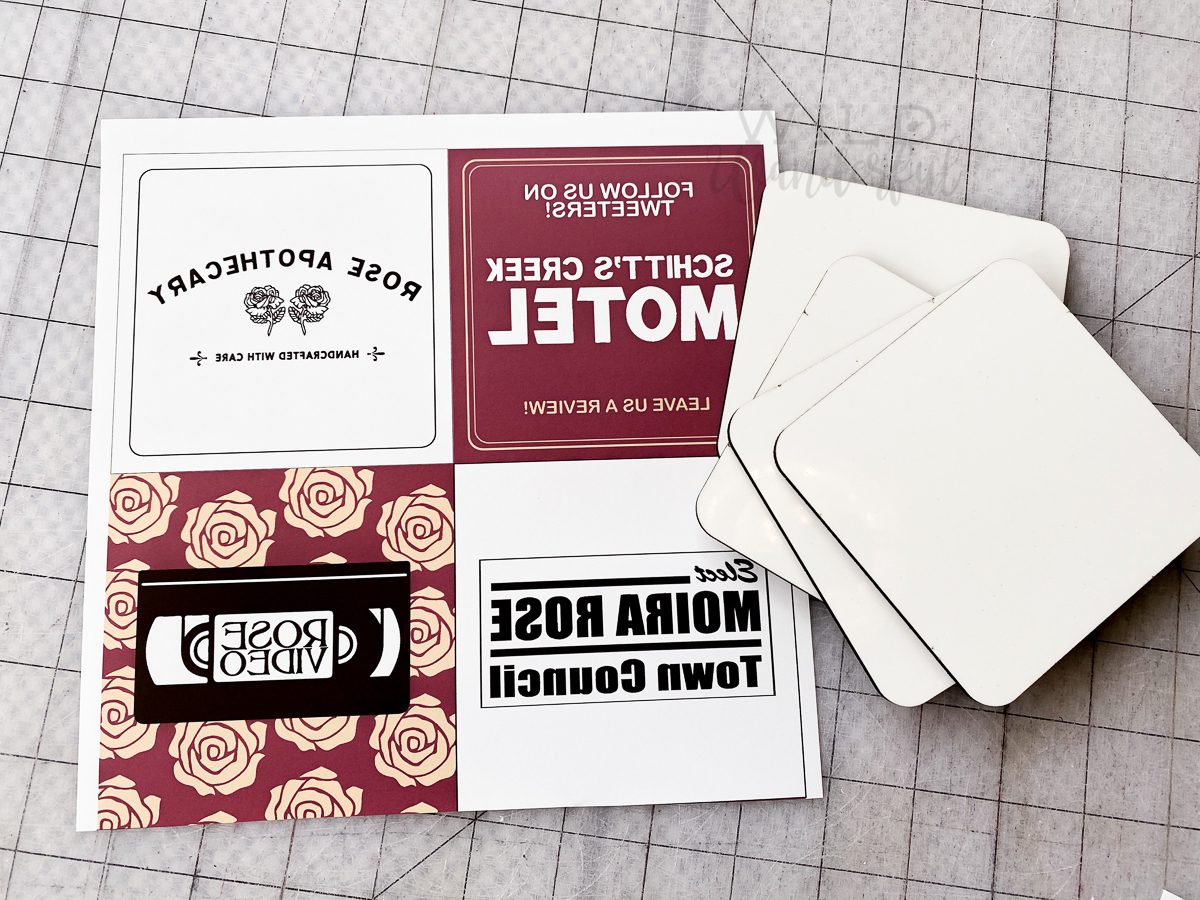
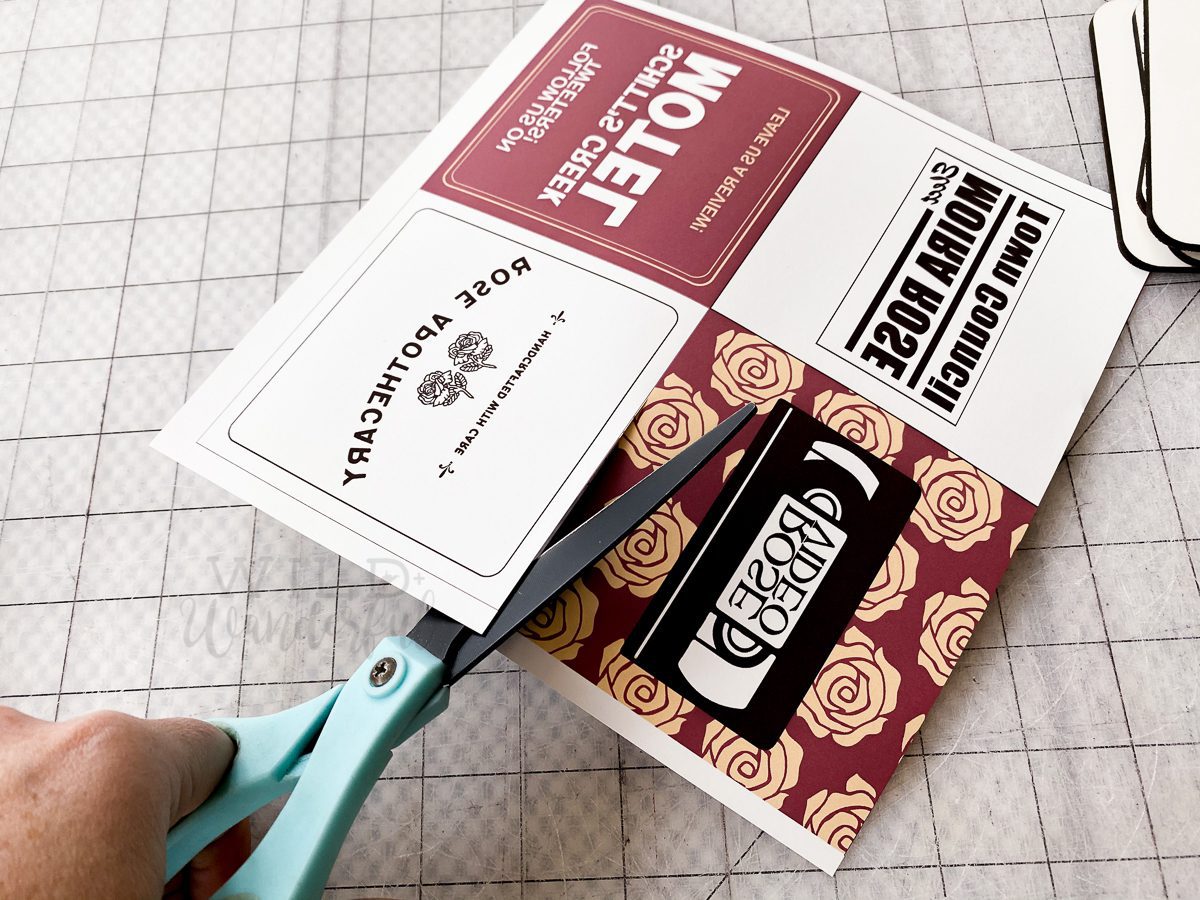
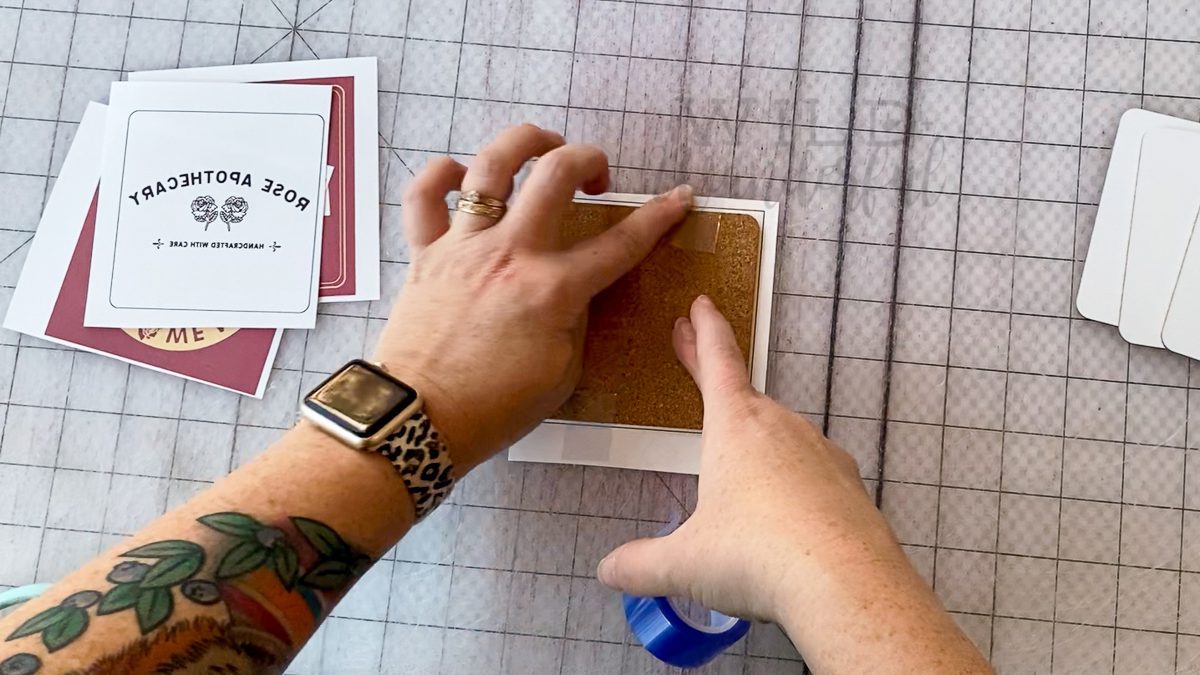
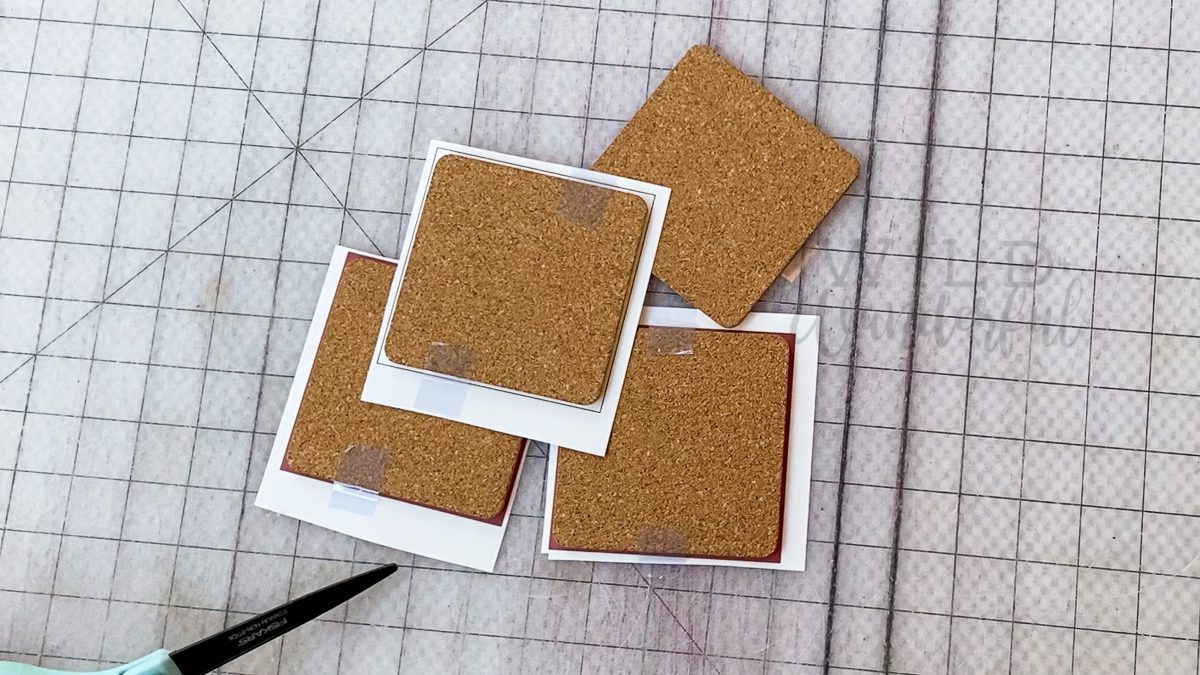
Step 3: Cut apart your images and align them onto your sublimation coaster blanks.
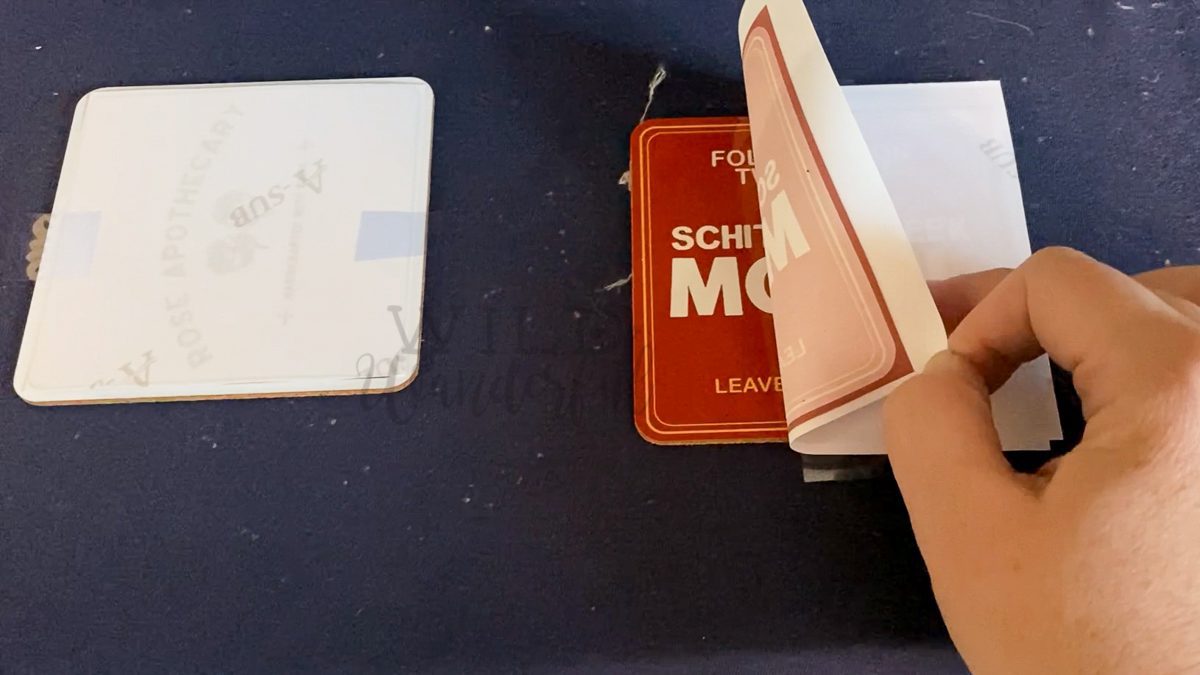
Hot tip: If you end up purchasing coasters from Amazon (or other places) they most likely are covered with a protective film. REMOVE THIS FILM. If not, you will regret it, much like I did.
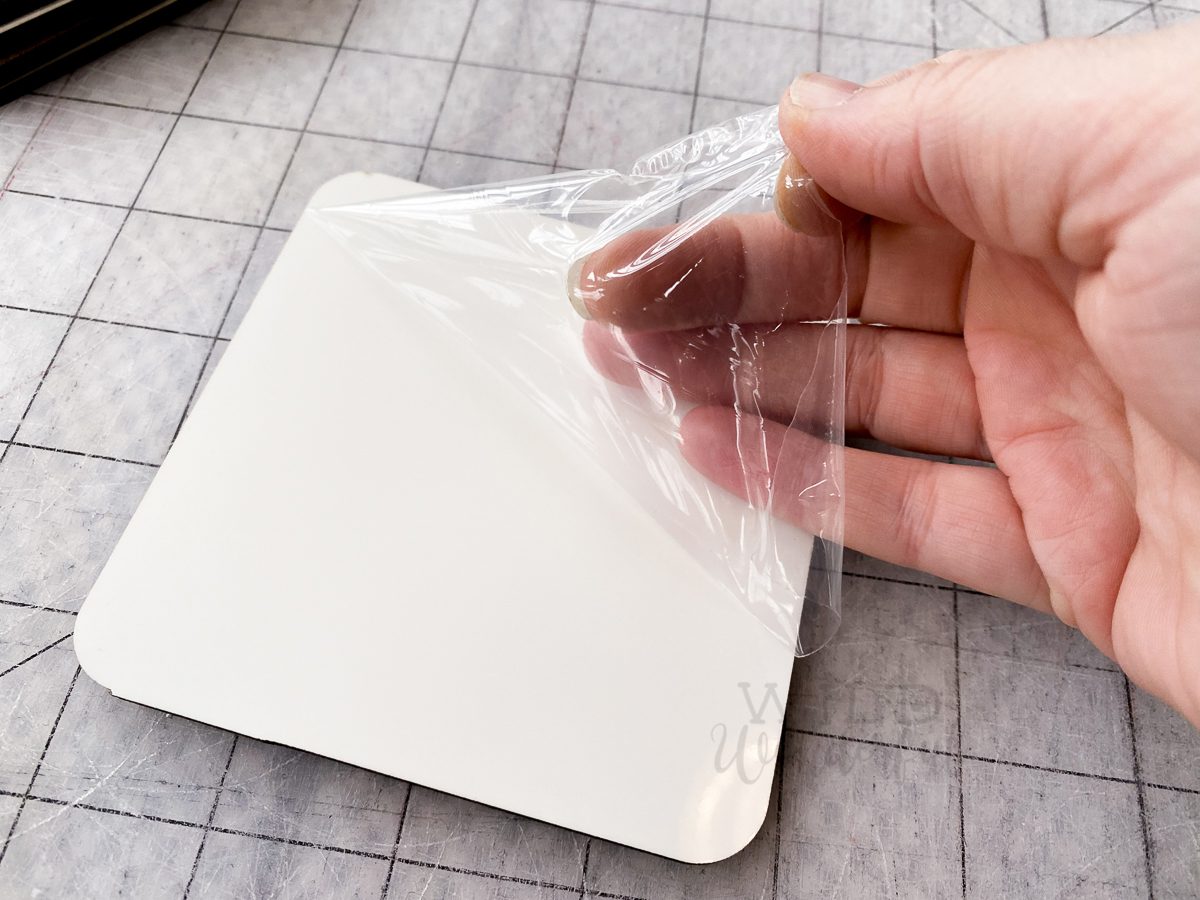
Learn from my mistakes, friends. I mean, check the difference between the film-less coaster and the one I accidentally left the film on while printing. Whoops.

Make sure the image on the paper and the substrate surface that you’re hoping to print on are right sides together, facing each other.

If you have it on hand, use some heat resistant tape to ensure the design or coaster don’t shift during the process.
Step 4: Head over to your heat press and set it to 400 degrees Fahrenheit. Place the coasters with the cork facing down, and the sublimation paper closest to you, and the heating element. Press for 60 seconds.
Step 5: Allow the items to cool before removing them from your press. (But obviously be careful and take a sneak peek if you must, like I did.)
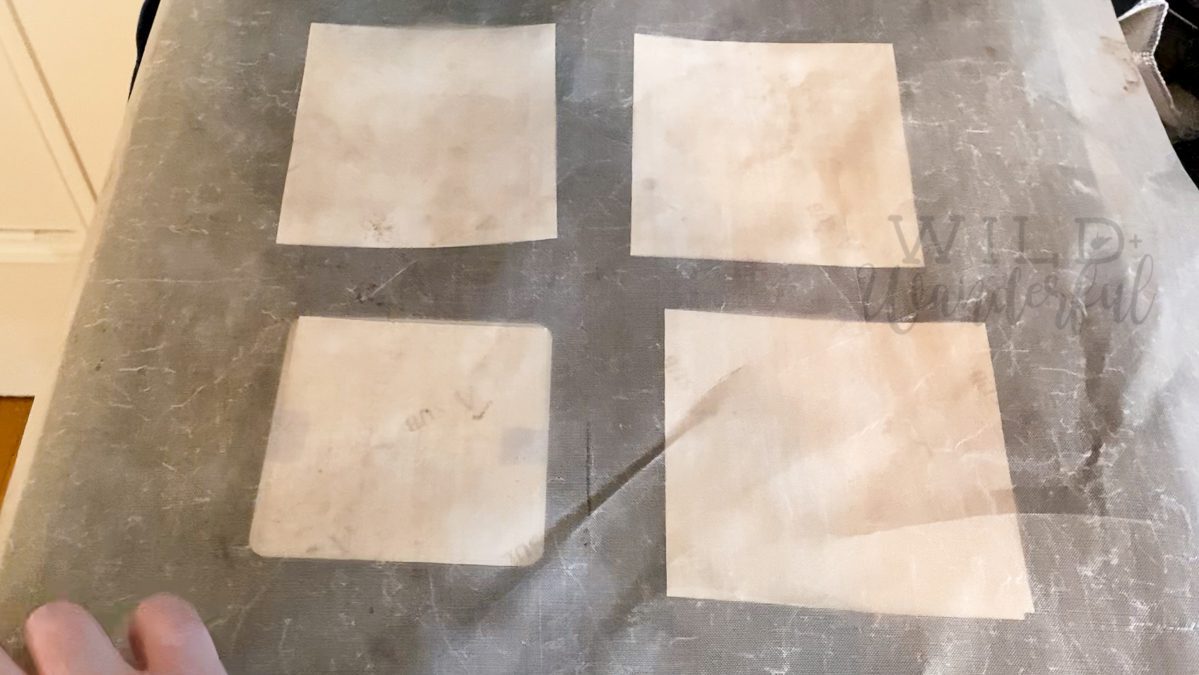
Carefully remove the taped down pieces of transfer paper from your coaster to reveal the design.
You’ll notice that some of the design will still be on your transfer paper. It’s totally normal, but most of the ink should have been absorbed into your sublimate item. All that’s really left on mine are the bleed areas.
Go celebrate, because you just made a super awesome coaster for your table!!

The download is a single PDF document in an 8.5×11″ letter sized format.
Please do not share the files, claim them as your own, or profit off of my design in any way. They are for PERSONAL USE ONLY.
Please follow me at Wild + Wanderful Blog on Facebook / Wild + Wanderful Blog Facebook Group / Wild + Wanderful on Instagram so you know when the newest posts come out. They’ll all make their way to my new resource page on the blog: Sublimation.


Great tutorial, do you have a tutorial for printing photo’s on to coasters? My photos look great when printed but when I use a heat press they go very dull. I am heating my coasters for 120 seconds at temperature of 155. Any advice you think would be good. I’m using this heat press from ebay
https://www.ebay.co.uk/itm/273422735183
Regards
I actually made some coasters with images for Christmas gifts this year and the photos came out super clear. With your settings, I’m thinking you don’t have a high enough heat. I press mine at 400F, for 60 seconds. I wonder if playing with your settings would be helpful!
I need help! My images come out just fine when printed, but after heat pressing, it’s a mess! Colors go crazy dull and weird. Please assist.
Thank You.
It should actually be the opposite. When printing to the transfer paper, it should be muted and the colors will look “off”. After pressing is when you get the true colors. What inks / paper are you using? And what is your press settings?
Do the Cricut Coasters have a film on them? It doesn’t appear to me?
The Cricut brand ones do not. The others that I linked through Amazon do — which is why I gave that little heads up for the film. 😉
The corners on my coasters keep curling up. They are all warped. I have the same coasters but with hardboard back.
I haven’t experienced this issue myself, I’m sure it’s frustrating! Is it curling during the cooling process? I wonder if laying a heavy book on top during the cooling process to help hold it’s shape would do the trick.
I tried to make coasters today using everything you have shown here, but my paper melted to the cricut coaster
That sounds like your heat settings are too high. I’m wondering if the press you are using runs hotter? I would try backing it down by ten or more degrees.
Hi- can I use this process with stone coasters? Pia
You’d have to coat / cover them in a sublimation ready substrate in order for the design to transfer. If you read my post here (https://wildandwanderful.com/blog/2020/10/sublimation-printing-101-what-is-dye-sublimation-printing/) it’ll talk more about what can work with the sublimation process.
Hey Katy, thanks for the tutorial. Do you need to seal these before putting them to use? I usually hand paint tiles and always seal. Not sure about whether or not I need to do that with sublimation. Thank you!
Not with these items. Sublimation is a chemical process, so you’re not really printing…you’re binding the sublimation ink to the polyester substrates.
I seem to have something on my cricut coasters that looks like a film after I process them. I clean them with a lint roller and I also cleaned two with alcohol. I heat them at 385 for 60 seconds. It’s also worth noting that at times the paper actually sticks to the coasters
This is a WONDERFUL tutorial for the beginner or seasoned creator. I am now into creating coasters for my graphic design business! My question is: is there any way to get a print friendly option for this tutorial?
I’m glad that you could get some use out of my quick project showcase! It lives on my blog only, sorry. 🙂