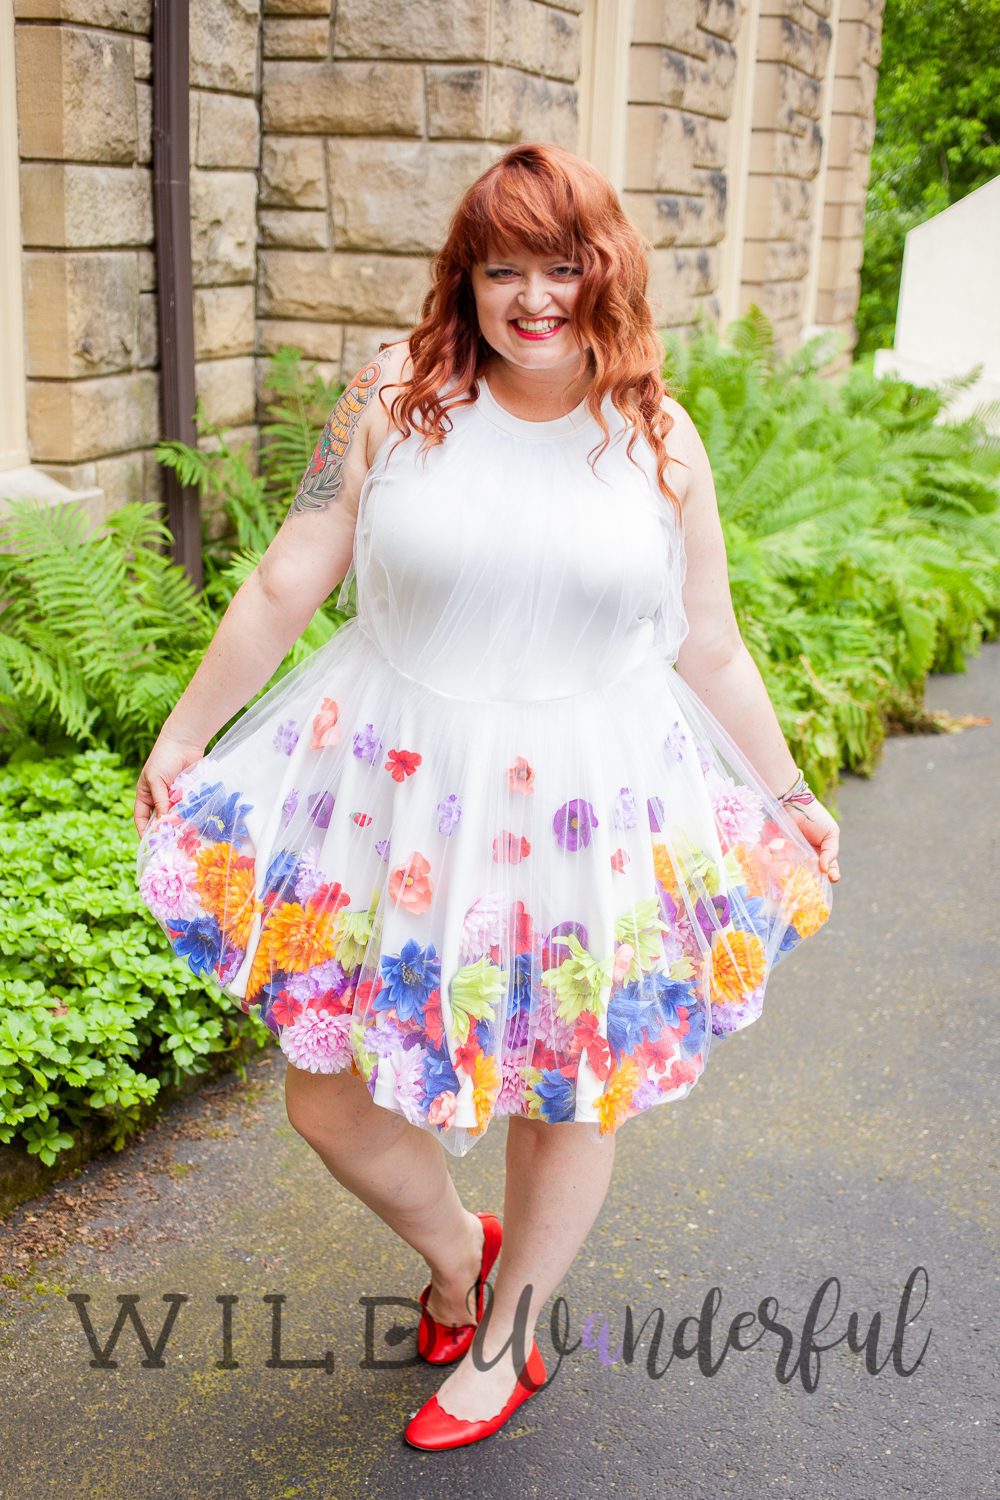
I can’t even begin to tell you how excited I was to start making my dress for our party. If you’ve known me for any amount of time, I usually wait until the very last minute to create outfits and costumes, because the inspiration hasn’t quite hit me yet. I think I just need to feel the excitement of whatever is about to happen, in order to really decide what to make. Maybe I work better under pressure, who knows? But as I was planning out the basics of our 10 Year Anniversary Party, I kept trying to visualize the tone and theme of our celebration. I almost wanted to build the party around what the three of us were going to wear.
I think what you wear completely helps set the mood. Think about every time you get dressed for anything. Funeral, birthday party, presentation, night out with the girls, etc. Clothing is an expression and I wanted to express my bright, fun, happy, and playful spirit. And goodness, I think it did just that.
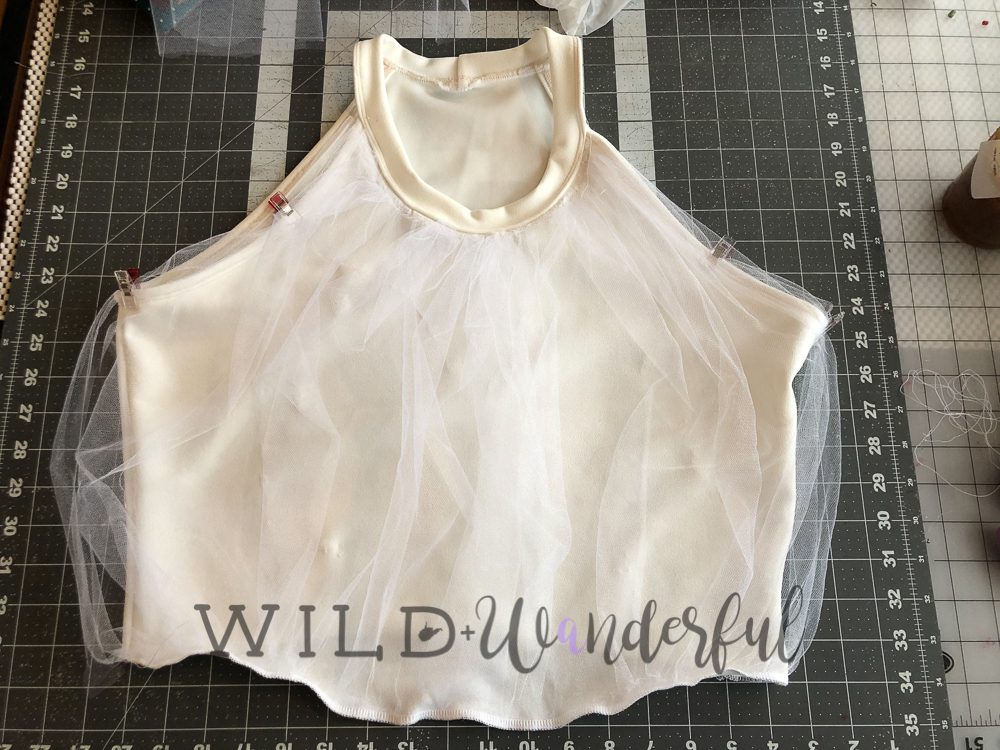
I merged a couple of patterns to create the bodice portion of my dress. I used the neckline and armscye of the Made for Mermaids Fiona, and then the rest of the dress was pretty much all the Patterns for Pirates Sweetheart Dress/Peplum. The fabric I used wasn’t anything incredibly special. It was just a thicker white ponte from JoAnn Fabrics.
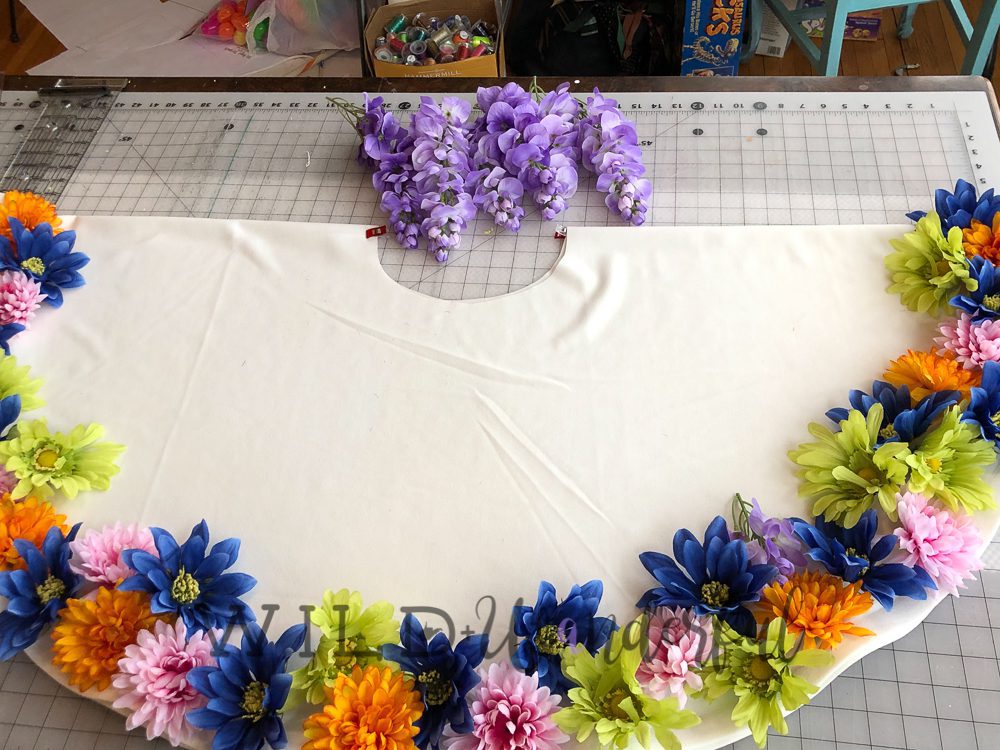
I first started with focusing on the skirt. Obviously it was going to take my focus first. The Sweetheart Dress/Peplum pattern features a full circle skirt, which I love, and I hemmed the bottom of the skirt with a horsehair braid to give it a little extra fullness and hold. I wasn’t sure if the weight of the flowers would end up crushing the fullness of the circle skirt or not. But I wanted to give it all the support I could.
And now I totally want to hem all of my circle skirts with horsehair trim because I absolutely adore how it lays.

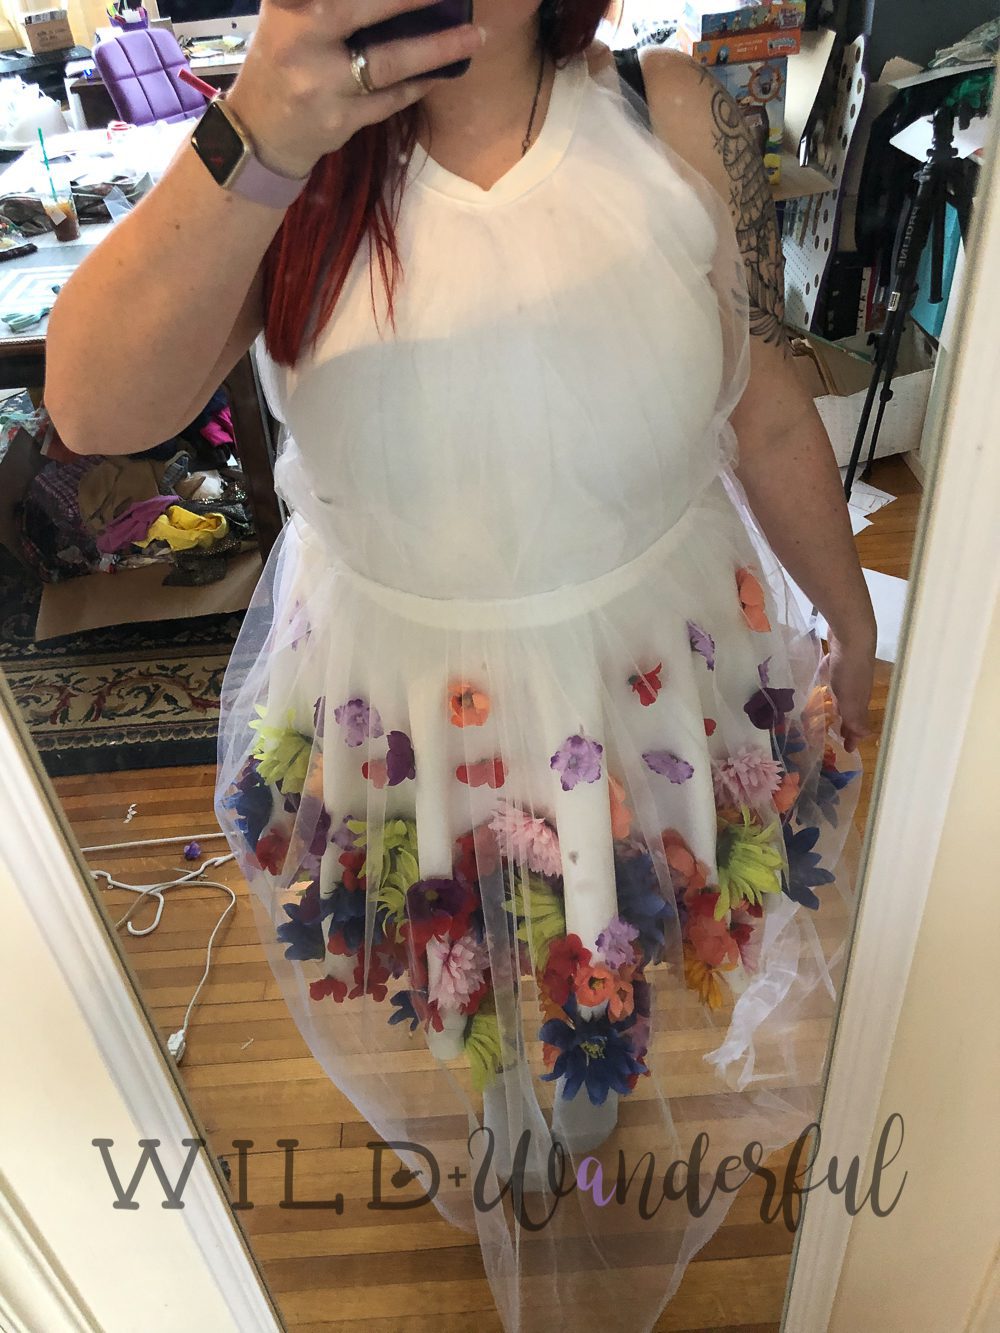
As for adding the flowers? Ohhhhh the flowers. I headed to our local craft store and spent quite some time trying to decide which colors and florals I really wanted to use. It was oddly hard to make a decision. But I threw a crap ton into the cart and off I went.

I added the flowers on the skirt by halves. So I popped the flowers off of the stems, counted how many I had of each, and set aside exactly half for each portion. I began adding them along the bottom hem only, and as randomly as possible added only the large blooms.
How did I attach them? Hot glue, my friends. HOT. freaking. GLUE.
Someone asked “but how will you wash this?” Um….washing it wasn’t part of my plans. This is a one time wear dress for me, so if someone wants it next, they can figure that part out I suppose. Ha!
After those flowers were secured to the fabric, I literally took all of the small flowers, mixed them up, and then threw them on to the dress. And almost nearly glued them exactly where they fell. There were more than enough to fill in all of the voids between the larger flowers, and it was an easier way for me to place them. If I’d tried to be “random” it would have taken me forever in my quest. Instead, I was truly random. Even with the few scattered ones that head toward my waistline, I kinda just tossed them around until I liked where the fell and then glued them into place. Bingo bango.
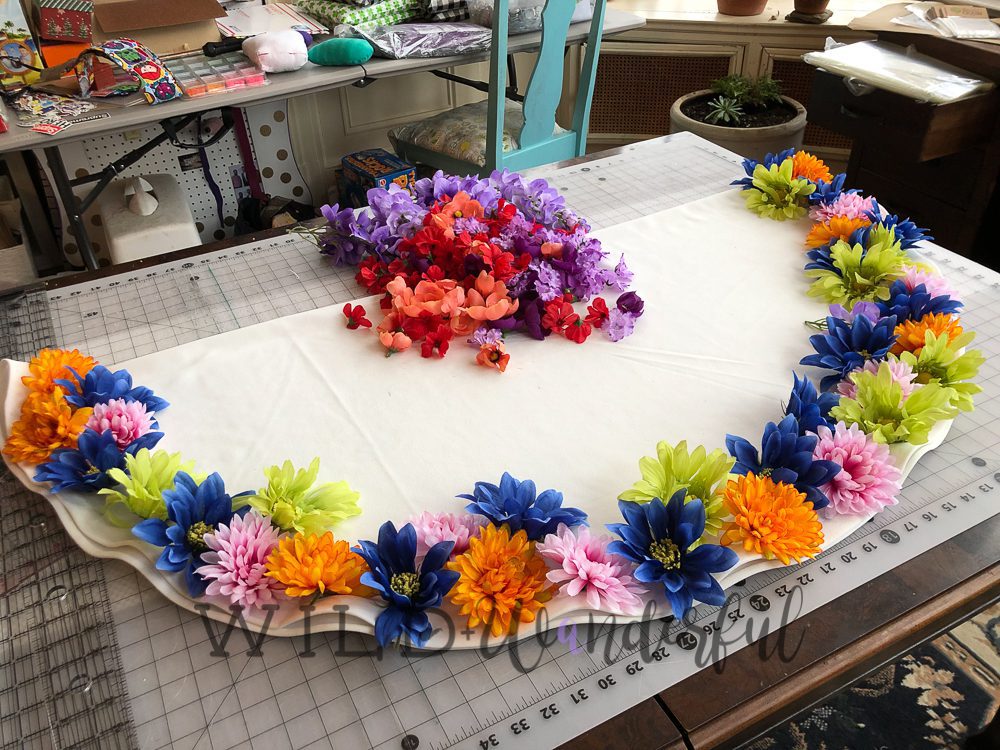

I then flipped it over and did it all over again. And then stood in the mirror for ten thousand hours to try and decide if I could really pull off a floral dress like this or not.


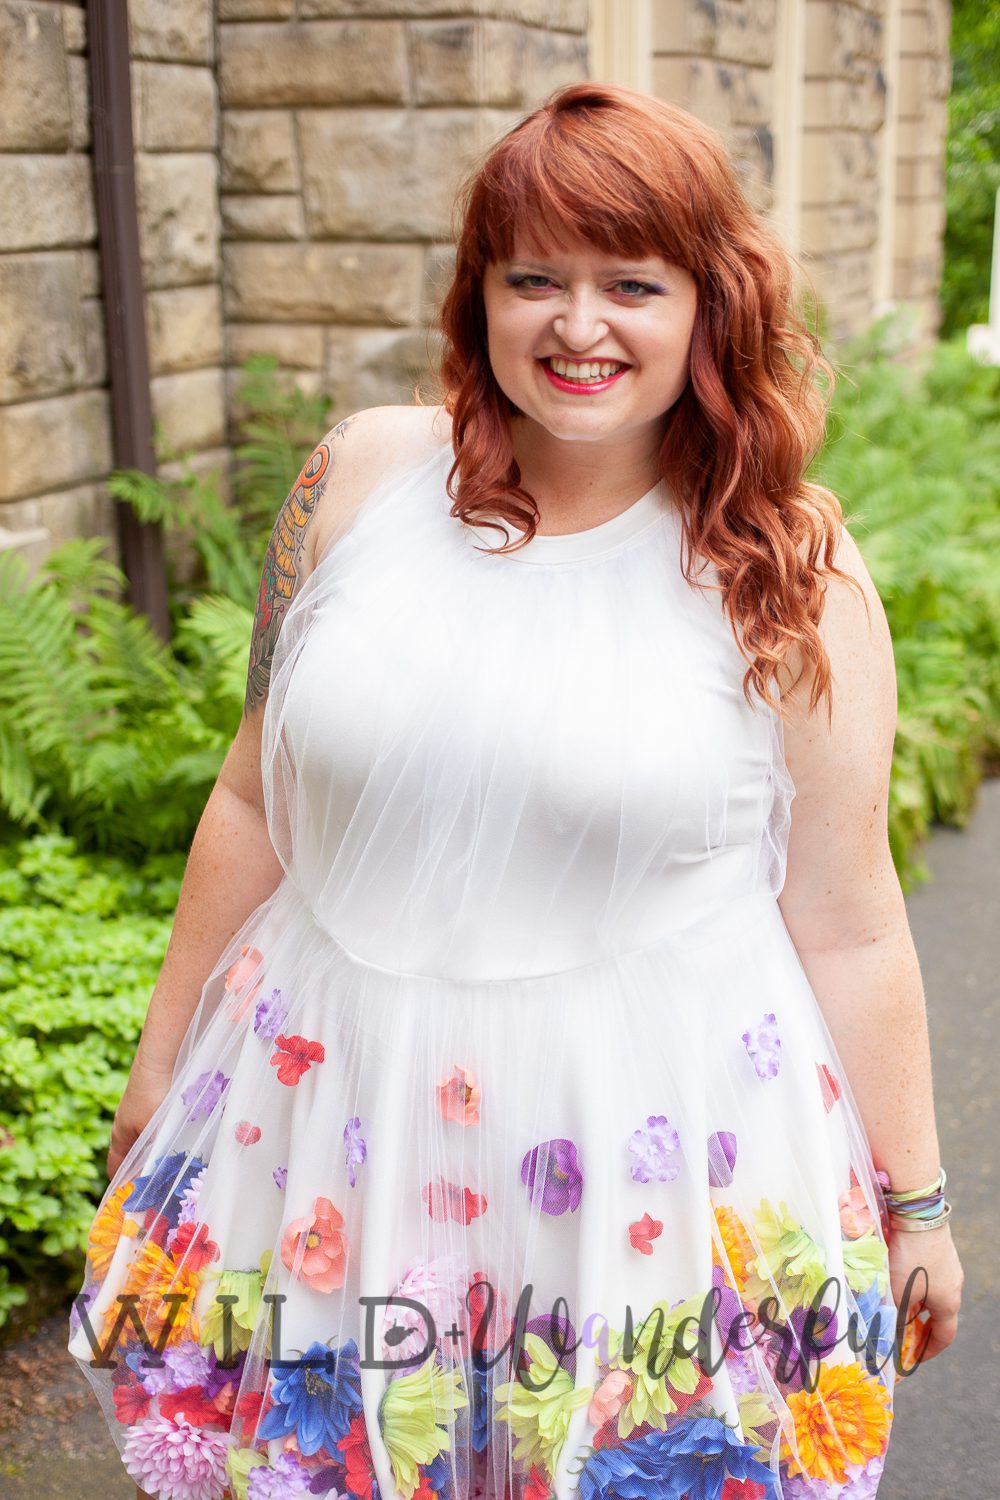
After that, I was on to my bodice piece. I added the tulle after it was already sewn together, because I didn’t really have a plan when I started it all. The tulle was added in the least calculated way ever. I took what I had available, cut it into front and back pieces, gathered it to fit along the neckline, added a couple of tacks along the armscye, and then gathered it to fit along the waistline.
And of course I again stared at myself in the mirror a lot. This time, contemplating if I can pull of wearing white or not.


The next step was to add tulle to the skirt portion. I wanted to enclose the flowers in the skirt, so I attached the tulle at the waistline on the outside, and pulled it all the way around the bottom hem and back up to the waistline again.
And then I sewed the skirt and bodice together and basked in the glory of my slightly over the top, super fun, anniversary party dress.


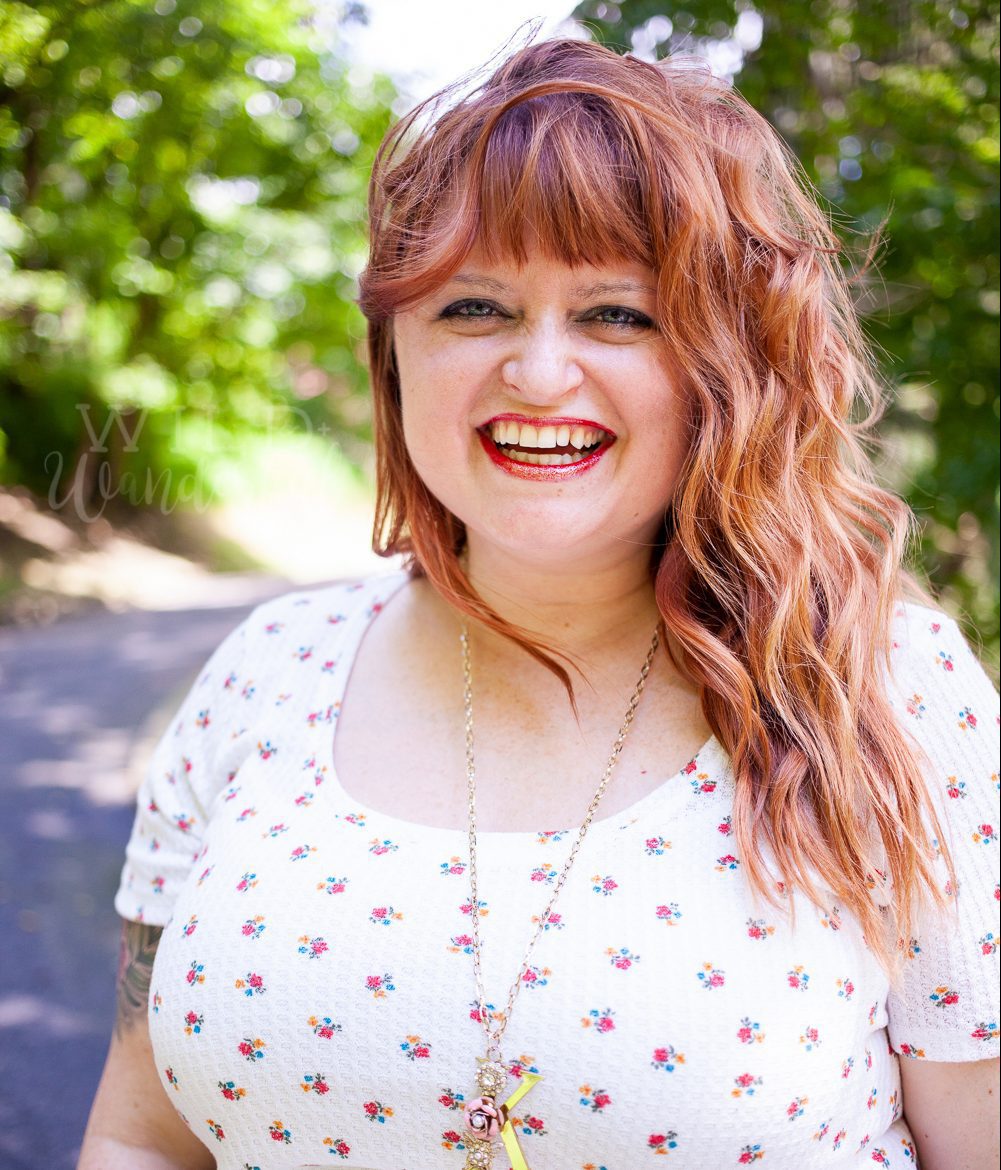
To take the whole thing over the top a little bit more, I had my cousin’s daughter give me some rainbow eyes. I seriously adored how my makeup turned out and would greatly consider hiring Amelia to do my face for everything, always. Kinda fun, right?

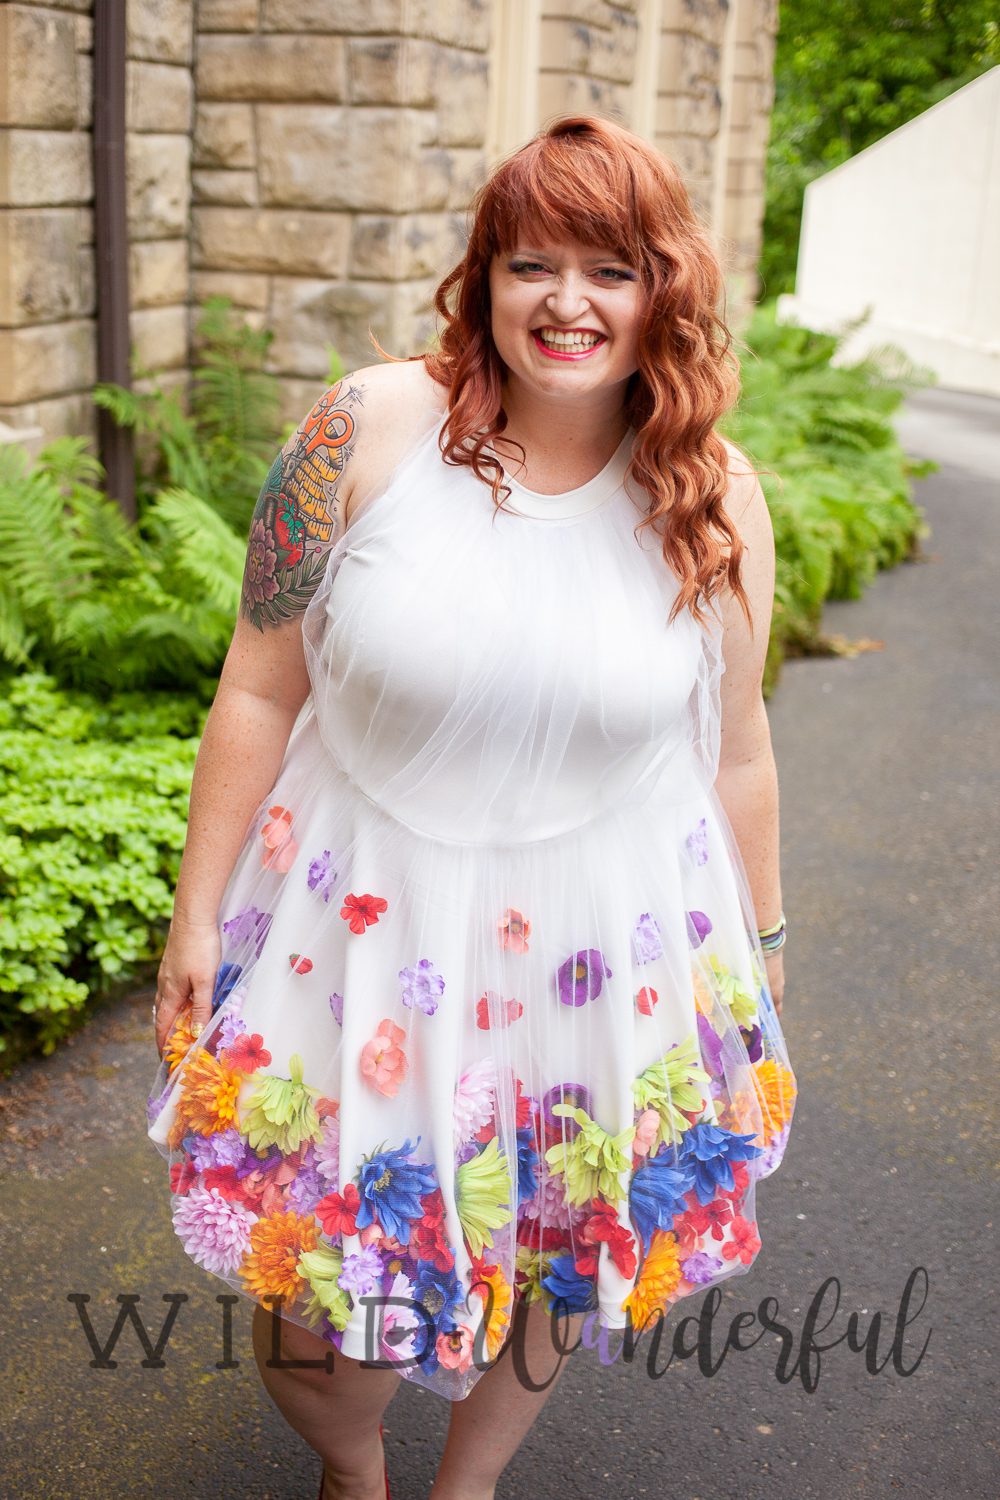
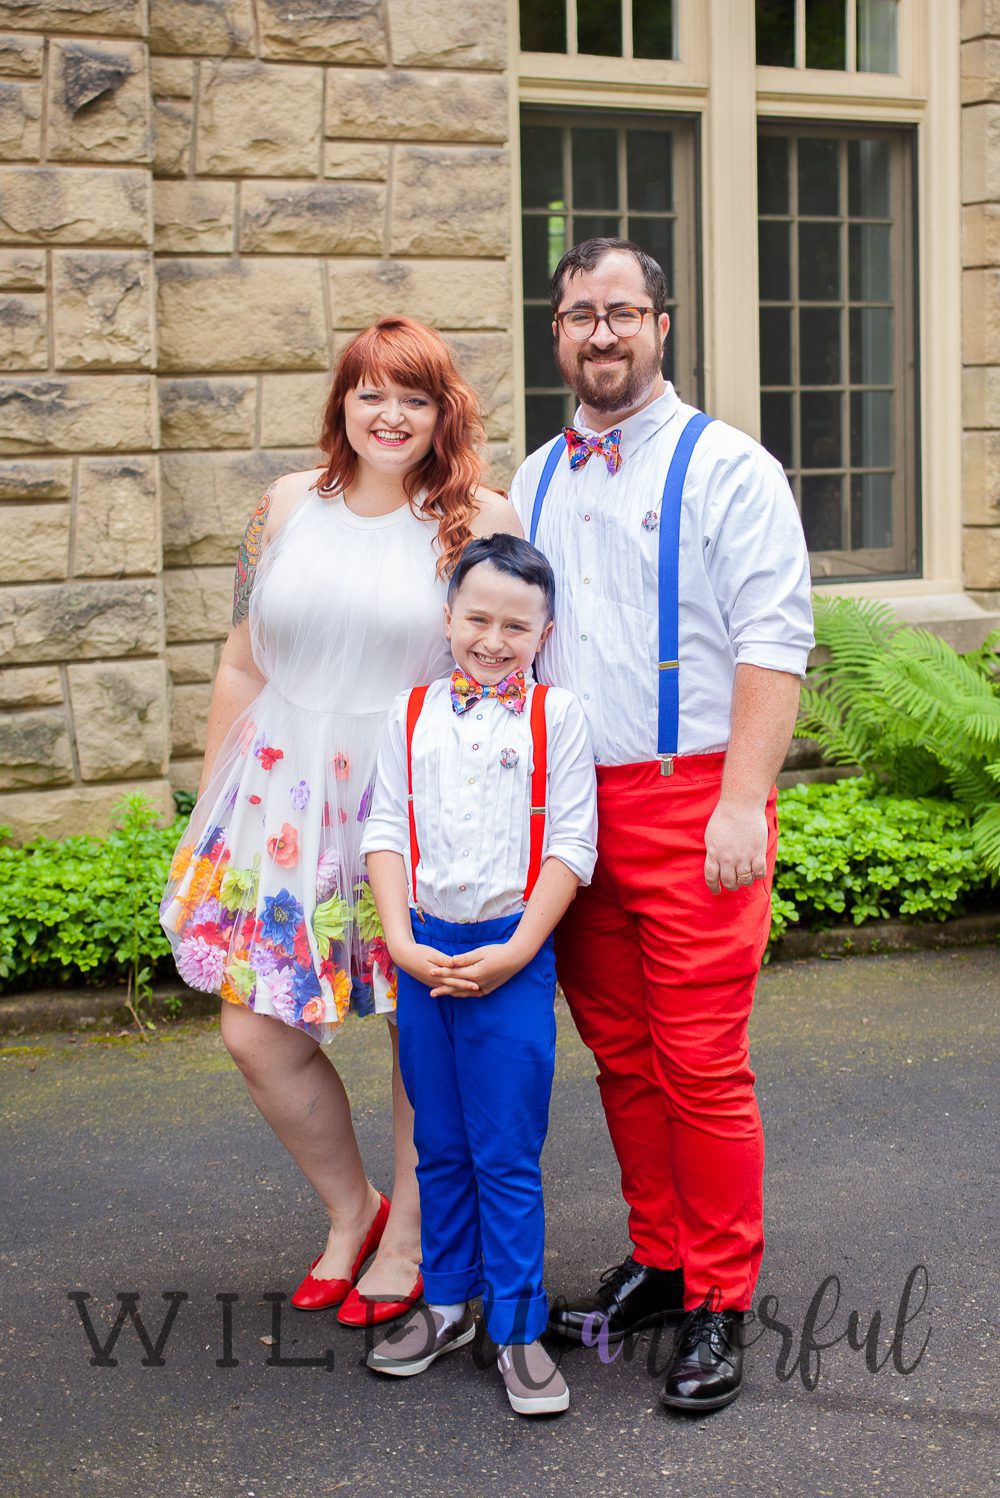
It was the best dress for the best day ever. I’m still smiling from all of the fun we had with our friends and family.
Here are a couple more links, sharing things from our super fun 10 Year Anniversary Party!
10 Year Anniversary Party Recap | My Happy Floral Dress | Pintucks + Suspenders
Outfits for Attendees | DIY Party Photobooth


Absolutely gorgeous, both the dress but especially you. Happy Anniversary! Love all that you see & your patterns!