What was almost as exciting as my dress to make for our anniversary party were the boys’ outfits! I actually find sewing button-downs super satisfying because there is a level of perfectionism that is required and when you absolutely nail that collar or placket, you get to do a mini celebratory dance.
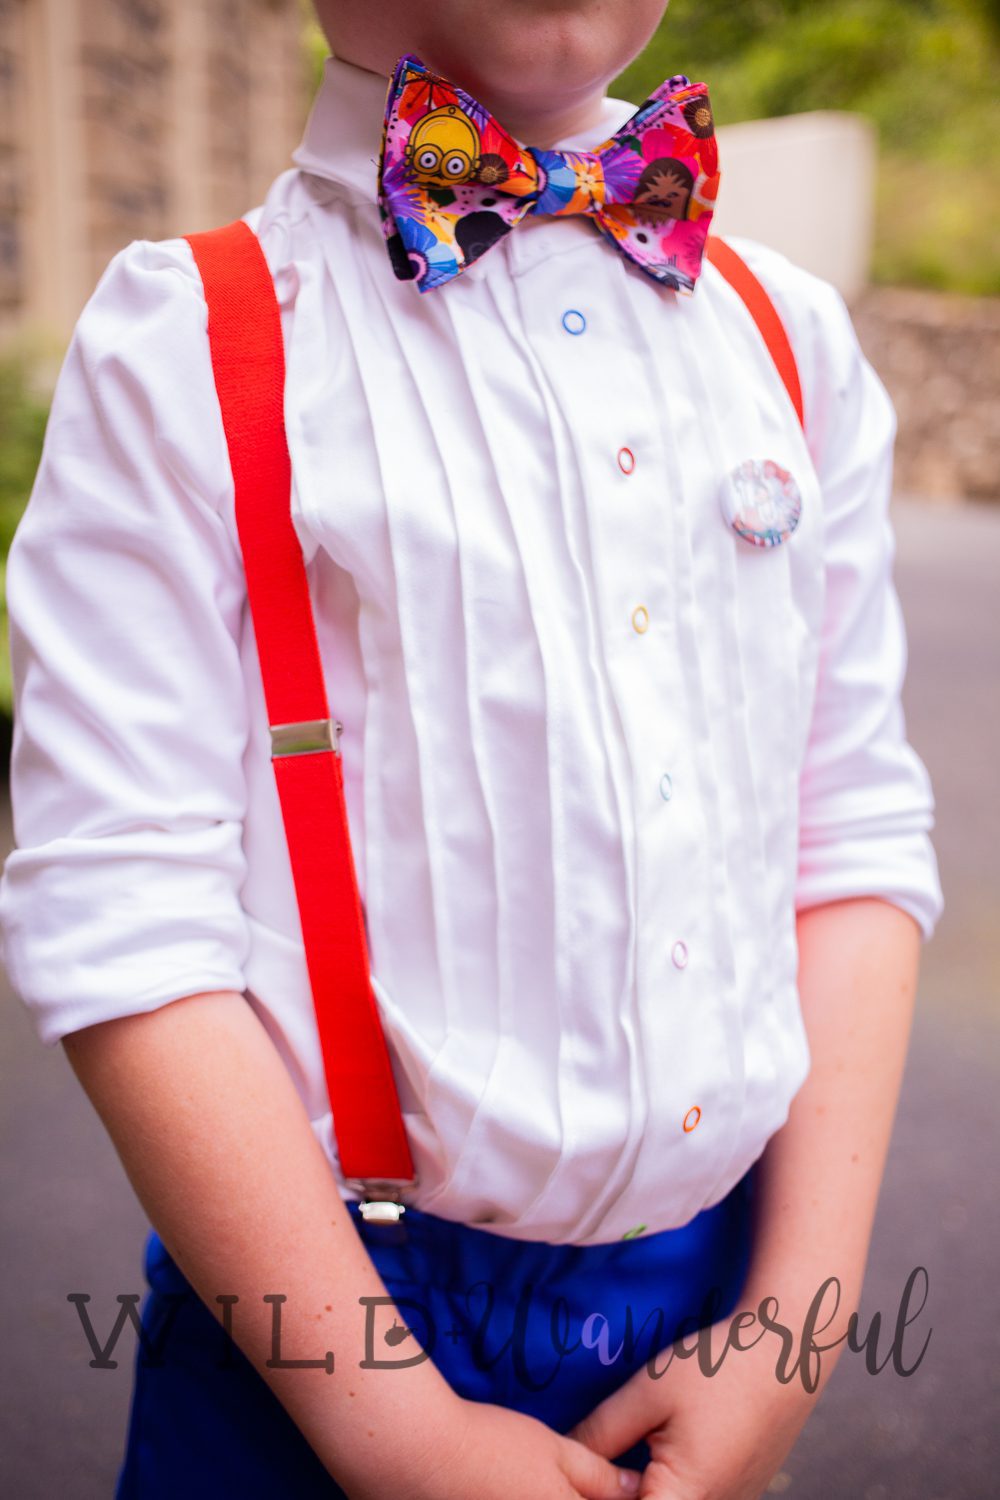
My vision for Bennett and Louis was to have them in colorful clothing, with a classic feel, and “tuxedo” style shirts. I also wanted them to be comfortable in the potentially hot June weather, so I decided to stay away from too many layers (ie: no jackets or cummerbunds). I absolutely adore how they looked on our big day! To the point where I’m trying to figure out how to make Louis wear suspenders and a bowtie every day of his life. Ha!
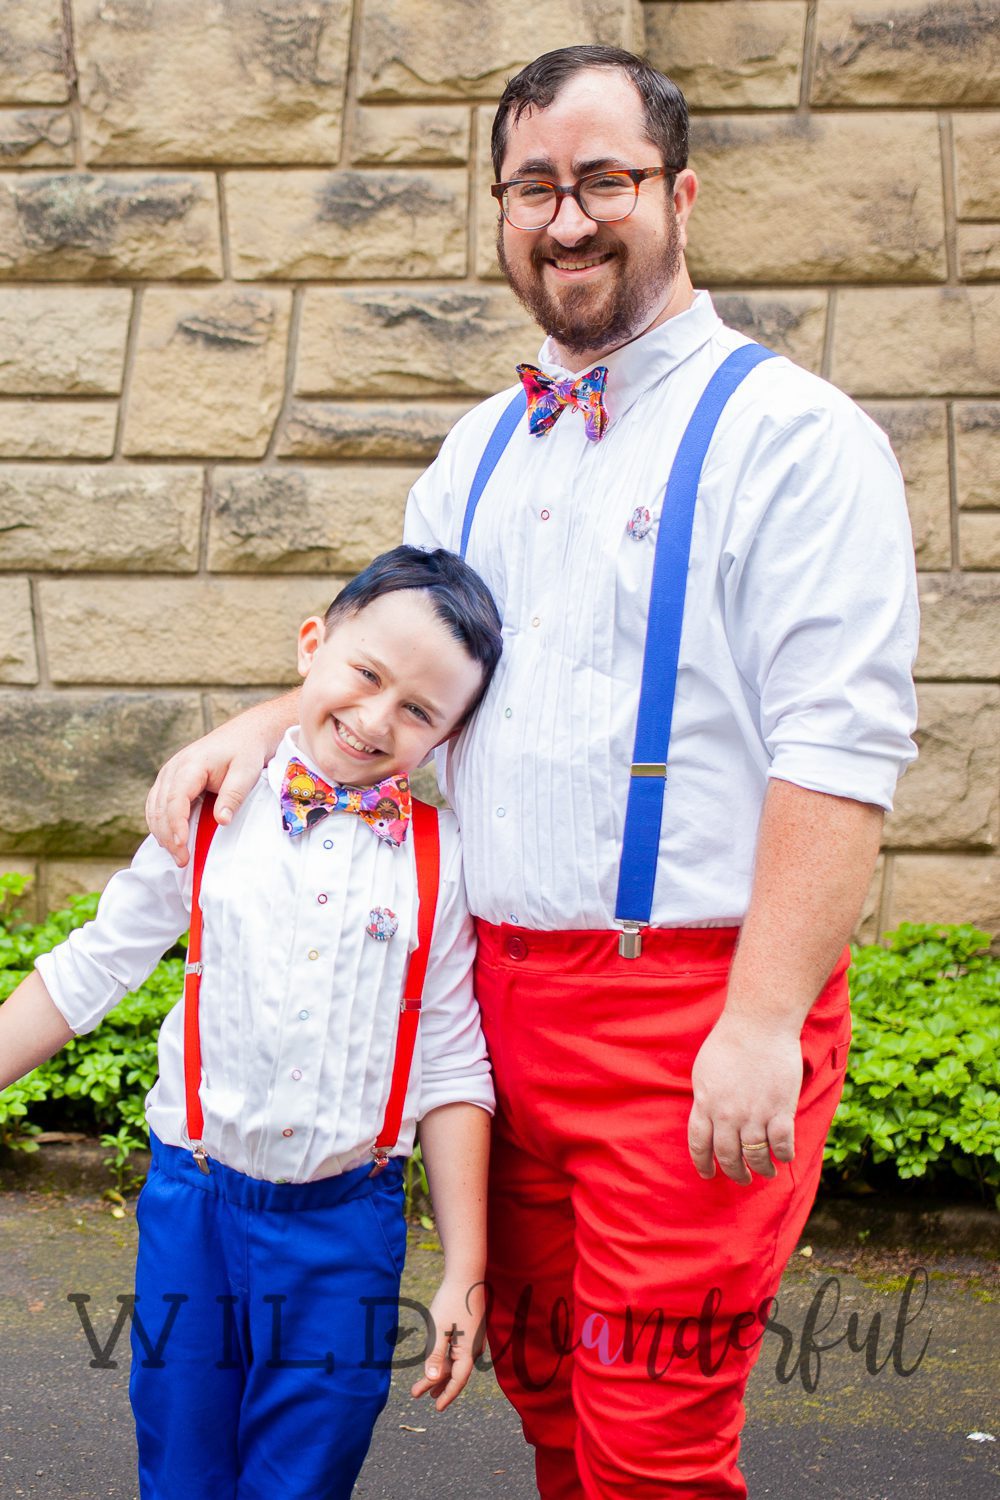
While they were dressed similarly, there was quite a mixture of patterns and designers that went into their tops and bottoms.
For Louis, I made him:
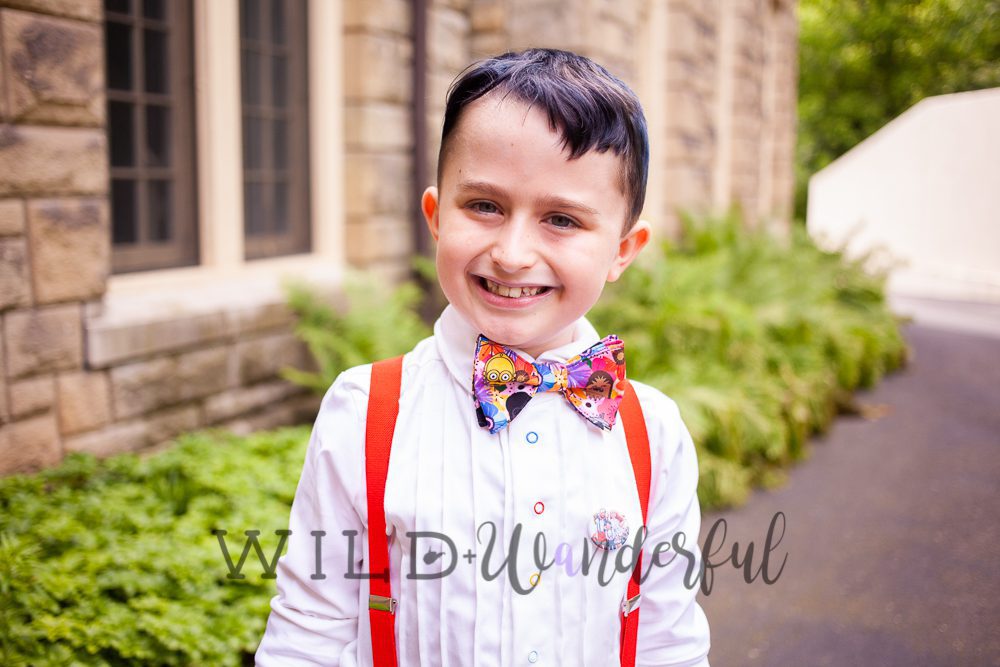
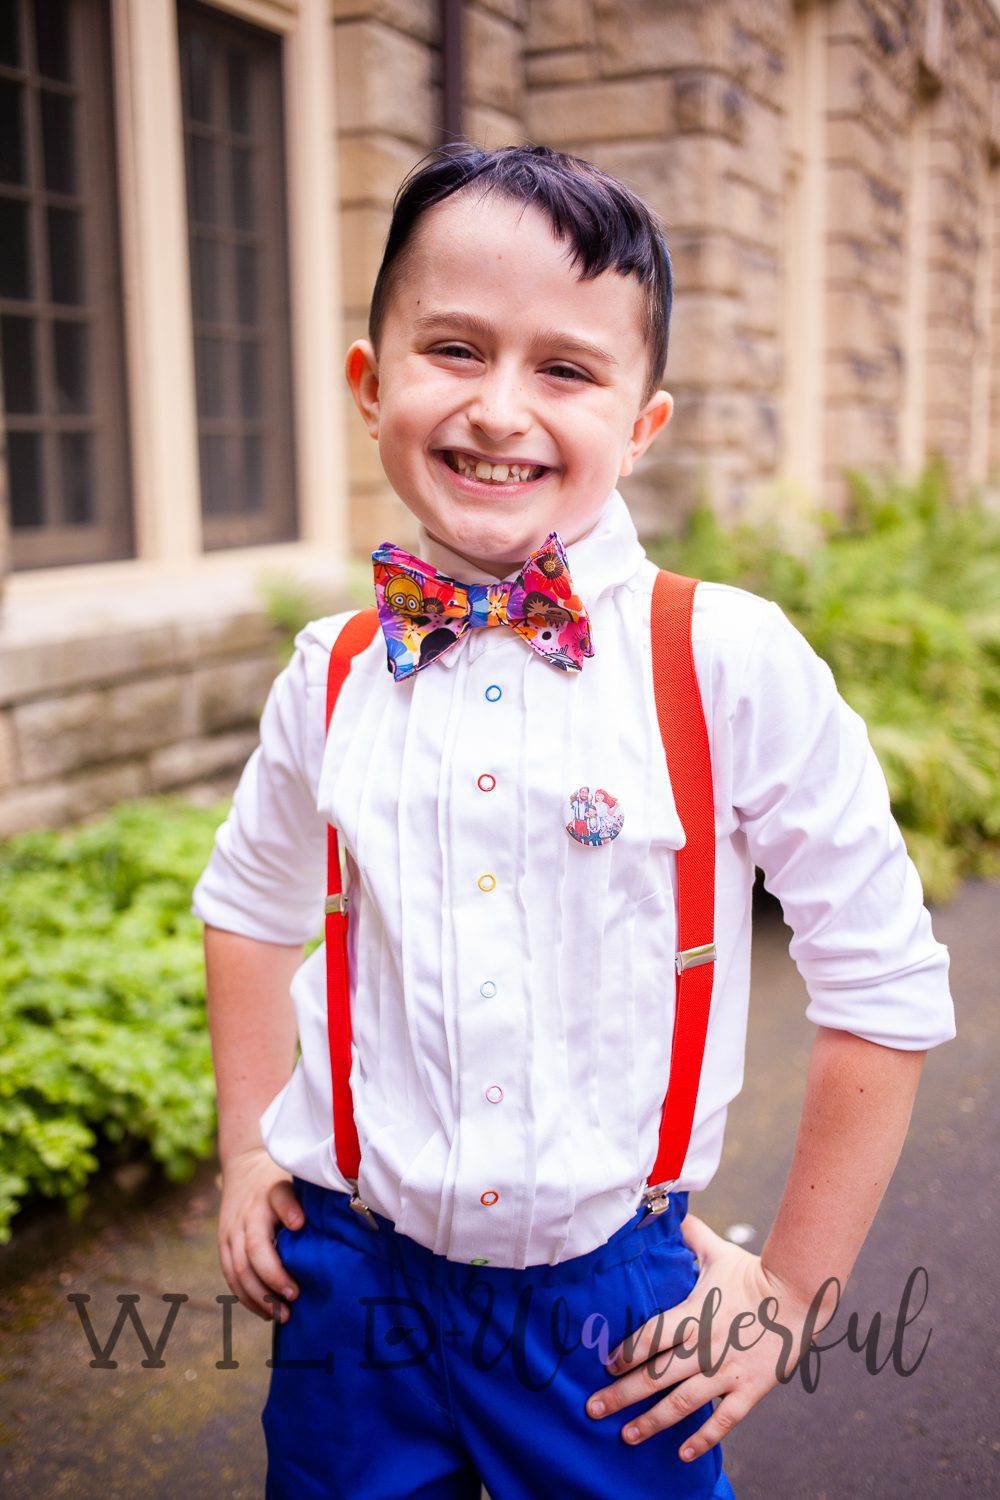
- Charlie Button Up by Made for Mermaids
- Little Loungers by Patterns for Pirates
- Free Bowtie by Patterns for Pirates
I also purchased these suspenders from Amazon and some cheapie $5 shoes from Walmart…since he will probably never wear those shoes ever again and his feet grow too quickly anyway.
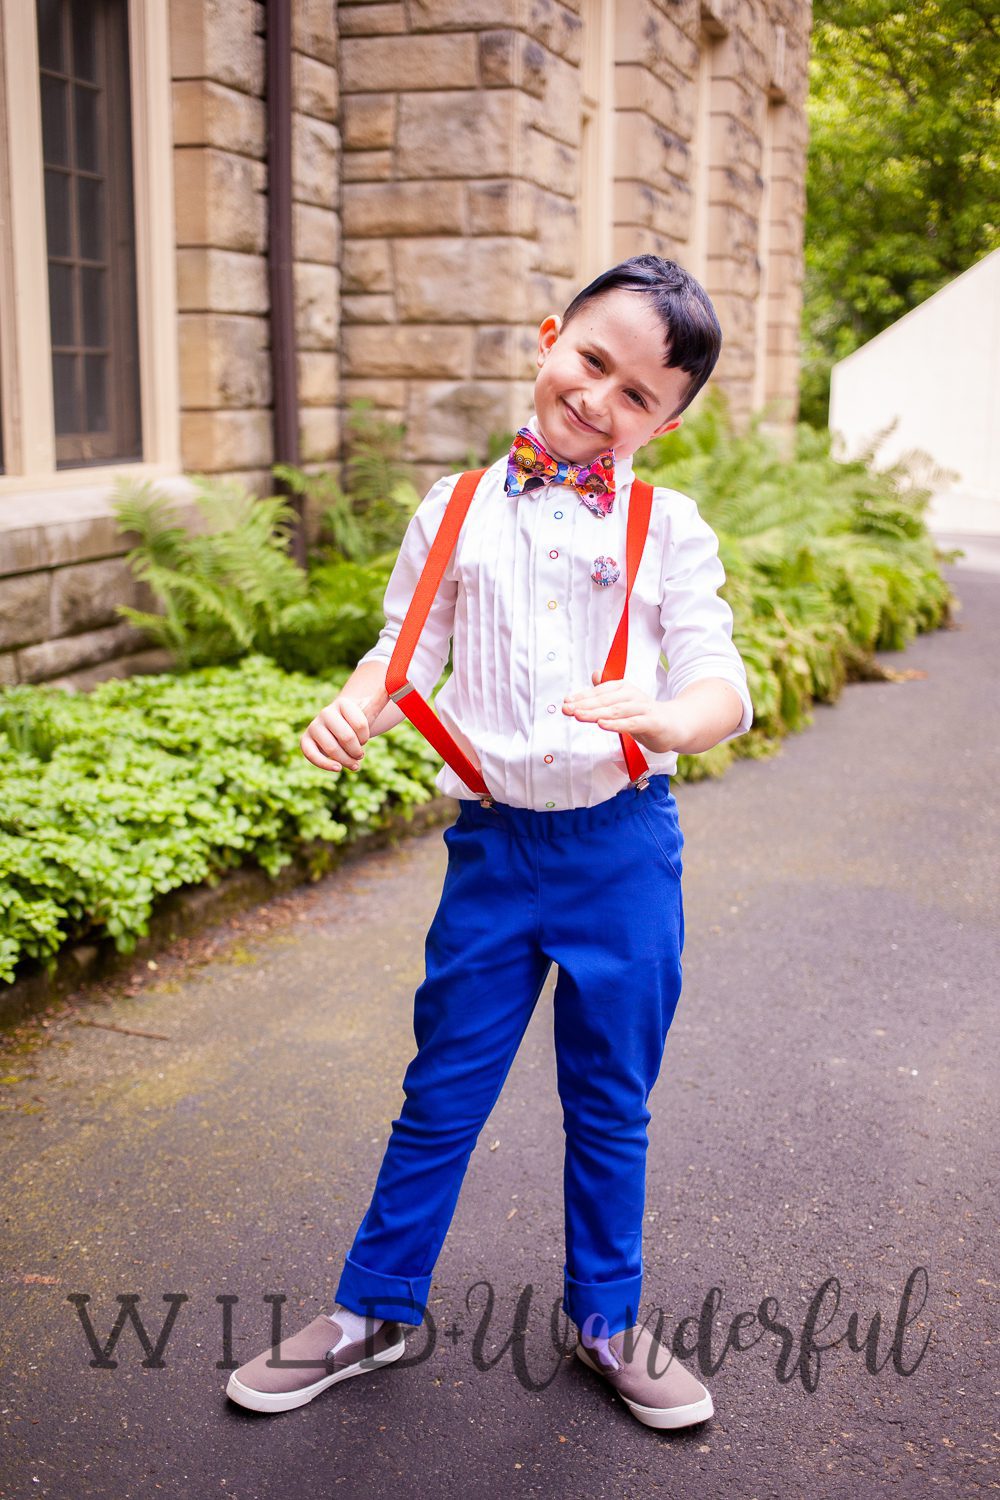
In terms of adjustments and alterations, I didn’t do too-too many for Louis. I slimmed down the hip and legs of the Little Loungers to give him more of a skinny pant, as well as made them longer so we could roll the bottom of the pant leg. For his top, I did slim that down a little as well (Louis and I both prefer a slimmer fit top on him) and I also added a couple more pintucks than the pattern originally has built into it. Otherwise, we let it be!
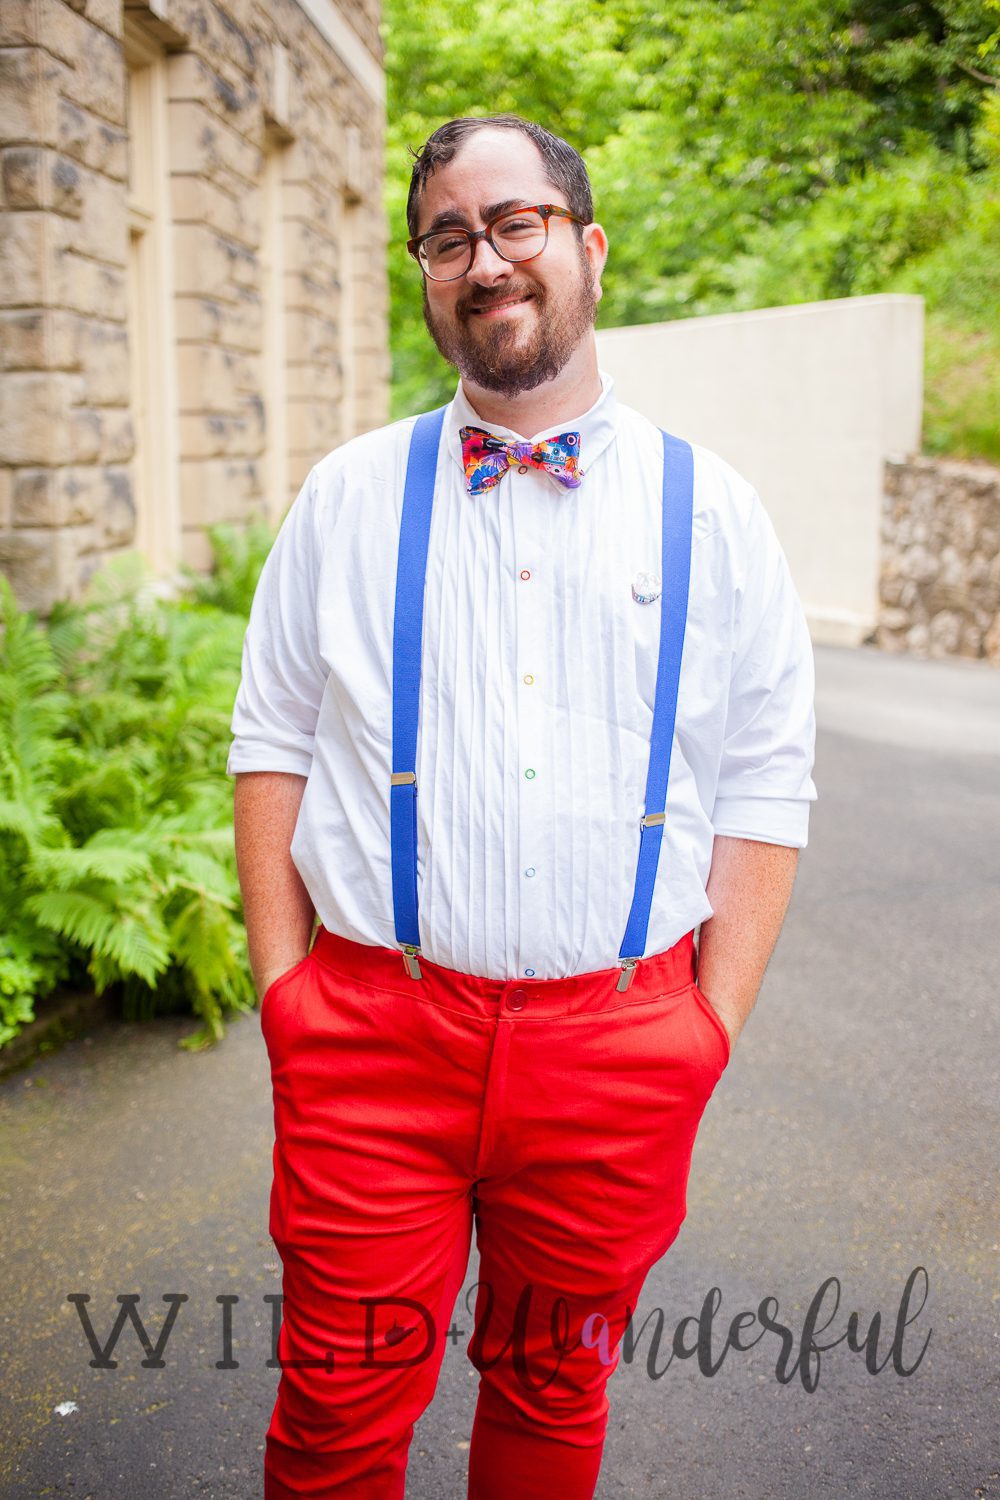
For Bennett, I wanted the same look, just with opposite colors on top and bottom. His was a little more effort to sew, because a lot more adjustments were necessary and my sewing machine was being a MONSTER, but we pulled it off I think!
- Yukon Button Up by Peek-A-Boo Pattern Shop
- Jedediah Pants by Thread Theory
- Free Bowtie by Patterns for Pirates
I also purchased these suspenders from Amazon and he just wore some dress shoes that he already owned.


I find my hubby to be extra-extra cute when he gets all dressed up. And honestly, he really pulls off the suspender + bowtie look pretty amazingly too. So….can this be a new McKinley fashion thing? I’ll work on making it happen!!
The Yukon Button Up does not have any pintucks at all built into the pattern, so all of those adjustments were needed to be done. Honestly, it’s not the hardest thing to add to a pattern! It just takes a little bit of math, decision making, and patience. But honestly it’s such a fun element to have added to the front of a top that it’s worth the extra effort.

For the pants, I had a bit of a time getting them to work for me. Thread Theory writes great patterns. I’ve used them before for this awesome winter jacket that I made for Bennett a couple of winters ago. However, these pants just weren’t working with me. I cut and sewed everything to Bennett’s measurements. But the waist was too wide (I added some elastic into it after the fact because I really wasn’t keen on seam ripping and making those adjustments at this point in the game), and the legs were super baggy in the hip area. I had to turn them inside out while on Bennett, mark and pin like crazy, and slim them down everywhere.
Let me just go ahead and say that I didn’t do the adjustments in a “proper” way, I did them in a quick and dirty “let’s just make this work as much as we can” way. Also, with my machine being a total terror, the tension was off apparently and he ripped the crotch of his pants an hour before our party started.
Picture me, in my dress, on the floor of my sewing room, Bennett standing over me, and I was sweating it out while sewing his pants together while they were on him. I was legit sewing my husband into his pants. And I was as careful as I’ve ever been with a needle in my lifetime, considering the location of the tear. Whew.
Here’s a quick “how to” for adding pintucks to your own sewing pattern….in case you wanted it!
- Determine where you want the pintucks placed. My drawing only shows the first one that we will be working with, but it’s really as simple as taking the pattern piece and drawing the line onto it. I can’t remember exactly, but I believe each of my pintucks were spaced 3/4″ from each other.
- Slice your pattern apart on that line you just drew and space the two pieces evenly. My spacing was 1/2″, because my tucks were 1/4″. You can do it differently, obviously. You just need to make sure that if you’re making your spacing wider, that your pintucks will need to be sewn with a wider seam allowance to make up for the difference.
- Reconnect your pattern pieces. I usually just tape a piece of paper to the backside of the pattern pieces, to hold them together. And then draw a new vertical line that will now be your fold line for your fabric.
- When you go to sew your pintucks, simply fold along this line, with the fabrics wrong sides together. And use your chosen seam allowance to straight stitch along the entire fold.
- Open up your fabric piece and press the tuck away from the bodice center.
- Repeat!
- Continue as many times across your bodice piece as desired. I added a total of six pintucks to each side of Bennett’s top, but obviously you can add as many or as few as you’d like!

Here are a couple of in-progress shots I got while working on both Bennett and Louis’ pieces. The colorful snaps were a huge favorite of mine. I didn’t originally plan on using them, but once I added them to Louis’, I was a smitten kitten over them and put them on Bennett’s as well.


One of my sewing weaknesses is a zipper fly. So whenever I successfully finish one, I take a thousand photos of it. The same goes for a cool pocket! I added welt pockets to the backs of both Louis and Bennett’s pants.


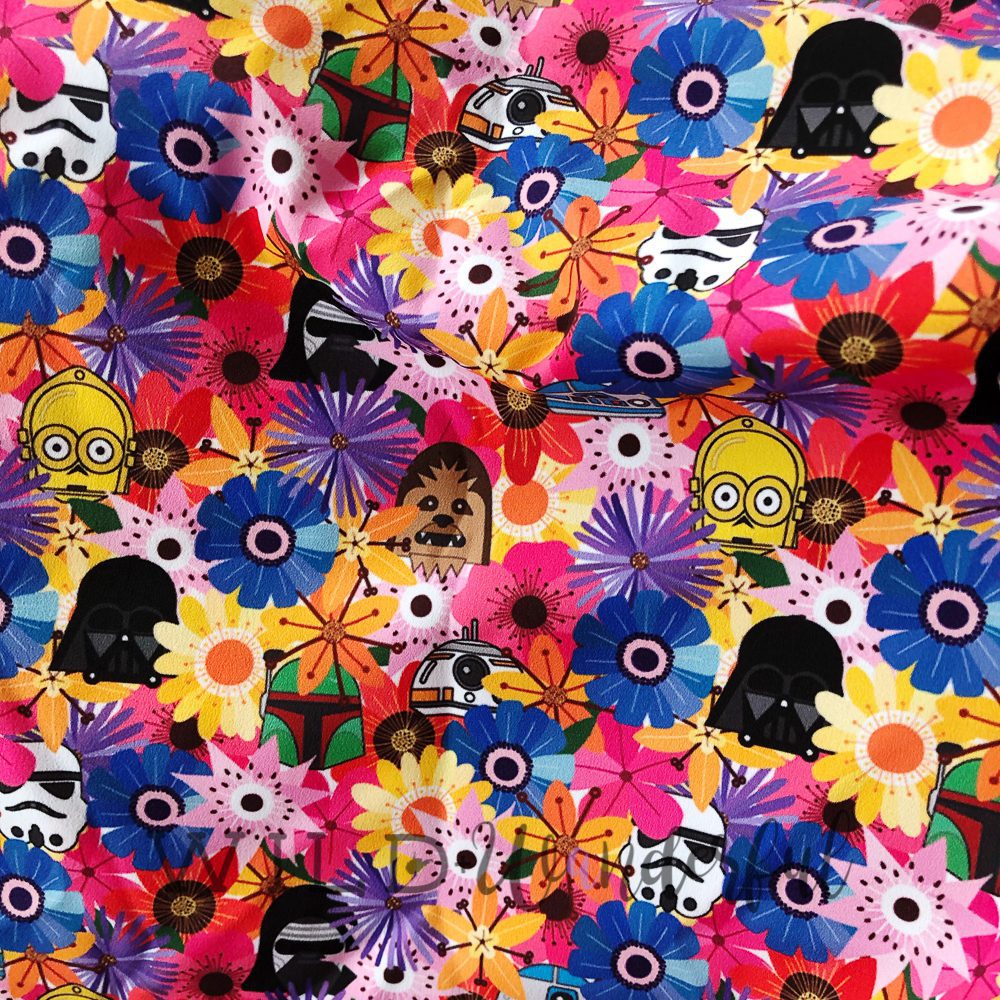
And of course I can’t forget to share the fabric that I used for their bowties! I really wanted to have a Star Wars element in our outfits, even if it was just a small detail. I designed up this floral Star Wars character fabric and had it printed for my own personal use. (You can also see it as a top that I created and wore in one of my Instagram posts HERE.) I wanted the floral to match the colors and happiness of the flowers in my own dress, and I obviously wanted to add our favorite characters for some peekaboo action. It’s cute and fun and happy and I’m glad it turned out as well as it did.
I had a blast putting together everything for our family to wear for this celebration of ours, and I’m more than happy with how everything turned out!
Here are a couple more links, sharing things from our super fun 10 Year Anniversary Party!
10 Year Anniversary Party Recap | My Happy Floral Dress | Pintucks + Suspenders
Outfits for Attendees | DIY Party Photobooth


0 Comments
Trackbacks/Pingbacks