“Louis, we need to come up with a Valentine’s Day card for your classmates.”
L – I want it to have puppies.
“Oh that’s fun! Let me think about a puppy card.”
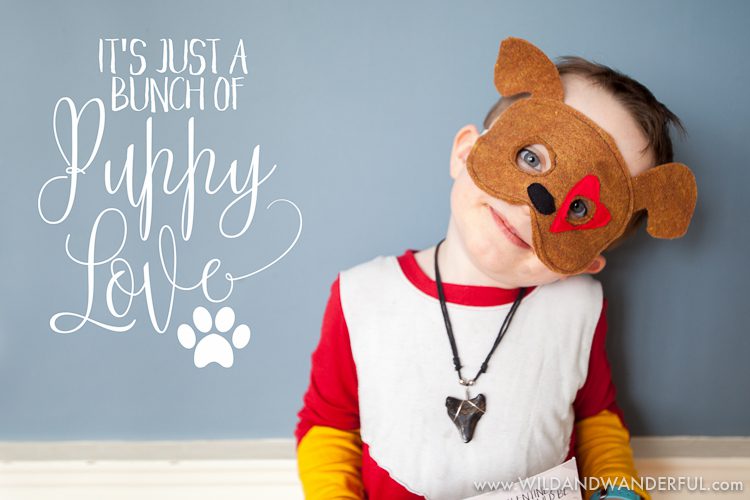
L – No, I want a puppy mask. AND a puppy card. So we can all wear masks and be puppies!
Have I ever mentioned that it’s dangerous to ever let your child know you’re capable of making things? Because he’ll use his creative little brain and come up with something that he’s sure you’re able to bring to life.
Well…he did. And I did.

I did a search online and couldn’t find exactly what I wanted in a puppy mask, so I decided to draw up my own pattern. I was so excited about how cute the masks turned out that I wanted to share them. Plus, I’ve really been learning how to use Adobe Illustrator and thought this was the perfect time to try and make my own “big girl” pattern.
Get ready to sew an ah-dorable puppy mask!
Here’s what you need:
- Valentine Puppy pattern pieces HERE
- Brown, red and black felt
- 12″ elastic
- Sewing machine + matching thread
- Sharp scissors

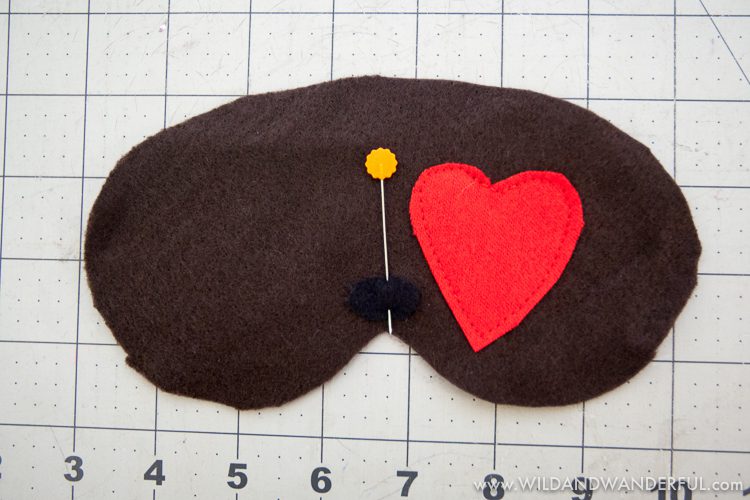
1.) Cut out all of your pieces.
Using your pattern pieces: you will need 2 masks, 2 ears, 1 nose, 1 heart and a length of elastic. I recommend to wait on cutting the eye holes until the end, so you can do it all at once, through all layers. But that part is up to you.

2.) Using your pattern piece, line up the placement of your heart eye patch.


3.) Pin in place and topstitch it down.


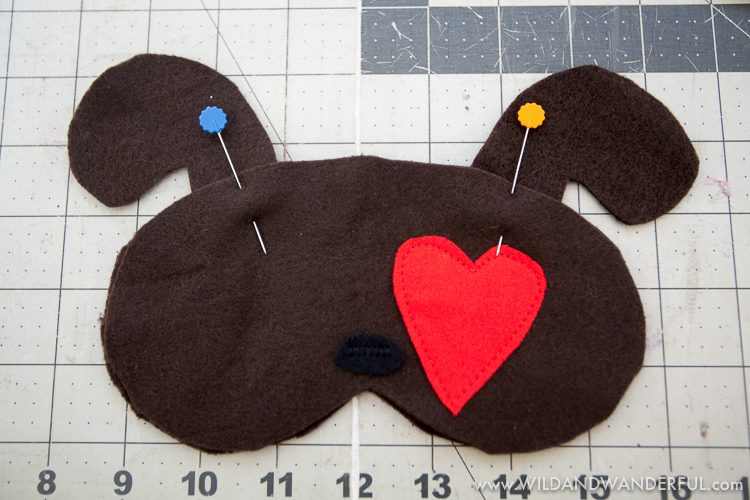
4.) Place the nose piece in the center, bottom of the top mask. Topstitch it into place.
5.) Using the second mask piece, lay your ears on top, overlapped by 3/4″.

6.) Place the top mask piece on top of the bottom and ears, sandwiching the ear pieces in between the two mask layers. Pin in place.
7.) Take your elastic and pin it in between the two mask layers, being sure to line it up in the middle of both mask sides. Sew around entire outer edge of mask.

8.) Using your mask template, line up the eye placement. You can use a fabric pen and trace the hole and then cut it out. Or you can be a wild child like me and just hold the pattern in place on top while you cut through the layers. Your pick!

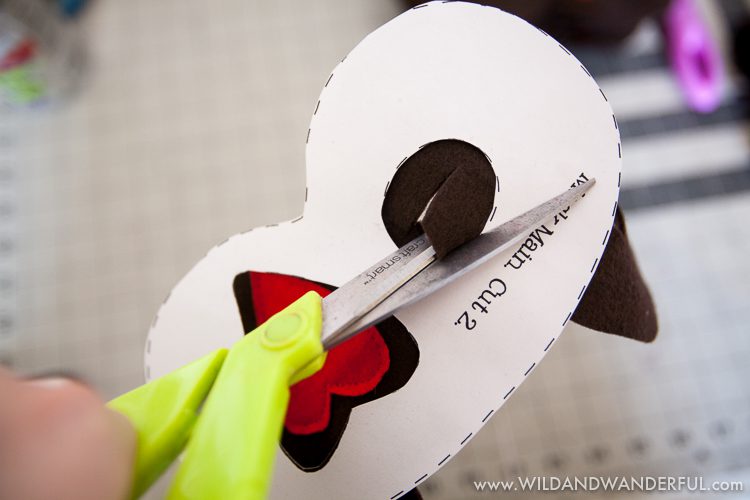
9.) Flip your mask pattern piece over and repeat for the other eye.

10.) This part is completely optional. But it does give the mask a bit more of a finished look. Top stitch around the openings for both eyes. (Try and do a cleaner stitch than me, haha. I had 24 to make so I wasn’t being super precise with my stitching. Whoops!)


We wanted something to hand the masks out with, so I created a quick printable card to string the masks around. You can get the print yourself HERE. All you need to do is sign it!


I hope your little puppies enjoy the mask as much as mine does! He’s been playing with our dogs and asking if he’s camouflaged himself. He thinks the pups are confused that he’s a real puppy, just like them, when he wears it.
Oh my heart. Please never grow up, Louis. I love your sweet innocence.


Happy Valentine’s Day, my loves!
**Remember, you’re more than welcome to sell finished products from this pattern. (The print, however, is for PERSONAL USE ONLY). I only ask that you give me credit and link back to this pattern. Please play nice and don’t claim the pattern or photos as your own. If you do end up making a mask from this pattern, I’d love to see the results! Link me to your blog, email me a photo (katy@handmadeescapade) or post it to my Facebook page. I want to see what you can do!!


0 Comments