This is a sponsored conversation written by me on behalf of Cricut. The opinions and text are all mine.
This post has been a long time coming and I’m finally here to share with you about the Cricut EasyPress (and give you a FREE Halloween cut file while I’m at it!) Are you ready?
Back when we were in Salt Lake City for Cricut’s big MakeAThon, they announced three new products. One of those newbies to the Cricut family was the EasyPress, which is Cricut’s answer for the heat press dilemma. What dilemma, you ask?
Well, when you start to learn about the beauty and fun of being able to create iron-on transfers and decorate ALL THE THINGS with them, you realize that using an iron sucks. It sucks big time. When I first started selling tshirts in my shop, I used to iron every single one of those suckers on by hand. It was torture and I’d end up sweaty and exhausted by the end of it. I eventually learned that a heat press would be my answer, and I hurriedly bought one. They aren’t terribly expensive, and if you plan on using it a lot, it’s totally worth the cost.
The biggest downfall of a heat press is that they’re big. And clunky. And not super cute. (Not that looks are everything…but still.) If you don’t have a lot of space in your sewing/crafting room, or if you don’t even have a designated makers space, a heat press is kind of out of the question. Space is everything.
Enter: Cricut EasyPress
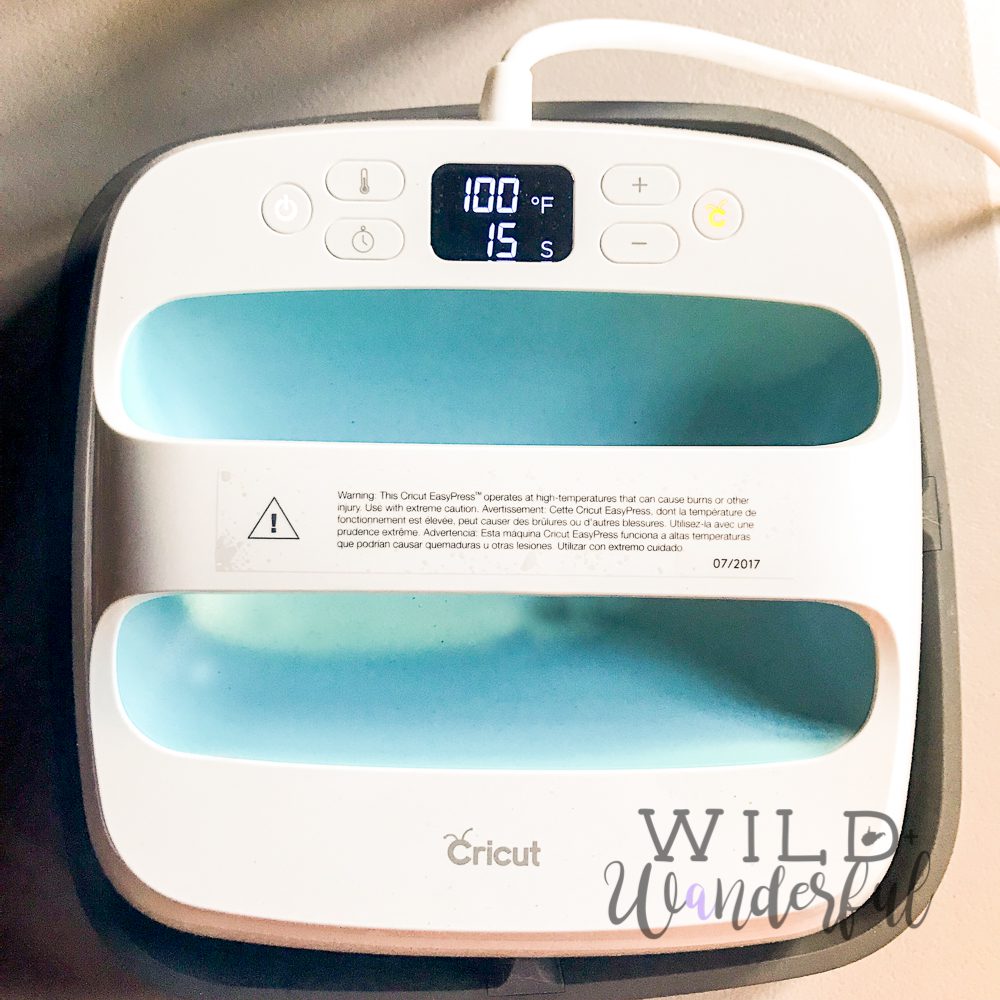
When it comes to size and cuteness factor, it’s not even a contest. It’s super compact and is pretty and white, with a neat little handle and easy-to-use controls on the top of it. Cricut also provides a cheat sheet of sorts, in both the manual that comes with your EasyPress and their website. You can find it HERE. They give you different temperatures to set your EasyPress, and the suggested time for pressing your item, based upon the type of iron-on you’re using AND the material you’re ironing it to.
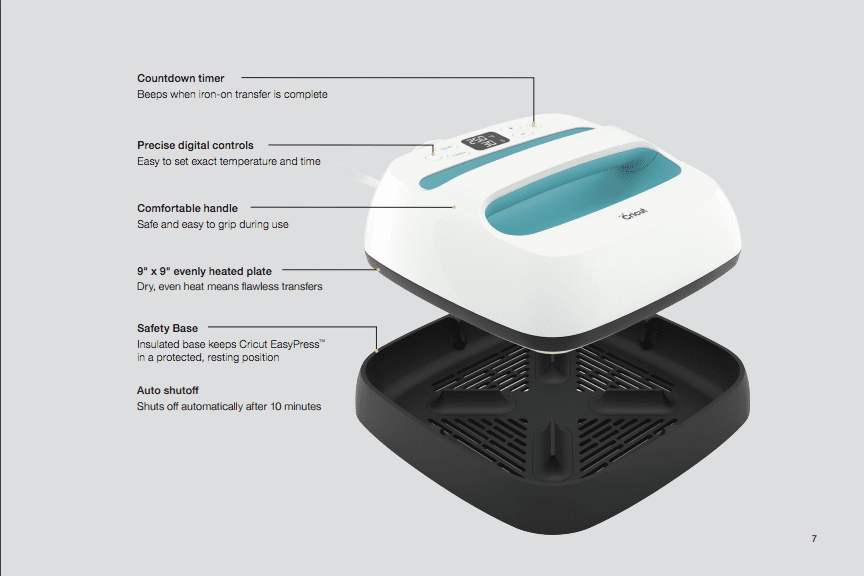
The EasyPress comes with a safety base, so you can safely warm it up and set it down without the risk of accidentally burning/melting something. It also has a pretty decent sized plate on it, measuring at 9″ x 9″. Much bigger than an iron, but still a lot smaller than my 15″ x 15″ heat press plate. I tend to shoot for 9″ wide on most of my shirts that I decorate (I’ve found that to be my sweet spot for the design to be big enough but not too big that it’s not readable anymore) but that does mean that you’ll have to press twice with the EasyPress to cover the entire image. Because who is accurate enough to iron a 9″ item with a 9″ plate? Not this girl. It’s no big deal. You can just press once, and then move it and press again…overlapping slightly from the last press.

When you’re using any type of iron-on material, you want to make sure you’re handling the heat element safely.
First: Protect the surface you’re about to iron down upon. It’s not recommended to use an ironing board because they are usually too padded and you can’t get all of the edges sealed with the lack of consistent pressure. I was gifted this movable ironing pad by Bennett last year for Christmas and it’s thin enough that it works well for hand pressing vinyl, but it also is meant for ironing so it protects my tables/other surfaces from being scorched or ruined by the ironing process. (To be honest with you, I would recommend getting a teflon cutting board. It would be heat resistant AND have a sufficient pressure for applying transfers.)
Second: Protect the material you’re about to iron. You could be dropping a 300 degree iron onto material that melts easily and you’ve just ruined your entire project. I’ve done that SO MANY TIMES at this point in my shirt decorating career. My biggest recommendation is to have some teflon sheets handy at all times. They don’t melt, and allow you to put a hot iron directly onto a surface without melting the crap out of the material.
What are my final thoughts on the EasyPress after playing with it a bit?
- It is slick, small, pretty, and easy to use.
- I still think a heat press is better and worth the purchase if you have the space. The pressure is more consistent with a heat press and they cover bigger spaces.
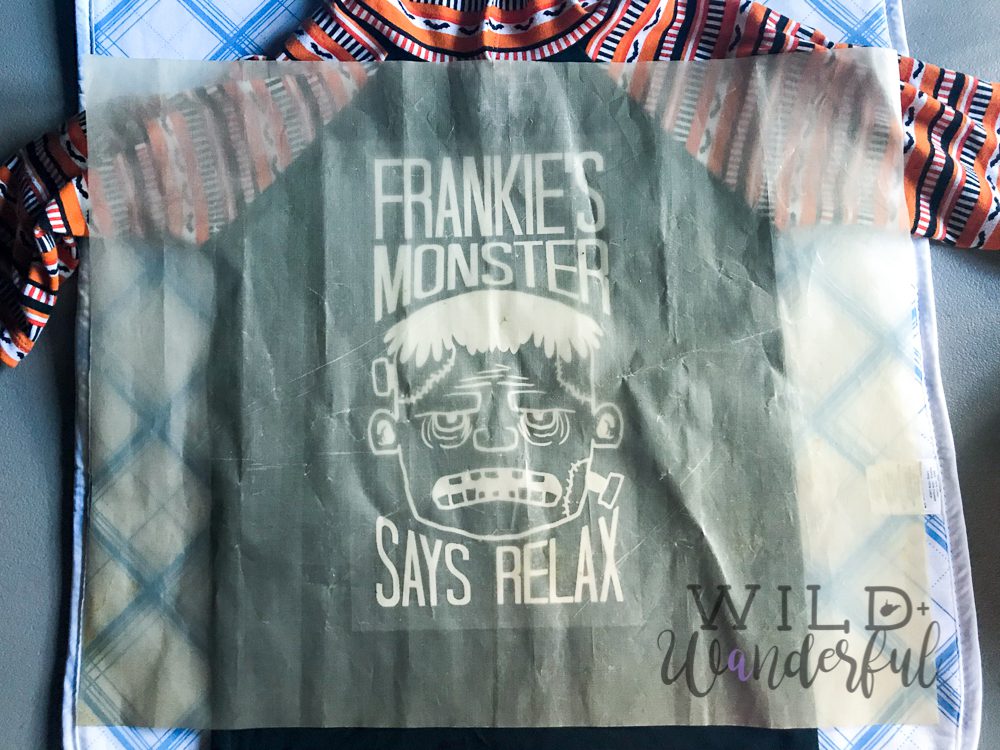
- It still does take a little bit of elbow grease and work to get your transfer to stick with the EasyPress. They even recommend turning it over and pressing an additional 15 seconds from the back. Though it’s only 15 seconds, it’s still one more step for me to do and I’m super lazy. I had a heck of a time getting this design to stick to my rayon/spandex blend fabric for the shirt in these images. I’ve used this material plenty of times before with my heat press and it nailed it on the first 15 second attempt.
- The price is comparable to a heat press.
- Cricut EasyPress runs at $149.99
- 15×15 Heat Presses run around $190 (sometimes cheaper…this is just one that I pulled up.)
- If you don’t have the room for a heat press, and hate using an iron, this is your best solution.
- The 9×9 plate is bigger than an iron, for sure.
- It has a timer and easy heat setting.
- The plate is a consistent heat, vs an iron that can have a ton of variables.
I totally think it’s worth the money! If you are like me and like to decorate everything you can get your hands on, an iron won’t cut it anymore. The Cricut EasyPress might be your new bae.
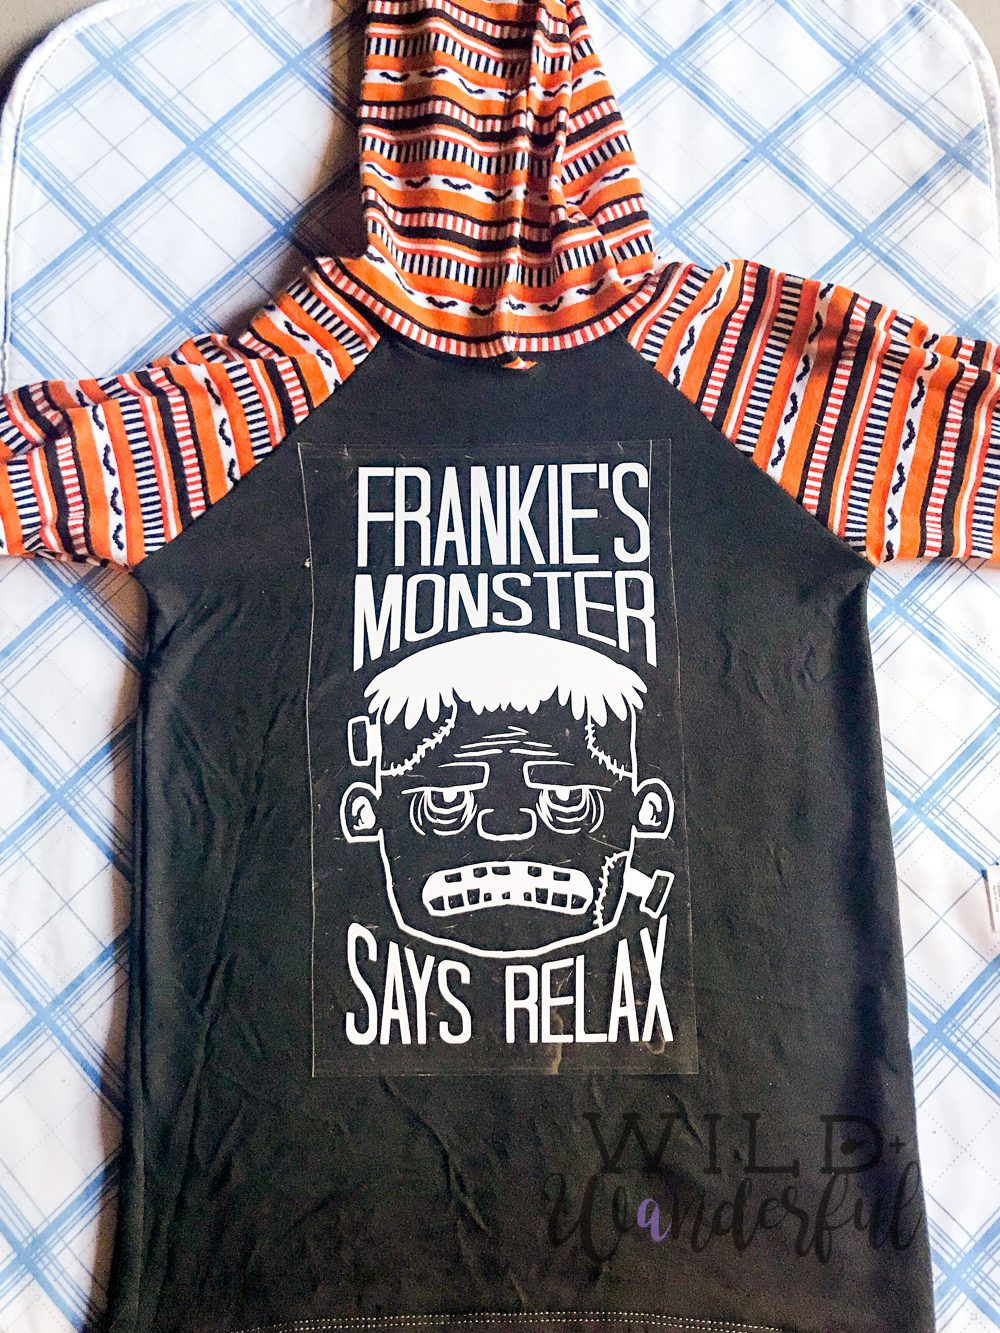
And now are you ready for your freebie?! First you have to look at a bunch of pictures of my cute little man in his new “Frankie’s Monster Says Relax” tee. #mommygogglesarereal


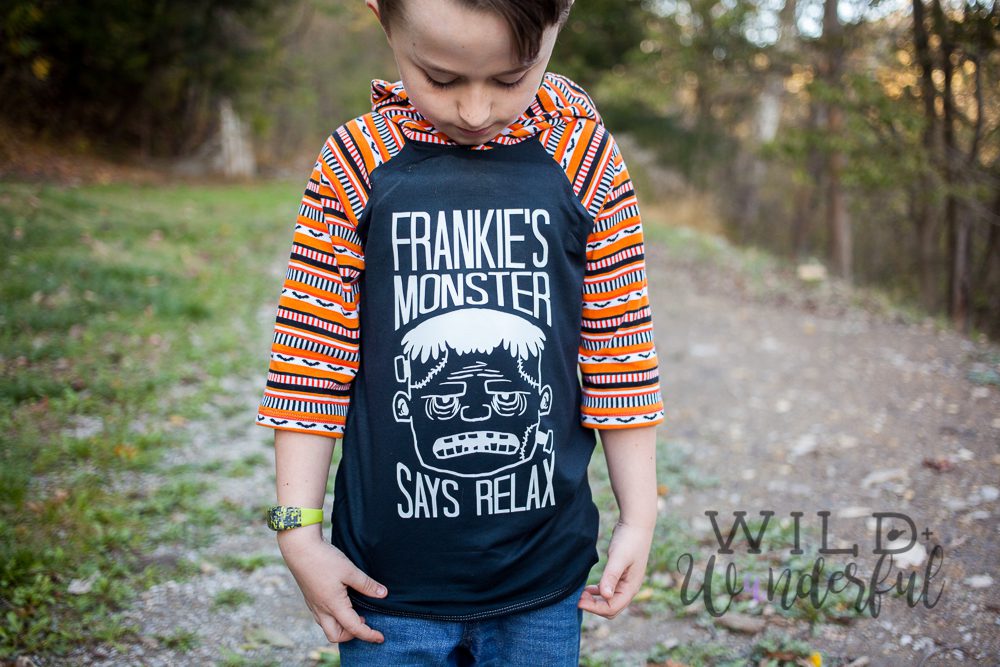

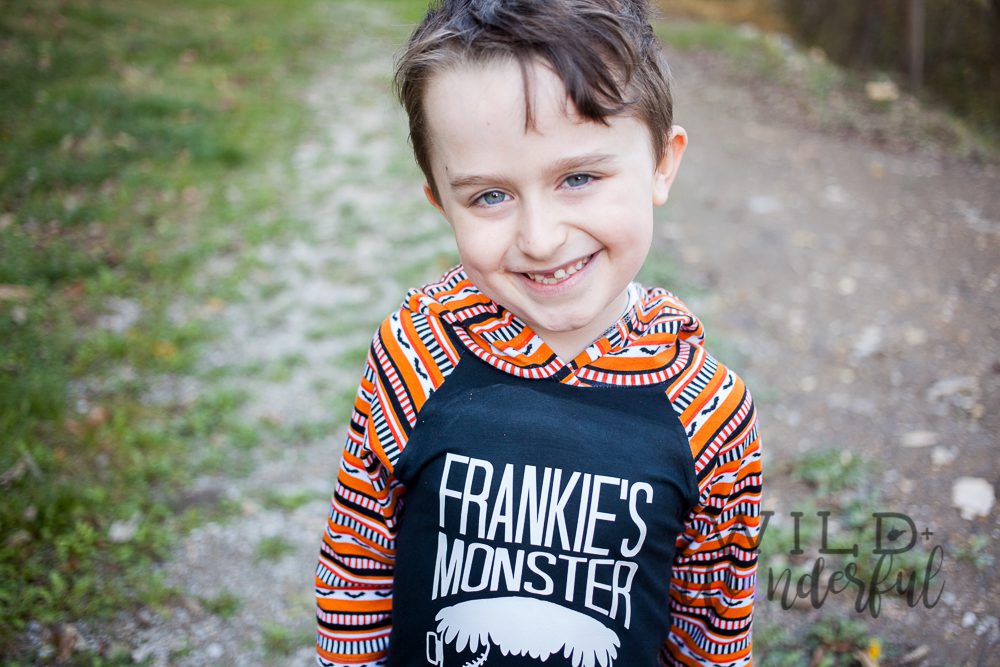
Pattern: Jolly Roger Raglan by Patterns for Pirates
Fabric: Halloween Bat Stripes | Sew Classic Spandex Knit Fabric
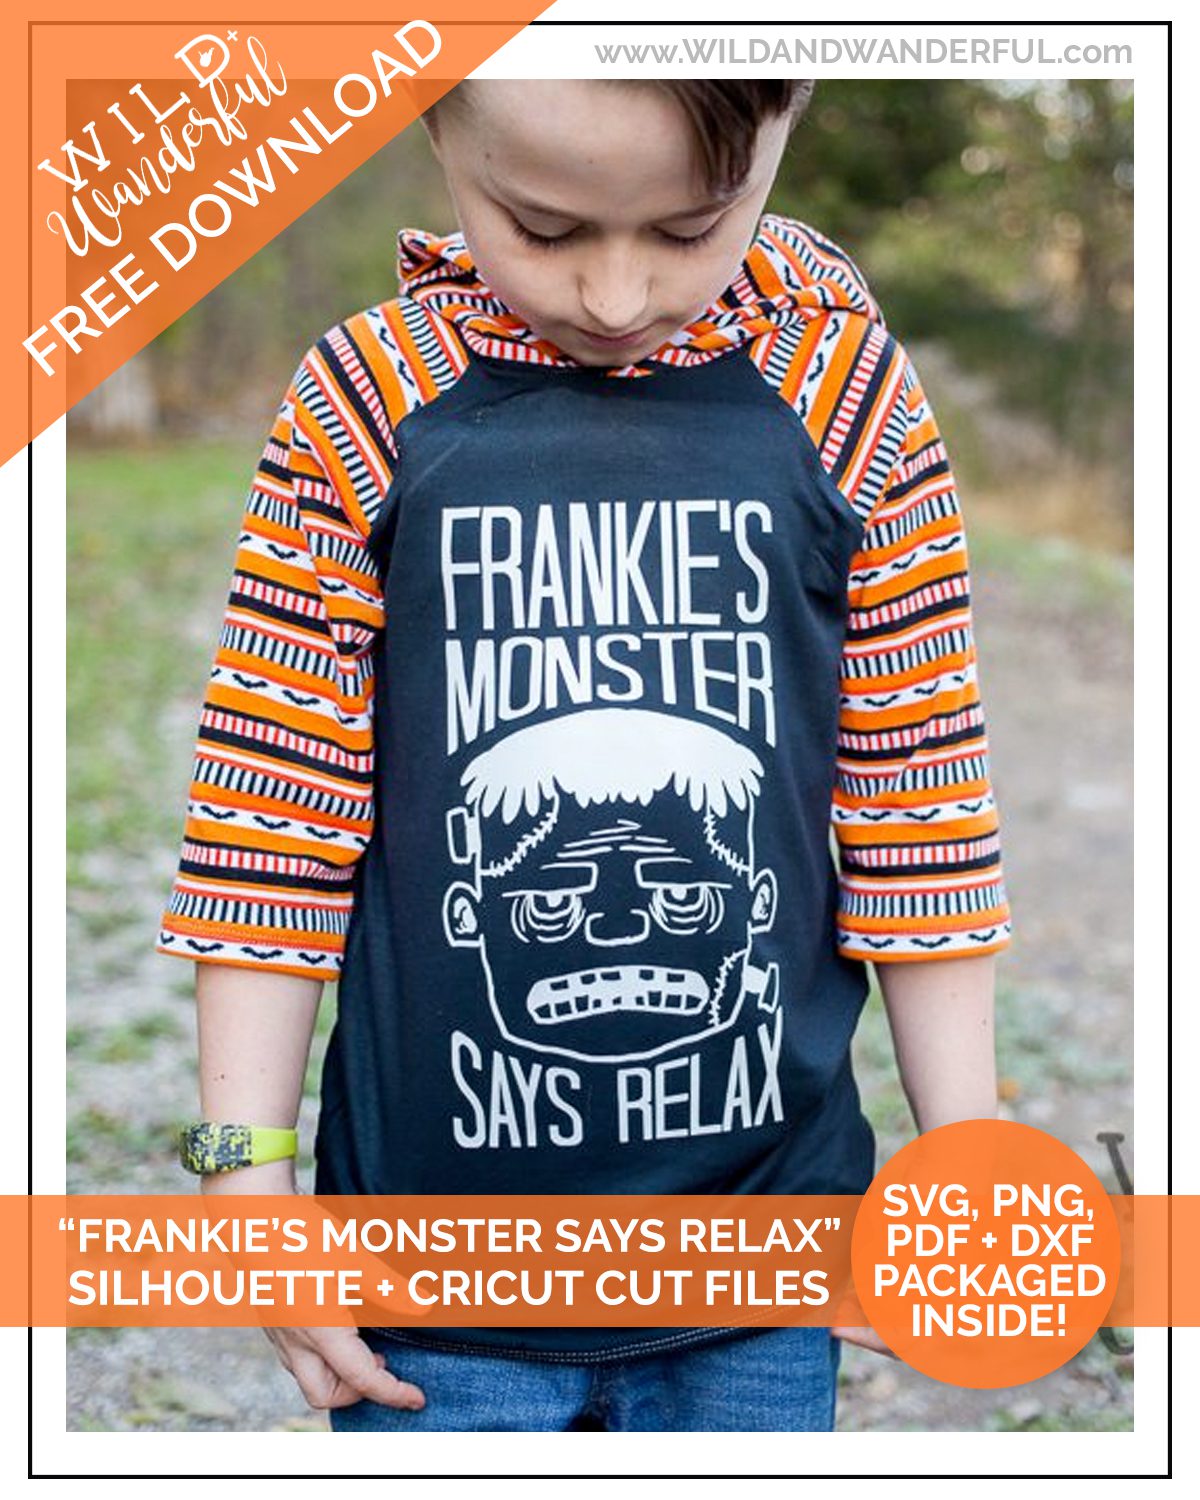
**The download is packaged as four file types: SVG, DXF, PNG and PDF. Just unzip them and you’re ready to go! Please do not share the files, claim them as your own, or profit off of my design in any way. They are for PERSONAL USE ONLY.


0 Comments
Trackbacks/Pingbacks